
Vegetables
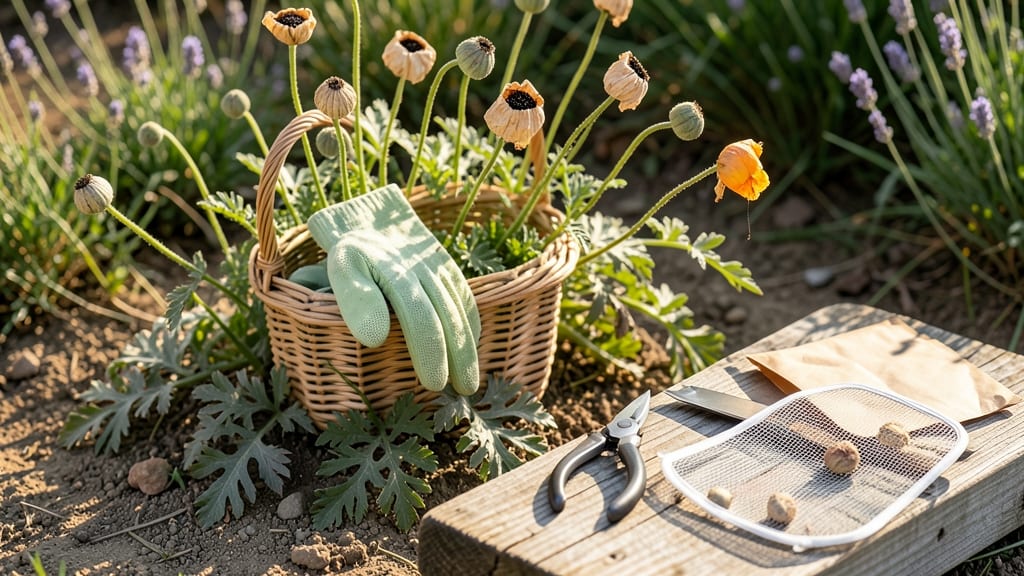
Poppy pods transform from garden showstoppers to next year’s seeds. 🌸 I’ve dried hundreds over the years, and the key is timing—harvest when they’re fully mature but before they crack open. One wrong move and you’ll lose those precious seeds to the wind or pests.
The process is simpler than it looks: snip pods when they’re brown and dry to the touch, then let them cure in a dry, shaded spot. You can air-dry them on a screen or use a dehydrator set to 95°F for 2-3 hours.
The goal is to preserve the pods without shrinking them into brittle husks.
Once fully dry, store them in a sealed container with silica gel or rice to keep moisture out. A little patience here means you’ll have seeds ready to plant next spring—no store-bought packets needed. The pods themselves make stunning dried arrangements too.
Common mistakes? Overcrowding pods during drying or rushing the process. Give them space and time, and you’ll end up with seeds that germinate just as well as fresh ones. Here’s how to do it right the first time.
📚 In This Guide
- What you need
- Instructions
- Tips and common mistakes
- Wrapping up and next steps
What you need
- ● Mature poppy pods: Harvest fully opened pods with seeds inside (typically in late summer or early fall). Aim for at least 10-15 healthy pods for a good seed yield.
- ● Pruning shears or sharp scissors: For cleanly cutting stems without damaging pods.
- ● Newspaper, brown paper bags, or cardboard boxes: To line drying surfaces and collect fallen seeds. Use 2-3 sheets of newspaper or 1-2 sturdy bags/boxes per batch.
- ● Drying surface: A clean, flat area like a table, tray, or screen. Ensure it’s elevated and well-ventilated (e.g., a mesh drying rack or wooden cutting board).
- ○ Fan or gentle airflow source (optional but helpful): A small household fan on low speed to speed up drying. Position it 1-2 feet away from the pods.
- ● Small paintbrush or soft brush: For gently coaxing stubborn seeds out of pods later.
- ● Air-tight storage containers: Glass jars, plastic containers with lids, or seed envelopes. Choose containers with desiccant packets to prevent moisture buildup.
- ● Hair dryer (cool setting): For pods that need a little extra drying time—hold it 6+ inches away to avoid heat damage.
- ● Seed drying tray with mesh: Elevates pods for better airflow and prevents mold.
- ● Labeling supplies: Masking tape and markers to label containers with the harvest date and poppy variety.
- ● Gloves (if sensitive to latex): Some poppy pods may cause mild skin irritation.
Step-by-step instructions for harvesting and drying poppy pods
Turn your garden’s late-summer blooms into next year’s seeds with this simple, foolproof method.
🌱 Step 1: Identify and Harvest Mature Pods
Wait until poppy pods turn from vibrant green to a dry, papery brown—this signals they’re ready for harvesting. The pods should feel crispy to the touch, almost like brittle paper. I like to harvest on a dry morning after the dew has evaporated, as moisture can make pods stick to your hands.
Gently twist each pod at the base until it releases with a soft pop. Avoid tugging—poppies are delicate, and forcing them can damage the stem or cause seeds to spill. Place harvested pods in a paper bag or open basket lined with newspaper to allow airflow. This prevents mold and keeps seeds dry during the drying process.
☀️ Step 2: Dry Pods in a Controlled Environment
Spread the pods out in a single layer on a clean, dry surface—like a baking sheet or cardboard box—in a warm, dry spot. I use a sunny windowsill or a well-ventilated area with temperatures between 65-75°F. Avoid direct sunlight, which can overheat and crack the pods prematurely.
Check the pods daily. They’re ready when they rattle when shaken—this means the seeds inside are loose and fully dried. If you see any pods starting to split open, move them to a sealed container immediately. Humidity is the enemy here; a dehumidifier or fan can help if your space tends to stay damp.
💧 Step 3: Extract Seeds from Dried Pods
Once the pods are completely dry, place them in a clean paper bag and seal it loosely. Shake the bag vigorously for 30-60 seconds—the pods will burst open, releasing seeds and chaff. I like to do this over a large tray or sheet of newspaper to catch any stray seeds that might escape.
Sift the contents through a fine-mesh strainer or sieve to separate seeds from debris. Discard the chaff and empty pods, then transfer the seeds to a small envelope or airtight container. Label it with the variety and date—poppy seeds lose viability after 2-3 years, so freshness matters.
⏰ Step 4: Store Seeds for Future Planting
Keep seeds in a cool, dark place—like a sealed jar in the refrigerator or a sealed envelope in a drawer. Poppy seeds thrive in dry conditions, so avoid plastic containers without ventilation, which can trap moisture and cause mold. I store mine in a small glass jar with a tight-fitting lid, tucked away until spring.
Before planting next year, do a quick viability test: Place a few seeds between damp paper towels in a sealed bag for 5-7 days. If they sprout, they’re ready to go. If not, you may need to source fresh seeds. This simple step ensures you’re not wasting time on seeds that won’t germinate.
Tips & tricks for perfectly harvested poppy pods
Here's what I learned after saving poppy seeds for years—these small details make all the difference.
Timing is Everything: The 8-12 week window after flowering is critical for harvesting. I've found that pods harvested too early (still green) won't produce viable seeds, while pods left too long (completely split open) will scatter seeds everywhere. Watch for the telltale rattle when you shake the pod—this is your perfect harvesting cue. Harvest on dry mornings to prevent moisture-related mold during drying.
Drying Environment Matters: For the 3-5 day drying period, I've had the most success using a mesh screen in a well-ventilated area with indirect sunlight. Direct sunlight can cause pods to overheat and crack, while poor ventilation leads to uneven drying. A simple kitchen fan aimed at the drying pods can help maintain consistent airflow without creating drafts that might scatter seeds.
Seed Extraction Technique: When extracting seeds from fully dried pods, I've discovered that gently rolling pods between your palms works better than squeezing. This method preserves more seeds and prevents the papery pod walls from tearing. Shake the paper bag occasionally during extraction—this helps dislodge seeds that might be stuck in the pod's crevices. Remember to remove any debris before storing, as clean seeds have higher germination rates.
Storage Wisdom: The cool, dry storage environment mentioned in the instructions is crucial for maintaining seed viability. I've had excellent results storing seeds in small glass jars with tight-sealing lids in my pantry. The key is consistency—don't move seeds between different storage locations, as temperature fluctuations can reduce viability. Labeling with both variety and harvest date is a game-changer when you're ready to plant next season.
Pro Tips for Dry Poppy Pods
- Here's what I learned after saving poppy seeds for years—these small details make all the difference.
- Timing is Everything: The 8-12 week window after flowering is critical for harvesting. I've found that pods harvested...
- Drying Environment Matters: For the 3-5 day drying period, I've had the most success using a mesh screen in a well-ve...
Frequently asked questions
Still have questions about drying poppy pods?
Here are some common concerns—and their answers—to help you harvest seeds like a pro!
How long does it take for poppy pods to fully dry?
Poppy pods typically take 2–4 weeks to fully dry on the plant, depending on your climate. Once they turn light brown and papery, they’re ready. If rain is forecast, harvest early and finish drying indoors.
Can I speed up the drying process?
Yes! If you’re impatient, harvest pods early (when they’re still green but slightly cracked) and dry them indoors. Place pods in a single layer on a tray with a paper towel, then let them air-dry in a warm, dry spot (like a sunny windowsill) for 1–2 weeks.
What if my poppy pods won’t open naturally?
If pods stay closed, they’re not fully dry. Try these tricks:
- Freeze them overnight, then let them thaw—this mimics seasonal changes and may prompt them to open.
- Gently tap or roll them on a hard surface to encourage seed release.
- Cut open mature pods with scissors if seeds are needed urgently.
How do I store dried poppy seeds for planting next year?
Store seeds in a cool, dark, dry place (like a sealed jar or envelope) for up to 3–5 years. Label them with the date and variety! For extra longevity, add a drying agent (like silica gel) to the container.
Are dried poppy pods safe for birds or pets?
Yes! Poppy pods are non-toxic and even attract birds (like goldfinches) who love the seeds. However, avoid feeding large quantities of fresh poppy parts (like unripe pods) to pets, as they may cause mild stomach upset.
Wrapping up and next steps
Drying poppy pods is a simple yet rewarding task that ensures you’ll have fresh seeds for next year’s garden—plus, you’ll add a touch of rustic charm to your home decor! 🌸 With the right timing, tools, and patience, you can transform those delicate pods into a beautiful keepsake or a seed source.
Whether you’re a seasoned gardener or just starting out, this process is well within your reach.
Now that you’re ready to tackle drying poppy pods, why not take it a step further? Try experimenting with pressed flowers or seed paper crafts—both are fantastic ways to repurpose your harvest. Happy drying, and here’s to a garden full of blooms next season! 🌱✨