
Propagation
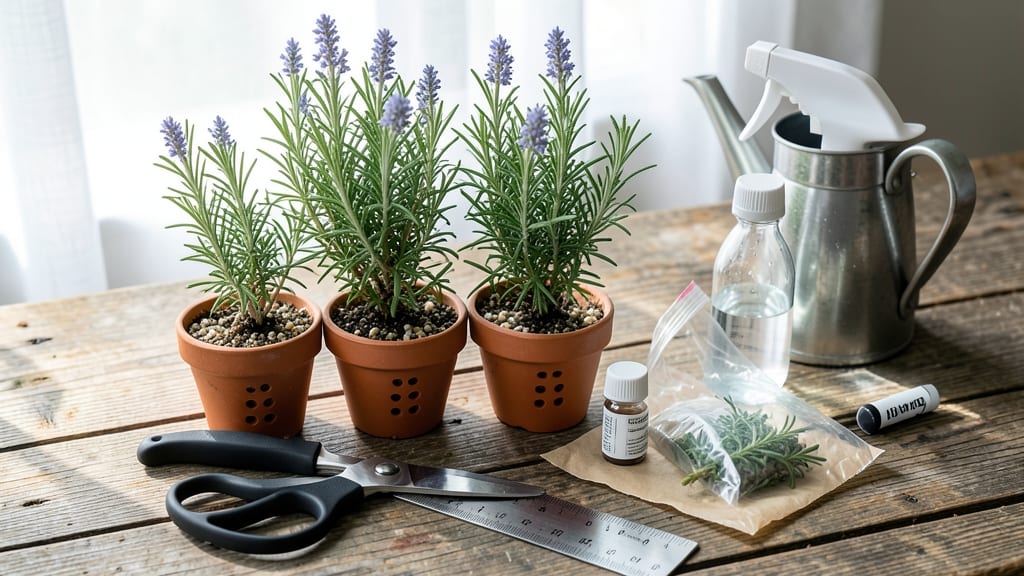
Cloning rosemary is the fastest way to multiply your favorite plants—no waiting for seeds. 🌱 I’ve turned a single bush into dozens of identical plants using this method, and the best part? You get all the fragrant, drought-resistant traits of your original plant, guaranteed.
Start with healthy stems in late spring or early summer when growth is vigorous. Cut 4- to 6-inch sections just below a leaf node at a 45-degree angle—this increases surface area for roots to form.
Dip the cut end in rooting hormone (optional but helpful) before planting in moist perlite or sand. Within 3-4 weeks, you’ll see roots forming. Keep the cuttings in bright, indirect light and maintain high humidity with a plastic bag or propagation dome.
Water lightly to keep the medium damp but not soggy—rotting is the #1 killer of rosemary cuttings. Once roots are 1-2 inches long, transplant into pots with well-draining soil.
These clones will grow just like the parent plant, and you’ll have a backup supply of your favorite variety for years to come. Patience pays off—stick with it, and you’ll have a rosemary army before you know it.
📚 In This Guide
- What you need
- Instructions
- Tips and common mistakes
- Wrapping up and next steps
What you need
- ● Healthy rosemary plant: Choose a mature stem (at least 4–6 inches long) with no flowers or buds—non-flowering stems root best!
- ● Pruning shears or sharp scissors: Sterilized to avoid disease (rubbing alcohol works!).
- ○ Rooting hormone (optional but helpful): A powder or gel (like Clonex or Rootone) to boost root growth.
- ● Well-draining potting mix: A blend of 50% perlite or sand + 50% peat moss or coconut coir (rosemary hates soggy soil!).
- ● Small pots or trays: 3–4 inches deep with drainage holes (or a seedling tray).
- ● Clear plastic bag or humidity dome: To retain moisture (a ziplock bag with holes punched in works!).
- ● Spray bottle: For gentle watering (avoid soaking the cuttings!).
- ● Warm, bright location: Rosemary thrives in 65–75°F (18–24°C) with indirect light (a sunny windowsill or grow light).
- ● Patience: Root growth takes 4–8 weeks—consistency is key!
- ● Clean workspace: Disinfect tools and pots to prevent fungal infections.
Step-by-Step instructions for cloning rosemary
Here's how to multiply your rosemary plants quickly—no special tools required.
🌿 Step 1: Select Healthy Stems for Cutting
Choose 4-inch long stems from the newest growth on your rosemary plant—these are the ones with flexible, green stems (not woody). I always look for stems with 3-4 leaf nodes (those little bumps where leaves attach). These nodes are where roots will form, so more of them means faster success.
Use clean, sharp scissors to make a 45-degree angle cut just below a leaf node. This increases surface area for better water absorption. If your plant has flower buds, snip those off—they'll slow down root growth. Here's the thing: the thicker the stem, the more roots you'll get, but even pencil-thin cuttings will work if you're patient.
💧 Step 2: Prepare the Cuttings for Root Growth
Remove the bottom 1-2 sets of leaves from each cutting—this prevents them from rotting underwater. I like to strip them off with my fingers, leaving just the top 2-3 sets of leaves intact. Dip the cut end in rooting hormone (optional but helpful for speed) and tap off any excess powder.
Fill a small container with lukewarm water (never cold) and place the cuttings so the bare stems are submerged, but the leaves stay dry. Change the water every 2-3 days to prevent bacterial growth. You'll see tiny white root hairs appear in 1-2 weeks—that's your signal roots are forming. Real talk: if you skip the hormone, just be extra patient—it might take 3-4 weeks instead.
☀️ Step 3: Transition to Soil When Roots Form
Once roots reach 1-2 inches long, it's time to plant. Fill 4-inch pots with well-draining potting mix (rosemary hates soggy roots). Make a hole with your finger, then gently insert the cutting so the roots are buried but the leaves stay above soil level. Press the soil lightly around the stem to secure it.
Water lightly until the soil feels evenly moist but not soggy. Place the pots in bright, indirect light for the first week—this helps the plant adjust without shock. After that, move to full sun (at least 6 hours daily). You'll know it's thriving when new leaves appear in 2-3 weeks. Don't overwater now—let the top inch of soil dry out between waterings.
✂️ Step 4: Harden Off and Transplant
After 4-6 weeks in pots, your clones will be ready for the garden. Start hardening them off by placing them outside in a shaded, sheltered spot for 1-2 hours the first day. Gradually increase their outdoor time over 10-14 days, slowly introducing more sun and wind.
Transplant on an overcast day or in the late afternoon to reduce stress. Space them 18-24 inches apart in well-draining soil with full sun. Mulch lightly to retain moisture but avoid piling it against the stems. Here's the secret: rosemary loves dry feet, so underwatering is better than overwatering. Once established, they'll thrive with minimal care.
Tips & tricks for fast rosemary propagation
Here's what I've learned after propagating dozens of rosemary plants—these little tricks make all the difference when you're racing against time.
The Stem Selection Secret: In Step 1, don't just grab any stem—look for the ones with the most vibrant green color and the thickest diameter. I've found that stems with 3-4 leaf nodes produce roots in just 7-10 days, while thinner stems might take up to 2 weeks. The key is selecting stems from the current year's growth, not the woody older stems. Confession: I skipped this step for years and wondered why my cuttings always took forever to root.
Rooting Hormone Hack: When you dip your cuttings in rooting hormone during Step 2, don't just dip and move on—tap off any excess powder. The leftover hormone can create a sticky residue that actually prevents root formation. I learned this the hard way after ruining three batches. Also, if you're short on time, use a small amount of honey (just a drop) instead of hormone—it works surprisingly well for rosemary.
Water Temperature Matters: That lukewarm water in Step 2 isn't just a suggestion—it's crucial. Cold water shocks the plant cells and slows root formation, while hot water can damage the delicate tissues. I keep a small thermometer handy and aim for about 70-75°F. You'll notice roots appear faster when using properly warmed water, especially in cooler climates.
Light Transition Strategy: In Step 3, when moving your rooted cuttings to full sun, don't rush it. I've seen beginners move them straight to full sun and end up with crispy leaves. Start with bright indirect light for that first week—this gradual transition mimics natural conditions and helps the plants adjust without shock. Think of it as a sunburn prevention strategy for your new plants.
Pro Tips for Clone Rosemary
- Here's what I've learned after propagating dozens of rosemary plants—these little tricks make all the difference when...
- The Stem Selection Secret: In Step 1, don't just grab any stem—look for the ones with the most vibrant green color an...
- Rooting Hormone Hack: When you dip your cuttings in rooting hormone during Step 2, don't just dip and move on—tap off...
Frequently asked questions
Got questions about cloning rosemary? You’re not alone! Here are answers to the most common concerns—whether you're a beginner or a seasoned gardener looking to refine your technique.
How long does it take for rosemary cuttings to root?
Most rosemary cuttings take 4 to 8 weeks to root, depending on conditions like humidity, warmth, and moisture. Patience is key—check roots by gently tugging the cutting. If resistance is felt, roots are forming! Use a humidity dome or plastic bag to speed things up.
Can I clone rosemary indoors without a heat mat?
Yes! While a heat mat (70–75°F) boosts rooting, rosemary can still thrive indoors with consistent warmth near a sunny window or under grow lights. Place cuttings in a bright, humid spot (like a bathroom with a shower curtain) and mist daily. Just avoid drafts—they slow growth.
What if my rosemary cuttings rot before rooting?
Root rot is common if cuttings sit in soggy soil. To prevent it:
- Use a well-draining mix (perlite + peat or coconut coir).
- Avoid overwatering—stick your finger in the soil; water only if the top inch is dry.
- Trim cuttings just below a leaf node and let them callus for 1–2 hours before planting.
Is it better to clone rosemary from softwood or hardwood?
For faster results, use softwood cuttings (new, flexible growth) in spring/summer. Hardwood (woody, mature stems) roots slower but survives winter. Softwood: 4–6 inches long; hardwood: 6+ inches. Both work, but softwood is ideal for beginners!
Can I clone rosemary from a grocery store plant?
Yes, but check for pesticides first—rinse the plant or let it sit outdoors for a few days to remove residues. Grocery-store rosemary is often treated, so rooting may be slower. For best success, propagate from a healthy, organic plant or one you’ve grown yourself.
How do I know when to transplant cloned rosemary?
Transplant when new growth appears and roots are 2–3 inches long (gently pull to test). Harden off cuttings for 1–2 weeks by gradually exposing them to outdoor conditions. Plant in well-draining soil, space 18–24 inches apart, and water lightly at first to avoid shock.
Wrapping up and next steps
Cloning rosemary is a rewarding way to expand your herb garden while ensuring strong, healthy plants! By following these simple steps—selecting healthy cuttings, using rooting hormone, and providing the right environment—you’ll soon enjoy lush, thriving rosemary that multiplies your harvest.
Don’t forget to patience and consistency are key as you watch those roots grow.
Now that you’re armed with the know-how, why not try cloning a few more herbs? Experiment with basil, mint, or thyme next—your green thumb is just getting started! 🌱