
Vegetables
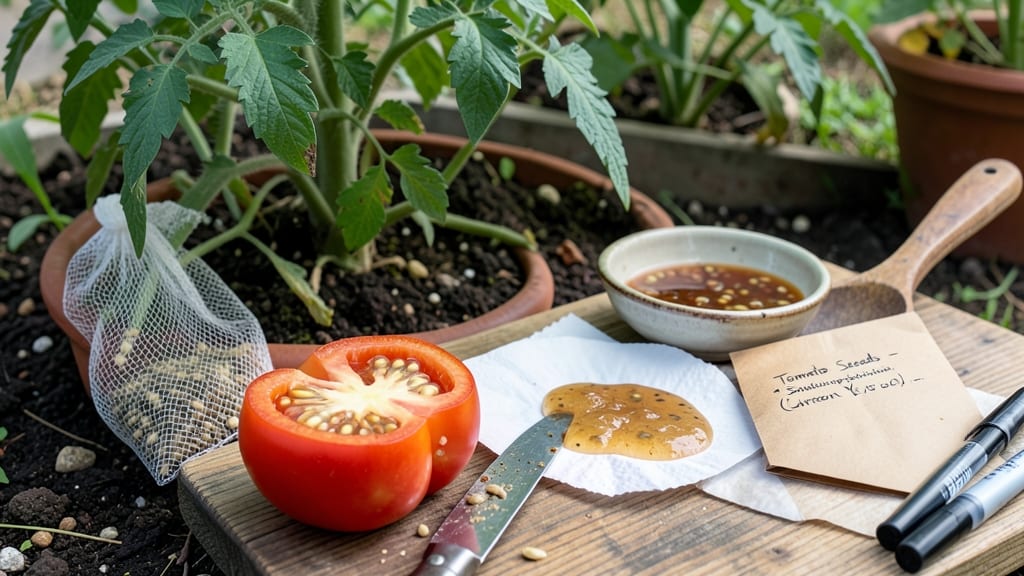
How to dry tomato seeds for next year saves you money and secures next year’s garden treasures. 🌱 I’ve saved seeds from my heirloom tomatoes for five years now, and the process is simpler than most gardeners realize—once you know the right steps to avoid moldy messes or shriveled failures.
The key is patience: let the seeds ferment in their pulp for 3-5 days to separate cleanly, then rinse and dry them properly. Using paper towels or mesh bags works best, but even a sunny windowsill can work if you’re careful.
I’ve dried seeds successfully both indoors and outdoors, as long as humidity stays low.
By the time you’re done, you’ll have a stash of viable seeds that’ll sprout just as reliably as store-bought ones. The right storage—cool, dark, and dry—keeps them good for 3-5 years, meaning you’ll never need to buy tomato seeds again if you save your own.
This method works for any tomato variety, from slicers to cherry tomatoes, and turns your harvest into a renewable resource. Let’s get those seeds ready for planting season!
📚 In This Guide
- What you need
- Instructions
- Tips and common mistakes
- Wrapping up and next steps
What you need
- ● Mature tomatoes: Fully ripened (or slightly underripe) heirloom or open-pollinated varieties—hybrid seeds won’t grow true to type.
- ● Sharp knife or scissors: For cleanly slicing open tomatoes (avoid dull tools to prevent crushing seeds).
- ● Fine-mesh strainer or sieve: A non-metallic strainer (stainless steel or plastic) with holes small enough to catch seeds but let water drain.
- ● Large bowl or bucket: For fermenting seeds (at least 2–3 gallons capacity to accommodate pulp and water).
- ● Paper towels or coffee filters: Unbleached and seed-free (bleach can harm seeds; avoid recycled paper with additives).
- ● Small paper envelopes or seed packets: 1–2 envelopes per tomato variety (label with the name, date, and growing conditions).
- ● Permanent marker or labels: For marking envelopes (waterproof ink works best).
- ● Drying surface: A cool, dry, well-ventilated area (e.g., a baking sheet, mesh screen, or open book with paper towels).
- ○ Small fan or dehumidifier (optional but helpful): To speed up drying in humid climates.
- ● Glass jar or container: For fermenting seeds if you prefer a contained method (add water to cover pulp).
- ● Hair dryer (cool setting): For speeding up drying in 10–15 minute bursts (avoid heat damage!).
- ● Desiccant packets: Place in envelopes to absorb excess moisture before storage.
- ● Seed storage kit: Includes humidity packets and airtight containers for long-term viability.
- ● Notebook or spreadsheet: To track seed varieties, germination rates, and growing notes.
Step-by-Step instructions for harvesting and drying tomato seeds
Turn this year's tomatoes into next year's plants with just a little patience and the right technique.
🍅 Step 1: Select and Extract Ripe Tomatoes
Pick tomatoes that are fully ripe but not overripe—think deep red, firm skin, and a slight give when pressed. Cut them open and scoop out the jelly-like pulp into a bowl. I like to use a spoon to scrape every last bit from the seeds, but leave the skin behind—it's full of seeds you don't want.
Add 1 cup of water to the bowl and stir gently. Let the mixture sit for 1-2 days at room temperature. You'll see the good seeds sink to the bottom while the bad ones (and pulp) float. This fermentation step removes the gel that coats the seeds, which would otherwise prevent germination.
💧 Step 2: Rinse and Prepare Seeds for Drying
After 1-2 days, pour the mixture through a fine-mesh strainer or cheesecloth to separate the seeds from the remaining pulp and water. Rinse the seeds under cool water to remove any lingering gel or debris. Spread them out on a clean, dry paper towel or a seed-saving screen.
I like to pat them dry gently with another paper towel—just enough to remove surface moisture without crushing them. The goal is to dry them evenly, so make sure they're in a single layer. If you're working with a large harvest, divide them into smaller batches to dry more efficiently.
☀️ Step 3: Dry Seeds in a Controlled Environment
Place the seeds in a warm, dry spot with good airflow—like a sunny windowsill or a seed dehydrator set to 95-100°F. Avoid direct sunlight, which can overheat and damage the seeds. They should dry completely in 3-7 days, depending on humidity levels in your home.
You'll know they're ready when they're hard to the touch and have a papery texture. Test a few by pressing them between your fingers—they should feel dry and slightly brittle. Store them in a labeled envelope or airtight container in a cool, dark place. Properly dried seeds can last 3-5 years and still germinate well.
⏰ Step 4: Test Viability Before Storing Long-Term
Before you tuck the seeds away for next year, do a quick viability test. Take 10 seeds and place them on a damp paper towel in a sealed plastic bag. Keep them in a warm spot and check daily. If 80% or more sprout within 7-10 days, your seeds are good to go. If fewer sprout, consider saving only the best batches or starting fresh.
Label your seed packets with the tomato variety and the year harvested. I also jot down notes about the plant's performance—like flavor, disease resistance, or yield—so I can make informed choices next season. This little extra step saves you from surprises when planting time rolls around again.
Tips & tricks for perfect seed drying
Avoid these common pitfalls—and get seeds ready for planting next season with confidence.
Fermentation Timing: The 1-2 day fermentation in Step 1 is crucial for removing the seed gel that prevents germination. If your kitchen stays cool (below 70°F), extend to 2 days to ensure complete separation. You'll know it's ready when the good seeds sink to the bottom and the water looks cloudy—this means the gel has broken down.
Drying Conditions: For the 95-100°F drying phase in Step 3, avoid direct sunlight—it can overheat seeds and reduce viability. A sunny windowsill with indirect light works perfectly, or use a seed dehydrator set to the lower end of the range (95°F) for more control. Humidity matters too: if your home feels damp, consider using a small fan to improve airflow around the drying seeds.
Batch Management: When drying seeds in Step 3, never pile them—always spread in a single layer. If you're processing a large harvest, divide into smaller batches and rotate trays daily for even drying. Uneven drying leads to moldy seeds or poor germination. I've ruined batches by skipping this step, so trust me on this.
Storage Wisdom: After the 3-7 day drying period, store seeds in labeled envelopes with silica gel packets to absorb moisture. Write the tomato variety and year on the packet—next year's you won't remember which seeds are which! Keep them in a cool, dark place (like your fridge's crisper drawer) to prevent temperature fluctuations that can reduce viability over those 3-5 years.
Pro Tips for Dry Tomato Seeds For Next Year
- Avoid these common pitfalls—and get seeds ready for planting next season with confidence.
- Fermentation Timing: The 1-2 day fermentation in Step 1 is crucial for removing the seed gel that prevents germinatio...
- Drying Conditions: For the 95-100°F drying phase in Step 3, avoid direct sunlight—it can overheat seeds and reduce vi...
Frequently asked questions
about drying tomato seeds can save you time and frustration. Here are answers to the most common queries to ensure your seeds stay viable and ready for next year’s garden!How long do dried tomato seeds last?
Properly dried and stored tomato seeds can last 3–5 years while maintaining good germination rates. For best results, keep them in a cool, dark place (like a sealed container in the fridge or freezer). Test germination annually by planting a few seeds to check viability.
Can I dry tomato seeds too quickly?
Yes! If seeds dry too fast (e.g., in direct sunlight or high heat), they may become brittle or lose viability. Aim for a slow, 2–4 week fermentation and drying process. A paper towel or mesh bag in a warm, shaded spot works best—patience is key!
What if my seeds mold during fermentation?
Mold is a red flag! If you see fuzzy growth, discard the batch and start over with fresh tomato pulp. To prevent mold, use clean tools, work in a sterile environment, and ensure your fermentation container is not airtight (a loose lid or cloth cover helps airflow).
Do I need to store seeds in the fridge?
While not mandatory, the fridge (35–40°F) or freezer (0°F) extends seed life by slowing moisture loss and decay. For short-term storage (1–2 years), a cool, dark pantry works fine. Label containers with the date to track freshness!
Can I save seeds from hybrid tomatoes?
Hybrid tomato seeds (like ‘Better Boy’ or ‘Early Girl’) may not produce true-to-type plants. For reliable results, save seeds from heirloom or open-pollinated varieties (check seed packets for labels). If you love hybrids, treat them as a fun experiment—germination might surprise you!
Wrapping up and next steps
Drying tomato seeds is a simple yet rewarding way to preserve your harvest and ensure fresh flavors for next year’s garden! 🌱 With just a few tools and a little patience, you can save money, reduce waste, and enjoy the satisfaction of growing heirloom varieties again.
Now that you’re ready to store your seeds, why not label and organize them in airtight containers? This small step keeps your seeds viable and makes next season’s planting a breeze.
Happy saving—and may your future tomatoes be just as delicious! 🍅