
Propagation
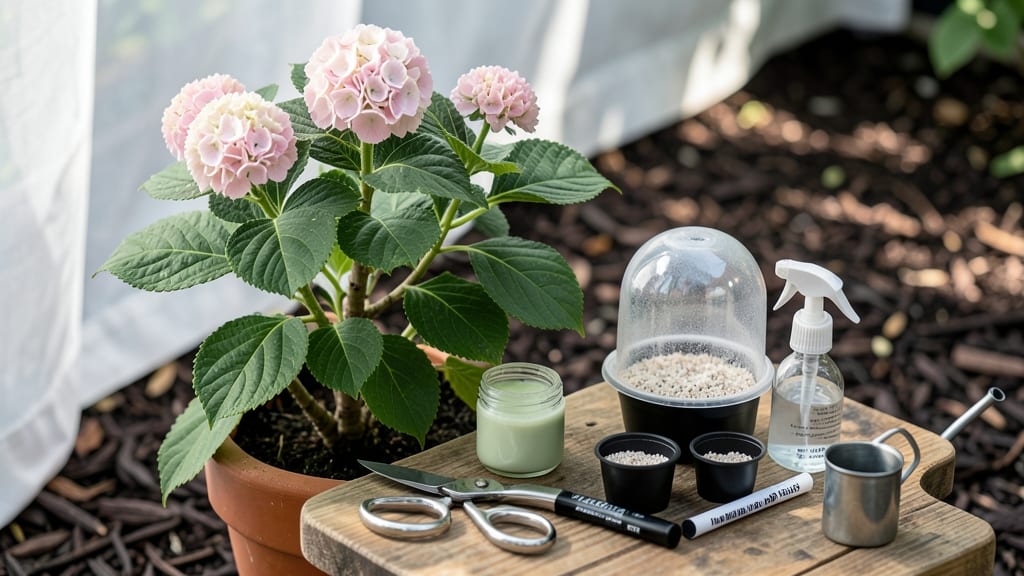
Cloning hydrangeas through layering creates identical plants with zero risk. 🌿 The magic happens when you coax a stem to root while still attached to the mother plant—no pots, no fuss. I’ve propagated dozens this way, and the success rate is shockingly high when you follow the right steps.
You’ll need sharp pruners, rooting hormone (optional but helpful), and a few weeks of patience. The best time to start is late spring or early summer when stems are mature but still flexible.
Choose healthy, non-flowering stems—these are your future clones. The process itself takes about 6-8 weeks from bending to potting up.
By summer’s end, you’ll have rooted cuttings ready to transplant. The new plants will mirror their parent’s blooms, colors, and vigor—just like buying from a nursery, but for a fraction of the cost. No more guessing which hydrangea will thrive in your space; you’re growing a proven winner.
This method works for bigleaf, oakleaf, and panicle hydrangeas alike. The key is keeping the soil moist but not soggy and protecting the layered stem from drying out.
Once roots form, you’ll know it’s time to sever and pot up your new plants—ready to fill your garden with lush, familiar beauty.
📚 In This Guide
- What you need
- Instructions
- Tips and common mistakes
- Wrapping up and next steps
What you need
- ● Healthy hydrangea plant (preferably 1–3 years old, with flexible stems)
- ● Sharp pruning shears or clean knife (sterilized with rubbing alcohol)
- ○ Rooting hormone (optional but recommended for faster root growth)
- ● Moistened sphagnum moss or perlite (for rooting medium, ~1–2 cups)
- ● Plastic wrap or clear plastic bag (to create a humid environment)
- ● Rubber bands or twist ties (to secure the plastic wrap)
- ● Small pots or containers (4–6 inches in diameter, with drainage holes)
- ● Well-draining potting mix (for transplanting rooted cuttings)
- ● Watering can or spray bottle (for gentle hydration)
- ● Garden twine or stakes (to support layers if needed)
- ● Hydrogen peroxide (3%) (to disinfect tools and cuttings)
- ● Fungicide spray (prevents rot during propagation)
- ● Heat mat or propagator tray (speeds up rooting in cooler climates)
- ● Grow lights (if propagating indoors with low natural light)
- ● Labels & markers (to track hydrangea varieties)
Step-by-Step instructions for cloning hydrangeas using layering
Here's the foolproof method I've used to propagate hydrangeas—no fancy tools, just patience and a little elbow grease.
🌿 Step 1: Select Healthy Stems for Layering
Choose 4-6 flexible, low-growing stems from your hydrangea bush, each with at least 3-4 leaves. These should be younger stems (this year's growth) that bend easily without snapping. Avoid thick, woody stems—they won't root well. Look for stems that naturally arch or droop toward the ground; these are perfect candidates.
I like to work on a cloudy day or in the early evening when the air is cooler. This reduces stress on the plant and gives you time to complete the process without burning the leaves in direct sun. Run your fingers along each stem to check for flexibility—it should bend like a bow, not crack like a dry twig.
🪴 Step 2: Create the Layering Site and Prepare the Stem
Dig a small trench about 2-3 inches deep along the stem you've chosen, creating a 4-6 inch section where the stem will rest. Gently bend the stem down into the trench and secure it with a U-shaped bent wire or a small rock to hold it in place. The goal is to keep the stem in contact with the soil without breaking it.
Next, make a small cut (about ½ inch long) on the underside of the stem where it rests in the trench. This cut encourages root growth by exposing the inner tissue to the soil. Don't cut too deep—just enough to split the stem slightly. If you're working with a thicker stem, you can make 2-3 small cuts spaced about 1 inch apart along the buried section.
💧 Step 3: Cover and Keep Moist for Root Development
Fill the trench with soil, pressing lightly to eliminate air pockets around the stem. Water the area gently but thoroughly until the soil is moist but not soggy. You want the soil to feel like a damp sponge—if water runs through it, you've overdone it. Use your fingers to check moisture; the top inch should stay damp but not dripping.
Cover the trench with 2-3 inches of mulch to retain moisture and protect the stem from drying out. I use shredded bark or straw because they break down slowly and keep the soil consistently moist. Avoid plastic or thick layers of mulch, which can suffocate the stem. Water lightly every 2-3 days to maintain even moisture, especially if your climate is dry or windy.
⏰ Step 4: Monitor and Encourage Root Growth
After 4-6 weeks, gently tug on the stem where it's buried. If you feel light resistance, roots are forming! If not, give it another 2-3 weeks before testing again. You'll see new growth at the tip of the stem—this means the plant is still photosynthesizing and feeding the potential roots below.
Here's the thing—don't rush it. If the stem dries out or the leaves wilt, the layering process will fail. Keep an eye on the soil moisture and adjust your watering as needed. Once you feel resistance when tugging, the roots are strong enough to separate. Use a small trowel to carefully dig around the stem and lift it out of the soil.
✂️ Step 5: Separate and Transplant the New Plant
Once roots are established (usually 8-12 weeks after layering), cut the new plant from the mother bush using clean, sharp pruners. Make the cut just below the new roots to encourage a strong root system. Shake off excess soil to inspect the roots—you should see at least 2-3 inches of healthy white or light brown roots.
Plant your new hydrangea in its permanent spot, digging a hole twice as wide as the root ball but no deeper. Water deeply after planting to settle the soil around the roots. Keep the soil consistently moist for the first 2-3 weeks to help the plant establish itself. You'll know it's thriving when new leaves appear within 4-6 weeks of transplanting.
Tips & tricks for perfect hydrangea layering
Here’s how I’ve perfected this method after years of trial and error—these tricks will help you avoid the most common pitfalls.
Stem Selection Secret: In Step 1, look for stems with a slight downward curve—they’re already primed for rooting. I’ve found that stems with 4-5 leaves (instead of the minimum 3-4) tend to produce stronger roots. Avoid stems with flower buds, as they’ll drain energy from root development. The younger the stem, the better—this year’s growth is your best bet for success.
Cutting Technique: When making that ½-inch cut in Step 2, angle it slightly downward to create a larger surface area for roots to emerge. For thicker stems, I recommend making 2 cuts spaced 1 inch apart—this increases your chances of successful rooting. Just be careful not to cut too deep; you’re not trying to sever the stem, just expose the inner tissue.
Moisture Management: In Step 3, the key is consistency. After watering, stick your finger 1 inch deep into the soil—it should feel like a wrung-out sponge. If it’s dry, water immediately; if it’s soggy, wait a day. I’ve seen layerings fail because the soil was too wet, causing rot, or too dry, preventing root formation. A spray bottle works well for light watering between your 2-3 day intervals.
Root Testing: When checking for roots in Step 4, I’ve learned to test at slightly different angles—sometimes roots form in unexpected directions. If you feel resistance but no roots, wait another week before testing again. The 4-6 week window is just a guideline; some varieties root faster, others slower. Patience here pays off—don’t be tempted to force the separation before roots are truly established.
Pro Tips for Clone Hydrangea
- Here’s how I’ve perfected this method after years of trial and error—these tricks will help you avoid the most common...
- Stem Selection Secret: In Step 1, look for stems with a slight downward curve—they’re already primed for rooting. I’v...
- Cutting Technique: When making that ½-inch cut in Step 2, angle it slightly downward to create a larger surface area ...
Frequently asked questions
Got questions about cloning hydrangeas? You’re not alone—this method can feel tricky at first! Below, we’ve rounded up the most common questions (and answers) to help you propagate like a pro.
When is the best time to clone hydrangeas?
The ideal window is late spring to early summer (May–June in most climates). This gives your cuttings warm soil and long daylight hours to root before winter. Avoid fall or winter—hydrangeas need energy to survive, and new roots struggle in cold soil.
How long does it take for hydrangea cuttings to root?
Most cuttings take 4–8 weeks to root, depending on warmth, humidity, and moisture. Check for success by gently tugging the cutting—if it resists, roots are forming! Patience is key; some varieties (like Hydrangea macrophylla) root faster than others.
What if my cuttings rot instead of rooting?
Overwatering or poor drainage is usually the culprit. Use a well-draining mix (perlite + peat or coconut coir) and keep soil moist but not soggy. If you see yellowing or mushy stems, reduce water and improve airflow. A clear plastic bag (with holes!) can help maintain humidity without suffocating the cutting.
Can I clone hydrangeas from store-bought flowers?
Nope! Store-bought hydrangeas are often grown from cuttings too, but they’re treated with growth inhibitors to keep them blooming. Try cloning from a healthy, thriving plant in your garden or a trusted nursery. If you’re desperate, ask the seller if the plant is untreated—some specialty shops sell "cloning-friendly" varieties.
What’s the difference between layering and stem cuttings for hydrangeas?
Both work, but layering (bending a stem into soil while still attached) is easier for hydrangeas—it guarantees water and nutrients until roots form. Stem cuttings (snipping and planting) require more precision and a rooting hormone. Layering also lets you keep the parent plant alive while propagating!
Do hydrangea cuttings need special light?
Bright, indirect light is best—think dappled shade or a sunny windowsill (avoid harsh midday sun). If your cuttings look leggy or pale, they need more light. A grow light (12–14 hours/day) speeds up rooting if natural light is lacking. Just avoid direct heat sources like radiators!
Wrapping up and next steps
Cloning hydrangeas through layering is a rewarding way to expand your garden without breaking the bank! 🌿 With just a few simple steps—like bending stems, securing them, and nurturing roots—you’ll soon have thriving new plants ready to brighten up pots or borders.
The best part? Patience and care pay off—soon, you’ll be sharing (or keeping!) these stunning blooms with confidence.
Ready to try? Start with one stem today—your future hydrangea army begins with a single layer! 🌱