
Container Gardens
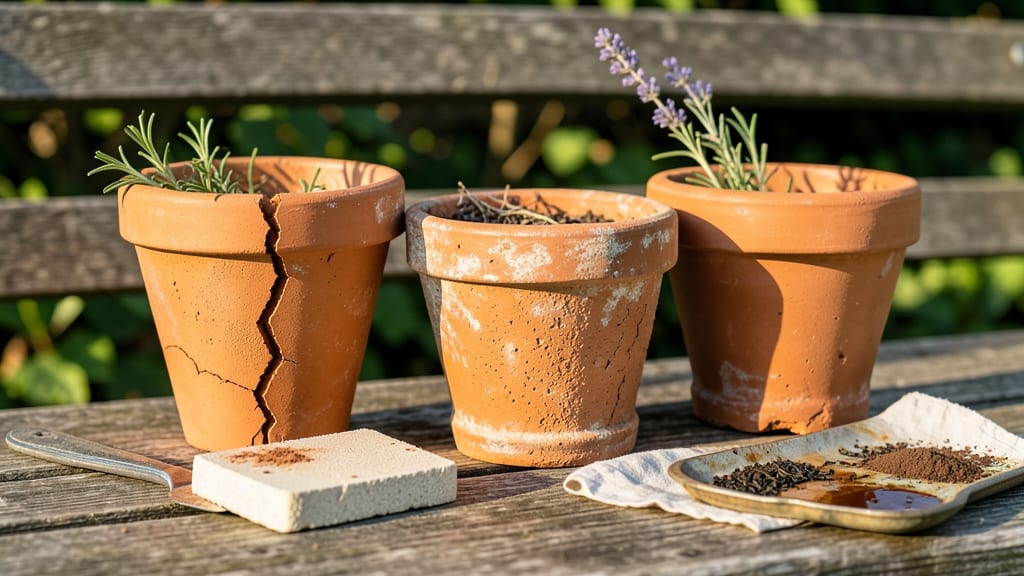
How to make terracotta pots look old—that rustic, sun-weathered charm is easier to achieve than you think. ✨ I’ve transformed store-bought pots into heirloom pieces with just a few simple tricks—no paint or expensive tools needed. The key? Mimicking the natural patina that develops over decades, not years. Start with a clean pot and grab sandpaper, coffee grounds, and vinegar. Rough up the edges first to create that uneven, handmade look. Then, let the magic happen: coffee stains mimic sun-bleached spots, while vinegar washes reveal subtle cracks. It’s all about layering texture, not perfection. By the end, your pots will have that authentic, sun-weathered charm that makes your garden feel like a storybook setting. The best part? Plants thrive just as well in these "old" pots—the distressing is purely decorative. Works for cottagecore gardens, Mediterranean vibes, or even urban planters. The only limit is how much character you want to add! Here’s how to get started without ruining your pots—or your plants.
📚 In This Guide
- What you need
- Instructions
- Tips and common mistakes
- Wrapping up and next steps
What you need
- ● Terracotta pots – Any size or shape (clean and dry)
- ● Sandpaper – Medium-grit (80-120) for rough texture, fine-grit (220+) for smoothing edges
- ● Acrylic paint – Earthy tones (e.g., burnt sienna, ochre, or dark brown) for distressing
- ● Paintbrushes – A mix of stiff-bristle (for texture) and fine-tip (for details)
- ○ Rust stain or tea/coffee – For authentic aging (optional but recommended)
- ● Clear acrylic sealer – Matte or satin finish (to protect your work)
- ● Water & sponge – For cleaning and blending
- ● Epsom salt or vinegar – To mimic mineral deposits
- ● Dry brushing tools – Old toothbrush or sponge for faded effects
- ● Crackle medium – For a naturally cracked, aged look
- ● Stencils or stamping tools – For custom patterns (e.g., floral or geometric)
Step-by-step instructions for aging terracotta pots
Here's how to transform new terracotta pots into weathered, vintage treasures with just a few simple techniques.
🪴 Step 1: Clean and Prep the Pots
Start by washing your terracotta pots with warm, soapy water to remove any dust or factory residues. Scrub gently with a soft brush to avoid scratching the surface—terracotta is porous and delicate. Rinse thoroughly and let them dry completely in a well-ventilated area. This step ensures your distressing will adhere evenly and look natural.
While drying, inspect each pot for any rough spots or uneven surfaces. Lightly sand these areas with 120-grit sandpaper to create texture that will enhance the aged look later. Focus on the edges and bottom where wear naturally occurs over time. Wipe away any sanding dust with a damp cloth before moving to the next step.
💧 Step 2: Apply Coffee or Tea Staining
Brew a strong pot of coffee or black tea—the darker, the better. Let it cool completely before pouring it into the pots until they're about half full. Swirl the liquid around to coat all surfaces evenly. This step mimics the natural staining that occurs from years of exposure to organic matter and moisture.
Let the pots soak for 1-2 hours, then drain and let them air dry completely. You'll notice the terracotta absorbing the liquid, which creates an uneven, patina-like effect. For a more dramatic look, repeat this process 2-3 times, allowing full drying between sessions. This builds up the aged appearance naturally.
☀️ Step 3: Create Scratches and Cracks
Use a wooden skewer or nail to gently scratch random lines across the pots, mimicking natural wear and tear. Focus on areas that would experience friction, like the sides and rims. Press lightly—you're not trying to break the pot, just create subtle surface damage. This step is where you add character, so don't be afraid to get creative with your patterns.
For a more advanced look, use a hammer and chisel to carefully tap out small chips along the edges. Start with just a few strategic spots to avoid making the pot structurally weak. These cracks and chips will give your pots that truly vintage, well-loved appearance. Wipe away any loose debris with a dry cloth afterward.
✂️ Step 4: Seal for Durability
Once your pots are fully dry, apply a matte sealant designed for terracotta or unglazed ceramics. Use a small brush to coat the entire surface evenly, including the inside if you plan to use the pots for plants. This step protects your hard work and prevents the staining from rubbing off over time. Allow the sealant to dry completely according to the manufacturer's instructions.
For an extra touch of authenticity, lightly brush on a watered-down acrylic paint in earthy tones like brown or gray. Apply it sparingly to highlight the scratches and cracks, enhancing their depth. Let it dry completely before using your pots. This final step ensures your distressed pots will last through multiple seasons of gardening.
Tips & tricks for perfectly aged terracotta pots
Between us, the secret to making terracotta pots look authentically vintage lies in the details—those little touches that mimic years of outdoor exposure without compromising durability.
Texture is Everything: In Step 1, don't skip the sanding—even if your pots look smooth, lightly sanding with 120-grit paper creates the perfect foundation for distressing. Focus on the edges and bottom where natural wear occurs, and wipe away dust thoroughly. This step prevents the staining from looking flat and artificial later on.
Staining Like a Pro: For Step 2, the 1-2 hour soak is non-negotiable, but here's what nobody tells you—use cold coffee or tea instead of hot. Hot liquid can cause uneven absorption and potential cracking in delicate terracotta. The cooler temperature lets the stain penetrate gradually for that authentic, uneven patina. For extra drama, let the pots dry completely between staining sessions to build up the vintage effect naturally.
Scratching with Purpose: When creating scratches in Step 3, think like a pot that's been through decades of gardening. Use your wooden skewer to make diagonal lines that follow the natural curves of the pot, not straight lines. For the advanced chipping technique, start with just 2-3 small chips per pot—too many weakens the structure. The goal is character, not destruction!
Sealing Secrets: In Step 4, apply the matte sealant in thin, even coats rather than one thick layer. This prevents drips and ensures full coverage. For that extra rustic touch, use a soft brush to apply the watered-down acrylic paint only to the deepest scratches and cracks—this enhances depth without overpowering the natural look. Let each layer dry completely between applications.
Pro Tips for Make Terracotta Pots Look Old
- Between us, the secret to making terracotta pots look authentically vintage lies in the details—those little touches ...
- Texture is Everything: In Step 1, don't skip the sanding—even if your pots look smooth, lightly sanding with 120-grit...
- Staining Like a Pro: For Step 2, the 1-2 hour soak is non-negotiable, but here's what nobody tells you—use cold coffe...
Frequently asked questions
Got questions about aging terracotta pots? You’re not alone! Here are some of the most common concerns—and their easy solutions—to help you achieve that perfect vintage look without the hassle.
Can I distress terracotta pots without damaging them?
Terracotta is durable, but gentle techniques like sanding (with medium-grit paper) or using a soft brush with vinegar or coffee grounds won’t harm it. Avoid harsh chemicals or excessive scrubbing—think distress, not destruction! For extra safety, test a small area first.
How long does it take for the aged look to set?
The drying time varies: vinegar or coffee solutions dry in 1–2 hours, while paint or sealant may need 24+ hours to cure fully. If you’re impatient, a hairdryer (on low heat) can speed up the process—just keep it moving to avoid overheating the pot.
What if I don’t like the color after aging?
No worries! You can reverse the process by scrubbing with soapy water and a stiff brush, then re-sealing with clear polyurethane. For a different vintage vibe, try tea staining (strong black or green tea) or rust paint for a metallic patina.
Will aging affect how my plants grow?
Not at all! Once fully dried and sealed, your pot will drain and aerate just like new. Just avoid sealing before planting—let the soil absorb moisture first. Pro tip: Unsealed pots (like those aged with vinegar) may dry out faster, so monitor soil moisture closely.
Are there pre-aged terracotta pots available, or should I DIY?
While some garden centers carry distressed pots, DIYing gives you custom control over the look. If you’re short on time, check Etsy or vintage shops for pre-loved pots—but DIYing is often cheaper and more satisfying! Plus, you can match the style to your garden’s theme.
Bonus Pro Tip:
For a natural aged look, bury your pots in the garden for a few weeks before planting. The soil and weather will do the work for you—just rinse off excess dirt afterward!
Wrapping up and next steps
Transforming your terracotta pots into rustic, vintage treasures is easier than you think! With just a few simple techniques—like coffee staining, sanding, or using vinegar—you can give them that shabby chic or weathered look in no time.
The best part? These methods are budget-friendly, eco-conscious, and perfect for adding character to your garden or home decor.
Now that you’re armed with the know-how, grab those pots and get creative! 🌿 Try experimenting with different textures or colors to match your style. Ready for the next step? Check out our guide on styling your aged pots with plants for a cohesive, enchanting look.