
Propagation
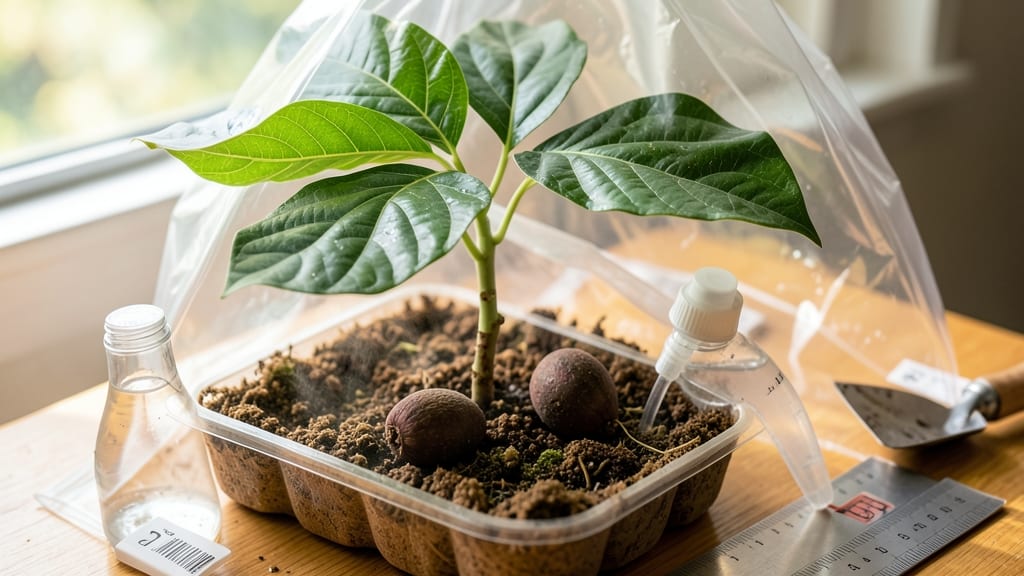
The first crack in that hard black seed could mean a tropical treasure in your garden. 🌱 Germinating soursop seeds (Annona muricata) feels like waiting for a slow-motion miracle—until you know the tricks to speed things up.
I've struggled with stubborn seeds that took months to sprout, but a few simple adjustments cut that time in half every season.
Start with a warm soak (not boiling) to soften the tough seed coat—this mimics nature's slow tropical rains. Plant them just under the surface in a mix of peat and perlite, keeping it damp like a wrung-out sponge.
A heat mat set to 75-80°F works wonders, especially if your home runs cooler. Patience is key, but these seeds will respond when given the right cozy conditions.
Within 4-8 weeks, you'll see those first pale green shoots pushing through. They're fragile at first, so avoid disturbing them—just keep the soil consistently moist and out of direct sun until they're sturdy enough.
The real reward? A thriving soursop tree that could one day produce fruit in your own backyard.
This method works best in zones 10-11, but container growers in cooler climates can keep seedlings indoors until spring. The secret isn't forcing speed—it's creating the perfect tropical environment where these seeds feel right at home.
📚 In This Guide
- What you need
- Instructions
- Tips and common mistakes
- Wrapping up and next steps
What you need
- ● Fresh soursop seeds: 3–5 clean, plump seeds (harvested from ripe fruit—avoid dried or shriveled ones!)
- ● Well-draining potting mix: 1 small pot (4–6 inches in diameter) filled with a blend of: 60% cactus/succulent mix (or regular potting soil)
- ● 30% perlite or coarse sand (for aeration)
- ● 10% compost or coconut coir (for moisture retention)
- ● Spray bottle: With water (to keep seeds moist without drowning them)
- ● Plastic wrap or humidity dome: A small clear bag or lid to create a greenhouse effect
- ○ Heat source (optional but helpful): Seedling heat mat (optional—keeps soil at 75–85°F for faster germination)
- ● OR a sunny windowsill (south-facing, if possible)
- ● Fungicide: A pinch of cinnamon powder or hydrogen peroxide (3%) to prevent mold
- ● Grow lights: LED bulb for 12–14 hours/day if natural light is weak
- ● Seed-starting tray: With drainage holes (if propagating multiple seeds)
- ● Label & marker: To track planting dates (soursop seeds can take weeks to months to sprout!)
Step-by-step instructions for germinating soursop seeds
Here’s how I’ve successfully sprouted soursop seeds—warmth, patience, and a few clever tricks make all the difference.
🌱 Step 1: Extract and Prepare the Seeds
Start by removing the seeds from fresh soursop fruit. Split the fruit open and scoop out the seeds, then rinse them under cool water to remove any pulp. The key here is to avoid drying them out—soursop seeds germinate best when kept slightly moist. I like to wrap them in a damp paper towel and seal them in a plastic bag for 24 hours before planting. This mimics the tropical humidity they’re used to.
Real talk: Don’t skip this step. Dry seeds take weeks longer to sprout, and some may never germinate at all. The moisture jumpstarts the seed’s metabolism, so to speak. After soaking, you’ll notice the seeds look plump and slightly darker—this is your sign they’re ready for planting.
💧 Step 2: Plant in a Warm, Moist Environment
Fill a small container—like a 4-inch pot or even a plastic cup with drainage holes—with a mix of 50% potting soil and 50% perlite or coarse sand. This blend drains well but holds enough moisture to keep seeds happy. Plant the seeds ½ inch deep, spacing them about 1 inch apart if you’re planting multiple. Press the soil gently around them to ensure good contact.
Here’s the thing—soursop seeds need warmth to germinate. Place the container in a spot where the soil stays between 75-85°F, like on top of a refrigerator or near a heat mat. If your home runs cooler, a clear plastic bag draped over the pot creates a mini greenhouse effect. Keep the soil moist but not soggy—water only when the top ¼ inch feels dry to the touch. Overwatering here leads to rot, and you’ll know it’s too wet when mold appears.
☀️ Step 3: Provide Indirect Light and Monitor Daily
Soursop seeds don’t need light to germinate, but they do need it once they sprout. Place your container in bright, indirect light—think under a grow light or near an east-facing window. Direct sun at this stage can scorch the delicate seedlings, so avoid south- or west-facing spots until the first true leaves appear. You’ll see tiny white roots emerge first, followed by a shoot breaking through the soil in 2-4 weeks, depending on warmth.
Watch for condensation inside the plastic bag (if you’re using one). If you see droplets forming, it’s too humid—remove the bag for a few hours to let excess moisture escape. I check the seeds every other day, gently lifting the soil to peek for signs of sprouting. Patience is key here; some seeds take up to 6 weeks to crack open, especially if they’re older.
🌿 Step 4: Transplant Seedlings to Individual Pots
Once seedlings reach 2-3 inches tall and have 2-3 true leaves (not the initial seed leaves), it’s time to repot them. Use 3-inch pots filled with a well-draining potting mix—soursop plants hate soggy roots. Gently remove the seedling from its original container, keeping the root ball intact. Plant it at the same depth it was growing before, and water lightly to settle the soil.
This is the moment that matters: Don’t rush it. If you transplant too early, the roots are fragile and can break. After repotting, place the seedlings back in bright, indirect light and keep the soil consistently moist but not waterlogged. You’ll notice new growth within a week—that’s your signal everything is working. If leaves yellow or wilt, it’s usually a sign of overwatering or poor drainage, so adjust accordingly.
Tips & tricks for germinating soursop seeds
Warmth and patience are your secret weapons—here's how to maximize your success with these tropical seeds.
Seed Prep Matters: After rinsing the seeds, pat them dry with a paper towel before the 24-hour soak. This prevents excess moisture from creating mold during storage. I also like to place the sealed bag in a warm spot (like near the fridge) during this time—this helps kickstart germination even before planting. The seeds should feel slightly heavier after soaking, indicating they've absorbed moisture.
Soil Mix Secrets: The 50/50 mix of potting soil and perlite is perfect, but if you don't have perlite, coarse sand works just as well. For extra drainage, I sometimes add a handful of orchid bark chips to the mix—this helps prevent the compacting that can suffocate roots. Just make sure your container has drainage holes, no matter what mix you use.
Warmth Hack: If your home stays below 75°F, try placing your seed container on top of a refrigerator or near a heat mat set to low. You can also use a seedling heat mat designed for germination—these maintain consistent warmth without risking overheating. The goal is to keep soil temps between 75-85°F consistently during the germination phase.
Transplant Timing: When checking for the 2-3 inch height and 2-3 true leaves, focus on the leaves—not the initial seed leaves. True leaves are smaller, darker green, and more oval-shaped. I wait until I see at least two true leaves before transplanting, as this gives the seedling enough energy reserves to handle the stress of repotting.
Pro Tips for Germinate Soursop Seeds
- Warmth and patience are your secret weapons—here's how to maximize your success with these tropical seeds.
- Seed Prep Matters: After rinsing the seeds, pat them dry with a paper towel before the 24-hour soak. This prevents ex...
- Soil Mix Secrets: The 50/50 mix of potting soil and perlite is perfect, but if you don't have perlite, coarse sand wo...
Frequently asked questions
Got questions about germinating soursop seeds? You’re not alone! Here are some of the most common concerns—and their answers—to help you troubleshoot and succeed.
How long does it take for soursop seeds to germinate?
Patience is key! Under ideal conditions (warmth, moisture, and humidity), soursop seeds typically sprout within 2–4 weeks. Some may take up to 6–8 weeks, especially if stored improperly or exposed to cold. Keep the soil consistently moist and warm (around 75–85°F) to speed things up.
What if my seeds aren’t sprouting? Troubleshooting tips?
If your seeds refuse to germinate, check these common issues:
- Dry soil: Soursop seeds need constant moisture—don’t let the top layer dry out.
- Cold temperatures: Use a heat mat or place them near a sunny window (but avoid direct heat sources).
- Old or damaged seeds: Test freshness by soaking a few in water—if they float, they’re likely non-viable.
- Poor airflow: Overcrowding can cause rot. Space seeds 1–2 inches apart in the tray.
If all else fails, try scarification (lightly sanding the seed coat) or soaking them in warm water for 24 hours before replanting.
Can I germinate soursop seeds in water instead of soil?
Yes! Many gardeners use the water germination method for soursop seeds. Place them in a jar of warm water, changing it daily, until roots (about 1–2 inches long) and a tiny sprout appear. Once rooted, transplant carefully into soil to avoid damaging the delicate stems. This method speeds up germination but requires extra care to prevent mold.
Do soursop seeds need light during germination?
Nope! Soursop seeds germinate best in darkness—light can actually inhibit sprouting. Keep your seed tray covered with a plastic lid or in a dark cabinet until you see sprouts peeking through. Once they’ve emerged, move them to a bright, indirect light spot to encourage healthy growth.
How do I know if a soursop seedling is healthy?
A thriving soursop seedling has:
- Two cotyledons (the first leaves) unfolding smoothly.
- Sturdy, not leggy, stems (a sign of proper light exposure).
- No yellowing or wilting—these could indicate overwatering or pests.
Once your seedling has 3–4 true leaves (not cotyledons), it’s ready for repotting into a larger container with well-draining soil.
Wrapping up and next steps
Germinating soursop seeds is a rewarding journey that blends patience with a little warmth and care!
By following the right steps—like soaking seeds, using a cozy propagation setup, and maintaining consistent moisture—you’ll soon witness those first tiny sprouts emerge. 🌱 Remember, consistency is key, and soon you’ll be nurturing a thriving soursop sapling.
Now that you’re armed with the know-how, why not take the next step? Share your progress with fellow plant enthusiasts, experiment with different germination methods, or even explore transplanting your sapling into a pot. Your green thumb is about to grow even greener! 🌿