
How To
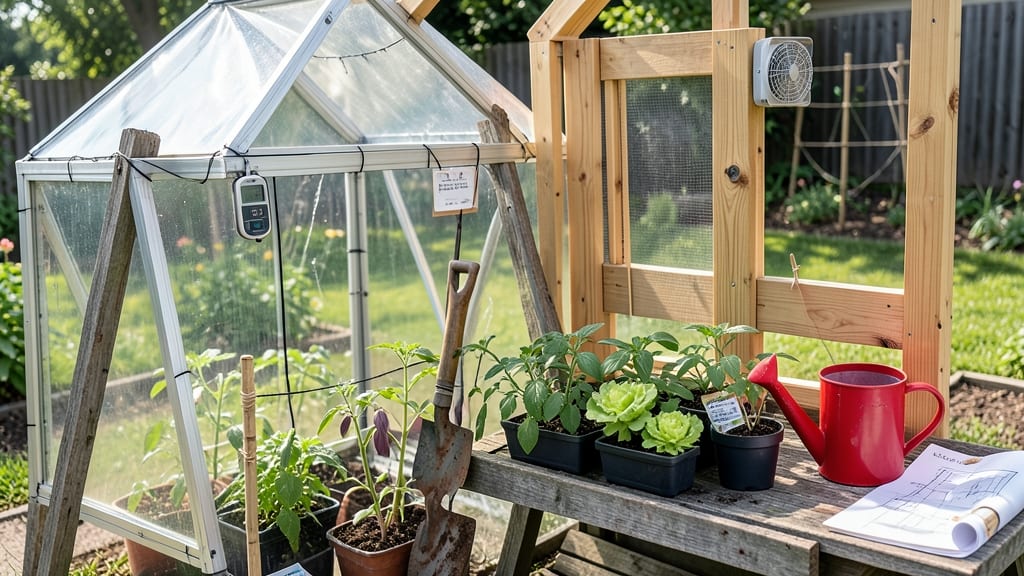
Your first frost just delayed your gardening dreams? 🌱 A DIY greenhouse changes that—turning a simple frame into a sunlight-harvesting space that extends your growing season by months. I built mine last spring after my seedlings bolted overnight, and now I’m harvesting tomatoes in December.
The best part? It costs a fraction of store-bought options and fits any backyard or balcony.
You don’t need fancy materials—just PVC pipes, plastic sheeting, and basic tools like a saw and drill. A cold frame (the simplest version) can be built for under $50, while a hoop house stretches that to $150-$200 for year-round use.
The key is maximizing sunlight exposure: face it south (in the Northern Hemisphere) and elevate it slightly to prevent water pooling. My 6’x4’ hoop house now gives me a 10°F warmer microclimate than outside, even in winter.
Once up, you’ll see the difference immediately—healthier seedlings, faster growth, and plants that thrive when outdoor temps drop. The condensation inside might startle you at first, but proper ventilation (a simple zipper vent or cracked door) keeps humidity in check.
I’ve even overwintered tender perennials like basil and peppers inside, saving me from replanting every spring. The payoff? More harvests, less waste, and a garden that never sleeps.
Whether you’re starting seeds in January or protecting your veggies from late frosts, this project scales to your needs. Small enough for a patio but sturdy enough for heavy snow loads—just adjust the frame size and materials. Let’s get you growing, no matter the season.
📚 In This Guide
- What you need
- Instructions
- Tips and common mistakes
- Wrapping up and next steps
What you need
- ● Frame Structure: Wood (2x4 or 4x4 lumber) – ~10-15 pieces, 8 feet long (for a 4’x6’ frame)
- ● OR PVC pipes (1-inch diameter) – ~12-15 pieces, 8 feet long (budget-friendly alternative)
- ● Corrugated metal roofing or polycarbonate panels – ~10-12 sheets, 4’x8’ (for durability and sunlight diffusion)
- ● Base: Cinder blocks or concrete pavers – ~12-16 blocks (for stability)
- ● OR Gravel or landscape fabric (if building on soil)
- ● Fasteners: Galvanized screws or nails – ~50-100 pieces
- ● Hinges (for doors) – 2-4 hinges
- ● Latch or hook-and-eye closures – 1 set
- ● Ventilation: PVC pipes (for vents) – 2 pieces, 4-6 inches in diameter
- ○ Adjustable vent flaps (optional but recommended)
- ● Extras for Stability: Wooden stakes or rebar – 4-6 pieces, 2 feet long (for anchoring)
- ● Outdoor-rated paint or sealant – 1 can (to protect wood from weather)
- ● Measuring tape
- ● Speed square or carpenter’s square
- ● Drill/driver with bits
- ● Saw (hand saw, circular saw, or miter saw)
- ● Screwdriver set
- ● Level (to ensure your greenhouse is straight!)
- ● Hammer or nail gun
- ● Pliers (for bending wire or adjusting hinges)
- ● Staple gun (if using landscape fabric)
- ● Thermometer/hygrometer – to monitor temperature and humidity
- ● Automatic vent openers – for hands-free climate control
- ● Reflective insulation (like bubble wrap) – to retain heat in colder months
- ● Shelving or stackable pots – for maximizing vertical space
- ● Drip irrigation kit – for easy watering
- ● Solar-powered lights – for extending growing hours
Step-by-Step instructions for building a DIY greenhouse
Here's the method I've used to create sturdy, sunlight-maximizing greenhouses that last seasons.
🪴 Step 1: Select and Prepare Your Base Structure
For a 4' x 6' footprint, I recommend using 2x4 lumber for the frame. Cut four 4-foot vertical posts and four 6-foot horizontal beams to form a rectangular base. Assemble them with deck screws into a sturdy rectangle, then add diagonal braces for wind resistance. The key is level ground—use a 4-foot level to check all corners before securing.
I always add galvanized hardware cloth along the bottom edge to deter burrowing pests without blocking airflow. This prevents rodents from nesting inside while still allowing ventilation. Once the frame stands, I attach plywood sheets to the bottom to create a solid floor—this keeps roots protected from temperature fluctuations and makes cleanup easier.
☀️ Step 2: Install the Roof and Maximize Sunlight Capture
For the roof, I use polycarbonate panels (they're stronger than plastic and last 5+ years). Cut them to fit the frame's angle, ensuring a 5-degree slope toward the south (in northern hemisphere) to shed rain while maximizing winter sun exposure. Secure panels with aluminum trim to prevent water leakage and UV degradation.
Here's the thing—I always add reflective insulation on the north-facing walls. A simple aluminum foil sheet behind the inner wall reflects sunlight deeper into the greenhouse, extending growing seasons by 2-3 weeks in cooler climates. Seal all seams with silicone caulk to prevent drafts that could stress tender seedlings.
💧 Step 3: Add Ventilation and Climate Control Features
Ventilation is non-negotiable. I install hinged roof panels that lift open for airflow, plus adjustable side vents near the top. Position vents so they open automatically when temperatures hit 85°F—this prevents heat buildup that can scorch plants. I use thermostat-controlled fans wired to a simple switch for precise control.
For humidity management, I add a 5-gallon water reservoir with a drip irrigation system that runs along the base. The evaporative cooling from the water keeps air moist enough for seedlings without creating stagnant conditions. This system also doubles as a self-watering feature for containers inside.
✂️ Step 4: Finish with Protective and Functional Add-Ons
I always install shade cloth on the east and west sides to filter harsh afternoon sun while still allowing light penetration. This prevents leaf burn on heat-sensitive crops like lettuce and basil. For security, I add removable mesh screens that zip onto the doors—keeping pests out while allowing easy access.
Finally, I mount shelf brackets along the interior walls to create adjustable growing levels. This maximizes vertical space for seedlings while keeping mature plants at optimal height. I use powder-coated metal brackets because they resist rust and support up to 20 pounds per shelf—plenty for heavy containers.
🌱 Step 5: Test and Optimize Before Planting
Before adding plants, I run a 24-hour temperature test with a thermometer inside and one outside. The ideal greenhouse should stay 10-15°F warmer than outdoor temps on sunny days. If it overheats, I adjust vent angles or add more shade cloth. I also test airflow by lighting a smoke pencil near the vents—proper circulation means smoke disperses evenly within 30 seconds.
This is the moment that matters: I plant fast-growing radishes first as a test crop. If they thrive with no wilting or yellowing after two weeks, the greenhouse is ready for more sensitive plants. Radishes also help me identify any cold spots where heat escapes—usually near the north wall where I'll add extra insulation later if needed.
Tips & tricks for building a sunlight-optimized DIY greenhouse
These practical insights will help you avoid common pitfalls and create a greenhouse that truly extends your growing season.
Foundation First: When assembling your 4' x 6' frame in Step 1, pre-drill all screw holes to prevent wood splitting—especially with 2x4 lumber. I've learned this the hard way after ruining three batches of lumber from over-tightening screws. Also, use galvanized deck screws (not regular screws) for rust resistance, particularly if you're building near coastal areas where salt air accelerates corrosion. The 4-foot level check isn't just about aesthetics—uneven bases cause structural stress that weakens over time.
Roof Angle Precision: That 5-degree slope toward the south in Step 2 matters more than you might think. Use a speed square to verify the angle before securing polycarbonate panels. In my first attempt, I eyeballed it and ended up with a 3-degree slope that collected rainwater instead of shedding it. For extra durability, I recommend using UV-resistant polycarbonate (rated for 5+ years) rather than cheaper plastic alternatives that yellow and degrade within a season.
Ventilation Strategy: The 85°F automatic vent trigger in Step 3 requires precise placement. Mount vents near the hottest areas (usually the roof peak) and test their operation before planting. I've found that adding a thermostat-controlled fan creates a chimney effect that pulls air through the entire structure. For humidity control, position your 5-gallon water reservoir near the intake vents—this creates a natural cooling cycle as water evaporates and circulates through the greenhouse.
Insulation Upgrade: While the instructions mention aluminum foil for north-facing walls, consider adding a second layer of reflective bubble insulation for climates with harsh winters. This simple addition can extend your growing season by an extra 2-3 weeks by reflecting both sunlight and radiant heat back into the greenhouse. Seal all seams with silicone caulk—I've seen drafts through poorly sealed joints that completely negate the insulation benefits.
Pro Tips for Make Diy Greenhouse
- These practical insights will help you avoid common pitfalls and create a greenhouse that truly extends your growing ...
- Foundation First: When assembling your 4' x 6' frame in Step 1, pre-drill all screw holes to prevent wood splitting—e...
- Roof Angle Precision: That 5-degree slope toward the south in Step 2 matters more than you might think. Use a speed s...
Frequently asked questions
Got questions about building your own DIY greenhouse? We’ve got answers! Here are some of the most common queries to help you get started with confidence.
What’s the best time of year to build a DIY greenhouse?
The best time to build is late winter or early spring—before planting season kicks off. This gives you time to assemble it before the growing rush. However, if you’re in a mild climate, you can build year-round. Just avoid extreme heat or cold, which can make materials brittle or installation tricky!
Can I make a greenhouse for under $100?
A budget-friendly greenhouse can be built with plastic sheeting, PVC pipes, and repurposed windows. Focus on a small, simple design (like a hoop house) to cut costs. Check local recycling centers for free or low-cost materials too—every dollar saved is a win!
How do I keep my DIY greenhouse from freezing in winter?
Insulation is key! Use bubble wrap, straw bales, or thick cardboard on the walls and floor. Add a thermostat-controlled fan to circulate warm air, and consider a mini heater (safely installed) for extreme cold. Plant cold-hardy crops like kale or spinach to extend your growing season naturally.
How do I control temperature and humidity inside?
Ventilation is everything! Install adjustable vents or mesh screens to let hot air escape. A simple shade cloth (30-50% coverage) blocks excess sun in summer. For humidity, avoid overwatering and use a dehumidifier or open vents during damp days. Monitor with a hygrometer for ideal levels (40-70% humidity).
What’s the easiest DIY greenhouse design for beginners?
Start with a hoop house—it’s the simplest! Use PVC pipes or wire hoops covered with plastic sheeting, anchored with stakes or sandbags. For a no-tools option, try a window greenhouse by propping up old windows with bricks. Both are low-cost, quick to assemble, and perfect for small spaces!
How do I keep pests out of my DIY greenhouse?
Prevention is your best defense! Seal gaps with caulk or mesh, and install fine netting over vents. Introduce beneficial insects like ladybugs or lacewings. Avoid overcrowding plants, and remove weeds regularly. A reflective mulch (like aluminum foil) can deter burrowing pests too!
Wrapping up and next steps
Building your own DIY greenhouse is a rewarding project that unlocks year-round growing potential—no matter your skill level! 🌱 With the right materials and a little creativity, you’ve got everything you need to create a thriving space for plants.
The best part? You’ll save money and gain the satisfaction of nurturing your own green haven.
Now that you’re armed with the knowledge, roll up your sleeves and start building! Whether you’re a seasoned gardener or a beginner, every step forward is a step toward fresher, homegrown produce. Happy growing! 🌿