
Landscaping
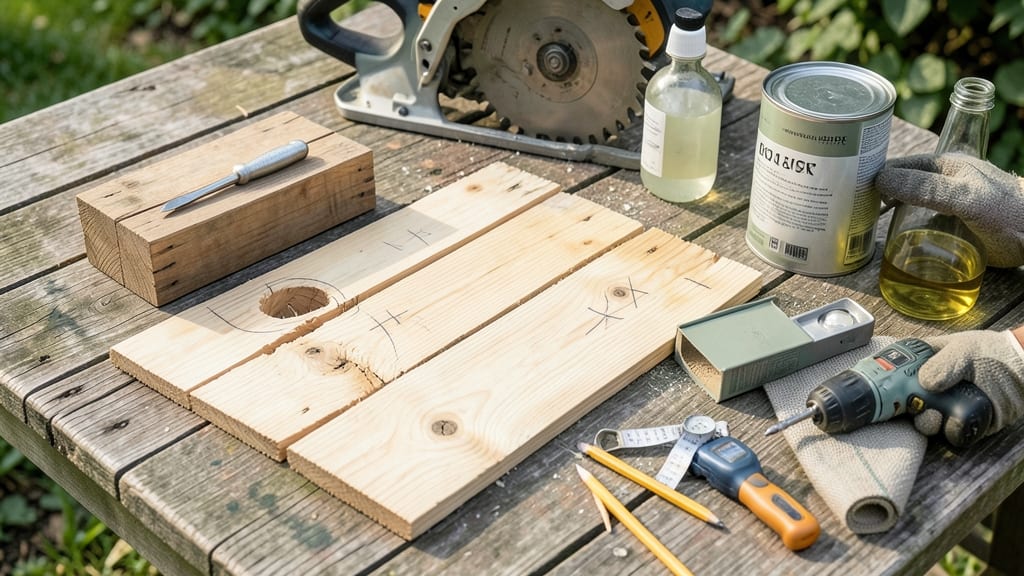
How to make a planter box out of wood transforms bare soil into a defined, productive garden space. 🌿 I’ve crafted over a dozen—some lasting 10+ years—by keeping it simple: cedar for rot resistance, basic tools, and a few key assembly tricks. The best part? You can customize sizes, add shelves, or even build them tall enough to hide unsightly areas. Start with 2x6 or 2x8 boards (cedar or pine) cut to your desired dimensions—most boxes need four sides plus a bottom. Pre-drill holes to prevent wood splitting, then use deck screws for durability. For drainage, skip the bottom or add holes (cover with landscape fabric to keep soil in). A weatherproof finish (like outdoor paint or linseed oil) extends the life of your box. By the end, you’ll have a sturdy, custom planter that elevates your garden beds—whether you’re growing veggies, flowers, or herbs. The satisfaction of building something functional with your own hands? Priceless. And the best part? You can tweak the design for raised beds, window boxes, or even vertical gardens. Pro tip: Line the bottom with cardboard before adding soil to block weeds. For extra stability, bury the bottom edges slightly or add corner braces to prevent warping. Now grab your tools—your garden’s about to level up!
📚 In This Guide
- What you need
- Instructions
- Tips and common mistakes
- Wrapping up and next steps
What you need
- ● Wood planks: 1x8 or 1x10 (cedar, redwood, or pressure-treated pine recommended for longevity). You’ll need 4 pieces, each at least 12 inches long (adjust based on your desired planter size).
- ● Wood screws: 1-inch exterior-grade screws (stainless steel or galvanized to prevent rust). Aim for 16–20 screws total (4 per corner joint).
- ● Wood glue: 1 small bottle (for extra reinforcement at joints).
- ○ Outdoor wood stain or paint: (optional but highly recommended for weather resistance). Choose a non-toxic, water-based option if planting edibles.
- ● Drill bits: 1/16-inch and 1/4-inch bits (for pre-drilling screw holes to prevent wood splitting).
- ● Sandpaper: 80- and 120-grit (to smooth rough edges and splinters).
- ○ Corner braces (optional):strong> Metal L-brackets for added stability (4 pieces).
- ○ Landscape fabric: (optional, for weed control at the base).
- ● Drill/driver (cordless recommended for ease).
- ● Measuring tape and pencil (for marking cuts).
- ● Circular saw or handsaw (for cutting wood to size).
- ● Speed square (for precise 90-degree angles).
- ● Clamps (2–4, to hold wood in place while assembling).
- ● Paintbrush or roller (if staining/painting).
- ● Safety gear: gloves, safety glasses, and ear protection (for sawing and drilling).
- ● 🔥 Pre-cut all wood planks to your desired planter dimensions (e.g., 4’x2’x1’ for a classic raised bed).
- ● 🌡️ Work in dry conditions—moisture can warp wood or make staining tricky.
- ● ✨ Test-fit corners before final assembly to ensure snug joints.
Step-by-step instructions for building a wooden planter box
Here's my go-to method for crafting a sturdy, long-lasting planter that elevates any garden bed.
🪴 Step 1: Cut and Assemble the Wooden Frame
Start by cutting your lumber to size—most planter boxes need 2 pieces at 4 feet (the long sides) and 2 pieces at 2 feet (the short ends) for a standard 4' x 2' x 12" deep box. I use 2x6 or 2x8 boards for the sides and 1x6 boards for the bottom, depending on the width I want. Sand all edges smooth to prevent splinters.
Lay out the pieces to form a rectangle, then pre-drill ½-inch holes at each corner to prevent wood splitting. Use 3-inch exterior wood screws to secure the corners—two screws per corner joint ensures stability. I like to use galvanized screws because they resist rust, especially if the box sits near sprinklers.
🪴 Step 2: Add Corner Braces for Extra Strength
Cut 4 pieces of 2x2 lumber at 12 inches long for corner braces. Position one brace diagonally across each corner, attaching it with 2-inch deck screws to both the side and end boards. This creates a triangular reinforcement that prevents the box from sagging under soil weight. I test the stability by gently pressing down on the corners—if it wobbles, add another brace.
For wider planters (over 3 feet), add a center brace along the long sides by attaching a 1x4 board horizontally between the side pieces. This keeps the box from bowing outward as it fills with soil and plants.
🪴 Step 3: Attach the Bottom and Reinforce Edges
Lay the 1x6 bottom board inside the frame, ensuring it sits flush with the inner edges. Secure it with 1½-inch screws every 12 inches along the perimeter. I leave a ¼-inch gap between the bottom and sides to allow for drainage—this prevents root rot and keeps the wood dry. Cover the gap with landscape fabric if you want to suppress weeds while still letting water through.
For extra durability, add a ½-inch lip to the top edges by screwing a 1x2 board along the inside top of the frame. This keeps soil from spilling out when you water or harvest. I also line the inside with landscape fabric to protect the wood from moisture and extend the planter's lifespan.
☀️ Step 4: Weatherproof and Position Your Planter
Apply a coat of exterior wood sealant to all surfaces, focusing on the bottom and inside edges where moisture collects. Let it dry completely—usually 24 hours—before adding soil. I use a semi-transparent stain to preserve the wood's natural look while protecting it from UV rays and rain. For extra longevity, reapply sealant every 2-3 years.
Place your planter in a location with 6+ hours of sunlight daily for most vegetables and flowers. I like to elevate the box slightly with cinder blocks or pavers to improve drainage and make maintenance easier. Fill with high-quality potting mix mixed with compost for nutrient-rich soil that drains well.
Tips & tricks for perfect wooden planter boxes
Building a sturdy planter box is all about precision and smart techniques—here's how to avoid common pitfalls while making your project even stronger.
Precision Cutting: Use a carpenter's square to verify your 4-foot and 2-foot cuts before making them final. I've learned the hard way that even a slight angle can throw off the entire assembly. Mark your cuts with a pencil first, then double-check measurements against your planter's intended dimensions before cutting. A small error in Step 1 can create gaps or misaligned corners that are hard to fix later.
Screw Placement Strategy: When attaching the frame in Step 1, position your 3-inch exterior screws at least 1 inch from the ends of each board to prevent splitting. I also recommend pre-drilling pilot holes that are slightly smaller than your screw diameter—this reduces resistance and makes driving screws much easier. For extra reinforcement, I use a countersink bit to create a slight depression for the screw heads, which lets the top of the box sit flush when you add the lip later.
Bracing Beyond Basics: The corner braces in Step 2 are essential, but for planters wider than 3 feet, I go a step further by adding a 1x4 board midway along the long sides as a horizontal support. This creates a "H" shape when viewed from the end, distributing weight more evenly. Test stability by placing a heavy object (like a gallon of water) in the center—if it doesn't flex, your bracing is sufficient. This extra step prevents the classic "sagging middle" problem that ruins many DIY planters.
Sealant Application: Don't rush the 24-hour drying time for your exterior wood sealant—this is when the product truly penetrates the wood fibers. I apply two thin coats rather than one thick one, allowing each to dry completely before adding the next. Focus especially on the bottom edges where moisture collects, and consider using a brush rather than a roller for better coverage in tight corners. The extra time now means your planter will last years without warping or cracking.
Pro Tips for Make A Planter Box Out Of Wood
- Building a sturdy planter box is all about precision and smart techniques—here's how to avoid common pitfalls while m...
- Precision Cutting: Use a carpenter's square to verify your 4-foot and 2-foot cuts before making them final. I've lear...
- Screw Placement Strategy: When attaching the frame in Step 1, position your 3-inch exterior screws at least 1 inch fr...
Frequently asked questions
Got questions about building your own wooden planter box? Here are some common ones—and their answers—to help you get started with confidence!
What’s the best wood to use for a planter box?
Opt for cedar or redwood—they’re naturally rot-resistant and weatherproof. If budget is tight, pressure-treated pine works well but avoid untreated wood, as it may warp or rot quickly. For a budget-friendly alternative, try plastic lumber or composite materials if you’re not into traditional wood.
How long does it take to build a planter box?
For a beginner, expect 2–4 hours depending on size and complexity. Smaller boxes (1–2 ft wide) can be done in under an hour with pre-cut lumber. Pro tip: Measure twice, cut once! Skipping this step can waste time (and wood). If you’re painting or staining, add another 1–2 hours for drying.
Do I need to line the planter box?
Not always! If using lightweight soil, a liner isn’t necessary. But for heavy or clay soil, add landscape fabric to prevent root intrusion and improve drainage. For extra durability, use corrugated plastic drainage boards at the bottom. Skip liners if you’re growing root crops like carrots or potatoes—they’ll need direct contact with soil.
What if my planter box leaks or cracks over time?
Leaks usually mean poor drainage—add gravel or sand at the bottom next time. For cracks, epoxy wood filler works for small gaps, but replace damaged sections if the issue persists. To prevent future problems, seal the wood with outdoor-grade paint or sealant and avoid placing the box in low-lying areas where water pools.
Can I make a planter box without power tools?
Use a hand saw, chisel, and mallet for cutting and shaping. For screws, a manual screwdriver or drill works. Just allow extra time—hand-cutting takes patience but yields a rustic, charming look. Pre-drill holes to avoid splitting the wood, even with hand tools.
Wrapping up and next steps
Building a wooden planter box is a rewarding project that breathes new life into your garden while adding a touch of rustic charm!
With just a few basic tools and materials, you’ve got the power to create a sturdy, custom planter that’s perfect for flowers, herbs, or veggies. Now that you’re armed with step-by-step guidance and pro tips, there’s nothing stopping you from getting started today!
Ready to take the next step? Grab your lumber, dust off those tools, and let your creativity grow. Whether you’re a beginner or a seasoned DIYer, your future planter box awaits—happy building! 🌱✨