
How To
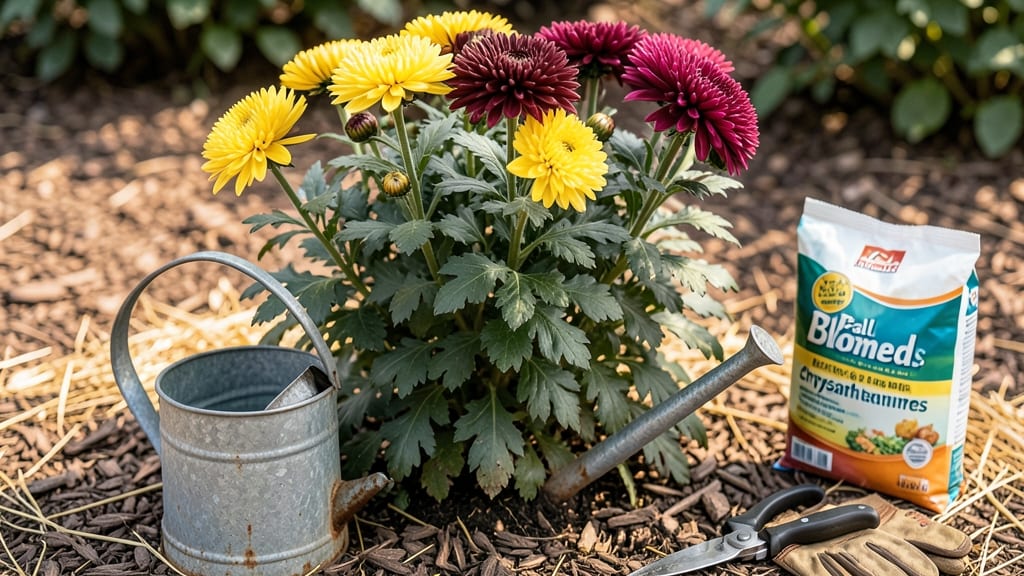
How to keep these fall mums alive—that’s the question every gardener asks as the crisp air arrives. 🌿 I’ve lost count of the mums I’ve nursed through winter only to see them revive the next spring, and the secret isn’t complicated: it’s about timing, soil, and a little winter prep. Most people overwater or ignore the soil’s role in cold survival, and that’s what kills them.
The key is to start now, before frost hits. Mums need well-draining soil—amend with compost if yours is heavy clay—and stop fertilizing after blooming. Water deeply but less frequently as temps drop, and avoid wet foliage, which invites rot.
A thick layer of mulch (3-4 inches) acts like a blanket, protecting roots from freezing.
By spring, you’ll see those familiar green shoots pushing through, ready for another round of blooms. The plants stay perennials in zones 5-9, but even in colder areas, a little winter prep means they bounce back like nothing happened. It’s not magic—just smarter care.
Here’s the game-changer: cut back faded blooms now, but leave the foliage until late winter. That green keeps feeding the roots all season. And if you’re in a colder zone? Dig up containers and store them in a cool, dark place. No more sad, wilted mums come winter.
📚 In This Guide
- What you need
- Instructions
- Tips and common mistakes
- Wrapping up and next steps
What you need
- ● Fall mums (Chrysanthemums): Healthy, potted plants (1–3 per container, depending on size). Look for sturdy stems and vibrant, pest-free foliage.
- ● Well-draining potting mix: 5–10 gallons, depending on pot size. Opt for a blend labeled for perennials or herbs (e.g., 60% peat/compost, 30% perlite, 10% sand).
- ● Containers: Large pots (12–18 inches in diameter) with drainage holes for 1–2 plants per container.
- ● OR a raised bed or garden plot (if transplanting outdoors in mild climates).
- ● Slow-release fertilizer: 10–20–10 NPK ratio (e.g., Osmocote or Miracle-Gro Shake ‘n Feed). Use 1–2 tablespoons per plant.
- ● Mulch: 2–3 inches of straw, shredded leaves, or pine needles to insulate roots.
- ● Drip irrigation or watering can: For consistent moisture (avoid overhead watering).
- ● Pruning shears: Sharp, clean pair for trimming dead blooms or leggy stems.
- ● Frost cloth or burlap: Lightweight fabric (1–2 yards) to wrap pots if temps drop below 25°F (-4°C).
- ● Plant tags: Label varieties to track favorites for next year.
- ● Epsom salt: 1 tablespoon dissolved in water for magnesium boost (if leaves yellow between veins).
- ● Grow lights (LED, full-spectrum): For indoor overwintering (12–14 hours/day if natural light is limited).
- ● Thermometer: Soil or air thermometer to monitor temps (ideal range: 40–60°F (4–15°C)).
- ● Compost tea: Organic liquid fertilizer to strengthen roots before dormancy.
Step-by-Step instructions for winter-proofing fall mums
Here’s how I’ve kept my mums thriving through winter for years—no guesswork, just proven tricks.
🌿 Step 1: Trim and Fertilize After Blooming
Once your mums finish flowering, cut back the stems by about one-third using clean, sharp shears. This prevents disease and redirects energy to root growth. I always use bypass pruners to avoid crushing stems—crushed tissue invites rot.
After trimming, apply a balanced, slow-release fertilizer (like 10-10-10) around the base, following package rates. This gives roots a final nutrient boost before winter. Water deeply right after to help the fertilizer penetrate the soil. You’ll see new basal shoots emerge in 2-3 weeks—that’s your sign the plant’s prepping for dormancy.
☀️ Step 2: Mulch Heavily for Insulation
Spread 3-4 inches of shredded bark or straw mulch around the base of each plant, leaving 1-2 inches of space between the mulch and stems. This insulates roots from freezing temperatures while allowing airflow to prevent rot. I use pine straw because it’s lightweight and resists clumping.
Don’t skip this step—unmulched mums often suffer frost heave, where roots lift out of the soil and get damaged. Check mulch depth in early spring and add more if it’s broken down. The goal is to mimic the plant’s natural winter protection.
🪴 Step 3: Protect from Harsh Winter Conditions
In zones with hard freezes (below 10°F), wrap the entire plant in burlap or frost cloth after the first frost. Secure it loosely with twine—too tight, and you’ll restrict airflow. I leave the top open to allow snow accumulation, which provides extra insulation.
If you’re in a coastal or mild-winter zone, you can skip wrapping but still mulch heavily. Watch for sudden temperature drops—if forecasts predict a cold snap, add an extra layer of mulch or a temporary plastic dome (remove it during the day to prevent overheating).
⏰ Step 4: Monitor and Adjust Through Winter
Check your mums once a month during winter for signs of stress. If the mulch looks compacted or washed away, fluff it up. If stems are exposed, add more mulch or wrap them with burlap strips. Avoid watering unless the ground is completely dry—overwatering in winter suffocates roots.
In early spring, when new growth appears (usually late February to March depending on your zone), remove winter protection and trim any dead foliage. This signals the plant it’s time to wake up. I always do this on a cloudy day to reduce transplant shock if you’re moving them later.
🌱 Step 5: Prepare for Next Year’s Growth
Once frost danger has passed, feed lightly with a low-nitrogen fertilizer (like 5-10-10) to encourage blooming. I also divide overcrowded clumps in early spring—dig up the plant, separate the roots, and replant sections. This rejuvenates mums and gives you more plants for free!
Stake taller varieties if needed, especially in windy areas. You’ll notice buds forming by mid-summer if you’ve given them the right care. The key is consistency—mums reward patience with years of vibrant blooms if you winter-proof them properly.
Tips & tricks for winter-proofing fall mums
These small adjustments make all the difference between mums that survive winter and those that thrive for years to come.
Pruning Precision: When trimming stems in Step 1, aim for clean cuts just above a leaf node or bud. This encourages new growth from the base while preventing disease entry points. I use sterilized pruners between cuts—dipping them in rubbing alcohol keeps them sanitary. The goal is to remove about one-third of the plant height, but never cut into old wood at the base.
Mulch Layering: For Step 2, think of mulch like a cozy blanket—too thin, and your mums will shiver. The 3-4 inch depth works best when applied in two layers: first a base of coarse material like pine straw, then a top layer of finer mulch. This creates air pockets that insulate while allowing moisture to escape. In windy areas, mound mulch slightly higher around the stems to create a windbreak.
Cold Zone Strategy: If you're in areas with hard freezes (below 10°F), here's what I do: After the first frost, I wrap the entire plant in burlap but leave the top open—this creates a microclimate that traps heat while allowing snow accumulation. The snow acts as an extra insulator, and I've seen temperatures inside these wraps stay 10-15°F warmer than outside. For extra protection, I add a layer of bubble wrap around the stems before wrapping in burlap.
Spring Wake-Up: In Step 4, when you see new growth in early spring, resist the urge to remove winter protection immediately. Instead, gradually uncover the plants over 2-3 days to acclimate them to outdoor temperatures. I always do this on cloudy days to prevent sunburn on tender new leaves. This slow transition gives your mums the best chance to bounce back strong.
Pro Tips for Keep Fall Mums Alive
- These small adjustments make all the difference between mums that survive winter and those that thrive for years to c...
- Pruning Precision: When trimming stems in Step 1, aim for clean cuts just above a leaf node or bud. This encourages n...
- Mulch Layering: For Step 2, think of mulch like a cozy blanket—too thin, and your mums will shiver. The 3-4 inch dept...
Frequently asked questions
Got questions about keeping your fall mums thriving? You’re not alone! Here are answers to the most common queries—because nobody wants to say goodbye to those cheerful blooms too soon.
Can I keep mums alive indoors over winter?
With the right care, mums can thrive indoors. Move them to a cool (50–60°F), bright spot—like a sunroom or near a south-facing window. Reduce watering (let soil dry slightly between waterings) and avoid drafts. If leaves yellow, it’s likely overwatering. Prune leggy stems in spring to encourage fresh growth!
When should I bring mums inside for winter?
Wait until the first hard frost (usually late fall) to move them indoors. Mums are tough and can handle light frosts, but prolonged cold or snow will damage them. If you’re unsure, check your local frost date—typically between October and December. The sooner they’re inside, the easier it is to adjust their care routine.
Why are my mums dying even after winter care?
Common culprits include overwatering (mums hate soggy roots), sudden temperature swings, or lack of light. Check for pests like spider mites or aphids too! If stems turn mushy or leaves drop, it’s a sign of stress. Start fresh by trimming dead foliage and repotting in well-draining soil if needed.
Can I plant mums in the ground and leave them there year-round?
In warmer climates (zones 7–10), mums can overwinter outdoors with a thick layer of mulch (3–4 inches) and protection from freezing temps. In colder zones, dig them up before the ground freezes. If you leave them in the ground, choose hardy varieties like ‘Autumn Joy’ or ‘Snowball’—they’re more resilient!
What’s the best way to revive mums that look dead after winter?
Don’t toss them yet! Cut back dead stems to 2–3 inches above the soil and place the pot in bright, indirect light. Water lightly and wait—new growth may sprout in 2–4 weeks. If no signs of life appear by spring, it’s time to start fresh with new plants. Sometimes, patience (and a little luck) wins!
Wrapping up and next steps
Keeping your fall mums thriving through winter is all about timing, protection, and a little TLC—but with these tricks, you’ll set the stage for stunning blooms next season. 🌸 From proper pruning and mulching to strategic overwintering, every step counts.
Don’t let cold weather steal your joy—your hard work will pay off in vibrant, healthy mums come spring!
Ready to level up your gardening game? Start by planning your spring planting schedule or exploring advanced winter care techniques. Your garden’s future is brighter than ever!