
Propagation
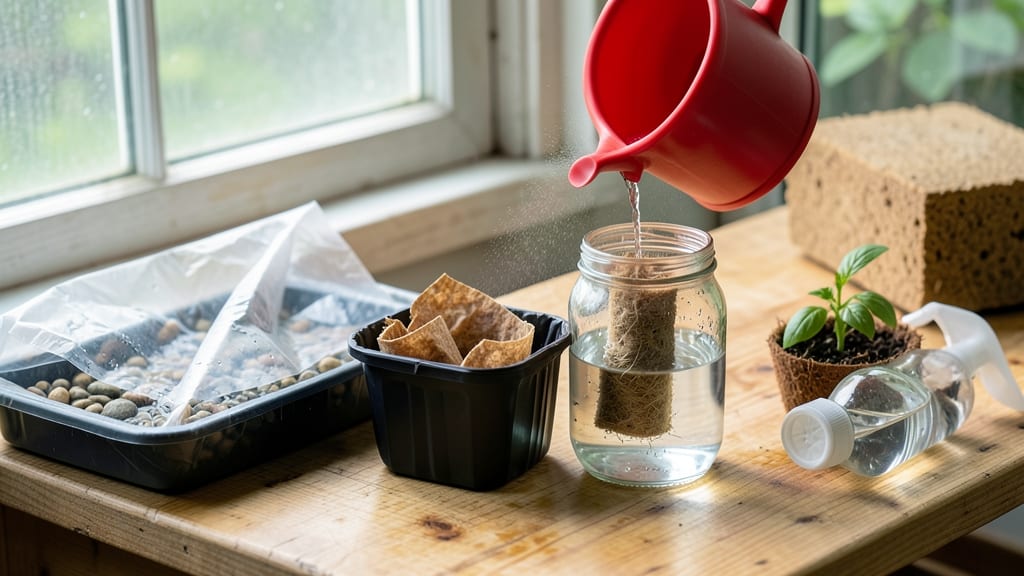
How to keep coco liners from drying out—it’s the trick that saves seedlings from wilting faster than you’d expect, unless you lock in that moisture. I’ve lost count of how many seedlings I’ve watched wilt because the coco coir dried out too quickly, no matter how much I watered. The key isn’t just adding water; it’s creating an environment where humidity stays consistent, just like in a tropical greenhouse.
Start with a clear plastic dome or sealable container to trap moisture—think of it like a mini greenhouse. Add a pebble tray filled with water underneath the liner, but never let the bottoms sit in standing water.
Coco coir absorbs moisture from the air, so keeping a damp (not soggy) environment is critical. A light misting every 2-3 days helps too, but don’t drown it.
You’ll see the difference within days: seedlings stay plump and green, not leggy or crispy at the edges. The roots develop stronger, and germination rates improve dramatically. This method works for everything from delicate herbs to sturdy tomatoes—just adjust the humidity based on your climate.
Fair warning: Over-moisture is just as bad as drying out. Check the liner daily—if it feels damp to the touch but not dripping, you’re golden. For extra insurance, wrap the container loosely with plastic wrap (leave a tiny gap for airflow), and watch your propagation success rate climb.
Trust me, your seedlings will thank you.
📚 In This Guide
- What you need
- Instructions
- Tips and common mistakes
- Wrapping up and next steps
What you need
- ● Coco liners (or coco coir bricks) – 1-2 per plant, depending on size (standard 2.5"–3.5" diameter).
- ● Perforated seedling trays – 1 tray (1020 or 50-cell) to hold liners securely.
- ● Spray bottle (fine mist) – 8–16 oz capacity for gentle hydration.
- ● Clear plastic dome or zip-top bag – Large enough to cover the tray (or a humidity tent kit for reusability).
- ● Distilled or dechlorinated water – Room temperature, 1–2 cups per tray (chlorine harms coco!).
- ○ pH test kit (optional but recommended) – 5.5–6.5 pH range for optimal coco performance.
- ○ Small fan (optional) – For airflow if using a closed dome (prevents mold).
- ● Coco liner humidifier – Automated misting system for hands-off care.
- ● Bottom tray with water reservoir – Passive hydration method (e.g., Kratky method setups).
- ● Hydrogen peroxide (3%) – 1 tsp per gallon of water to sterilize and boost oxygen.
- ● Calcium nitrate or gypsum – 1 tsp per gallon to improve water retention.
Step-by-Step instructions for keeping coco liners moist
Here’s the foolproof method I’ve used for years to keep coco liners lush and hydrated.
Prep Coco Liners with a Moisture Base
Start by soaking the coco liners in warm water for 10-15 minutes until they’re fully saturated but not dripping. This initial soak ensures they absorb enough moisture to stay hydrated longer. Drain any excess water completely—standing water will suffocate the roots and cause rot.
Once drained, gently squeeze out any remaining water by hand. You’ll know they’re ready when they feel damp but not soggy. This step is critical because coco liners dry out faster than traditional soil, and proper hydration at the start sets the tone for the entire growing process.
Layer with Moisture-Retaining Materials
Place the prepped coco liners in your growing container, then add a thin layer of perlite or vermiculite (about ½ inch deep) to improve aeration while still retaining moisture. This layer helps prevent the coco liners from drying out too quickly by balancing air flow and hydration.
After adding the perlite, cover the coco liners with a 1-inch layer of moist potting mix. The goal is to create a barrier that slows moisture evaporation while still allowing roots to penetrate easily. Press down lightly to eliminate air pockets—this ensures consistent contact between the coco liners and the potting mix.
Use a Humidity Dome or Plastic Wrap
Cover the container with a clear plastic dome or wrap tightly with plastic wrap to trap moisture. This creates a mini greenhouse effect, slowing evaporation and keeping the coco liners hydrated for longer. Check daily for condensation on the inside of the cover—this is a good sign that humidity levels are ideal.
Remove the cover for 10-15 minutes daily to allow airflow and prevent mold. If you notice water droplets forming on the coco liners, reduce the cover time slightly. The key is balance: too much humidity leads to rot, while too little causes drying. You’ll see the perfect balance when the coco liners stay consistently damp but not waterlogged.
Water Strategically to Maintain Moisture
Water the coco liners only when the top ½ inch feels dry to the touch. Use a spray bottle or gentle stream to avoid disturbing the liners. Overwatering is a common mistake—coco liners can’t handle soggy conditions, so always err on the side of slightly dry rather than overly wet.
For extra protection, place the container on a tray filled with ½ inch of water. The coco liners will absorb moisture from the bottom up, keeping them hydrated without the risk of overwatering. This method mimics natural humidity levels and is especially useful in dry or hot climates.
Monitor and Adjust as Needed
Check the moisture levels every 2-3 days by inserting your finger into the coco liners. If they feel dry beyond the top layer, it’s time to water again. Adjust your watering schedule based on your environment—hotter or drier conditions may require more frequent checks.
If you notice the coco liners drying out faster than expected, increase the humidity by adding a pebble tray or grouping plants together. This creates a microclimate that retains moisture longer. With these steps, your coco liners will stay lush and ready for planting for weeks.
Tips & tricks for keeping coco liners hydrated
Here's what I've learned after years of keeping coco liners perfectly moist—these little tricks make all the difference.
Soak Test: The 10-15 minute warm water soak in Step 1 is non-negotiable. Use a thermometer to confirm water is between 85-95°F—this temperature range opens the coco fibers for maximum absorption. I've ruined batches using cold water because the fibers just don't open properly. After soaking, squeeze the liners firmly by hand until water drips just barely—this removes excess moisture without drying them out.
Layering Strategy: When adding the ½ inch perlite layer in Step 2, mix it with a small amount of the moist potting mix (about 1 part perlite to 2 parts mix). This creates micro-channels that hold moisture better than perlite alone. Press each layer down gently with your fingers—this eliminates air pockets that would otherwise dry the coco liners faster. I've found that using a flat tool like the back of a spoon helps create even pressure distribution.
Humidity Balance: The daily 10-15 minute ventilation in Step 3 is where most people go wrong. If you notice condensation forming on the plastic cover within 5 minutes of replacing it, you're keeping it on too long. The ideal is light condensation that disappears within 10 minutes—this means perfect humidity balance. I keep a small notebook by my growing area to track when I remove the cover and any condensation patterns, which helps me adjust timing perfectly.
Watering Technique: For the ½ inch water tray method in Step 4, use distilled water if possible—tap water minerals can accumulate and affect pH over time. When checking moisture with your finger, insert it about 1 inch deep rather than just the top ½ inch. The deeper layer gives you a more accurate reading of the coco liners' true moisture level. I've found that using a wooden skewer instead of my finger gives me more consistent results and keeps my hands cleaner!
Pro Tips for Keep Coco Liners From Drying Out
- Here's what I've learned after years of keeping coco liners perfectly moist—these little tricks make all the difference.
- Soak Test: The 10-15 minute warm water soak in Step 1 is non-negotiable. Use a thermometer to confirm water is betwee...
- Layering Strategy: When adding the ½ inch perlite layer in Step 2, mix it with a small amount of the moist potting mi...
Frequently asked questions
Got questions about keeping your coco liners lush and hydrated?
You’re not alone! Here are some of the most common queries—and their easy solutions—to help your propagation game stay on track.
How often should I water coco liners to prevent drying?
Check moisture daily! Coco liners dry out faster than soil, so water lightly every 1–2 days (or more in hot/dry climates). Press your finger ½ inch deep—if it feels dry, it’s time. Overwatering is worse, though, so aim for consistently moist, not soggy. A spray bottle or misting works best for gentle hydration.
Can I use regular potting soil instead of coco liners?
Not ideal! Coco liners retain moisture better than soil, which dries out quickly. If you must use soil, mix in 50% perlite or vermiculite to improve water retention. For best results, stick with coco coir—it mimics the humidity of a greenhouse and keeps roots happy during propagation.
Why do my coco liners still dry out even when I water them?
Three likely culprits:
- Poor sealing: If the liner isn’t fully sealed (or has holes), moisture escapes. Double-check your twist-tie or clip!
- Low humidity: Use a clear plastic bag or humidity dome to trap moisture. A pebble tray with water underneath also helps.
- Heat or airflow: Avoid placing liners near vents, AC units, or direct sunlight. A warm, shaded spot (70–75°F) is perfect.
How long can I keep a coco liner moist before planting?
Coco liners stay viable for 2–4 weeks if kept moist and sealed. After that, roots may outgrow the liner or risk drying. For long-term storage, wrap the sealed liner in a damp paper towel and refrigerate (up to 2 months). Just rehydrate before planting!
What’s the best way to revive a dried-out coco liner?
Don’t toss it! Soak the liner in room-temperature water for 10–15 minutes, then gently squeeze out excess. If the coco feels crumbly, mix it with a little hydroponic nutrient solution or diluted seaweed extract to jumpstart root activity. Place it back in a humidity dome and monitor closely.
Pro tip: Keep a notebook nearby to track watering schedules—consistency is key!
Wrapping up and next steps
Keeping your coco liners moist is all about balance—proper hydration, airflow, and a little patience go a long way! By using the right materials, misting techniques, and humidity tricks, you’ll give your cuttings the best shot at thriving roots.
Remember, consistency is key—check your liners often and adjust as needed.
Now that you’re armed with these pro tips, it’s time to put them into action! 🌱 Start with your next propagation project and watch those cuttings flourish. Happy growing!