
Orchid Care
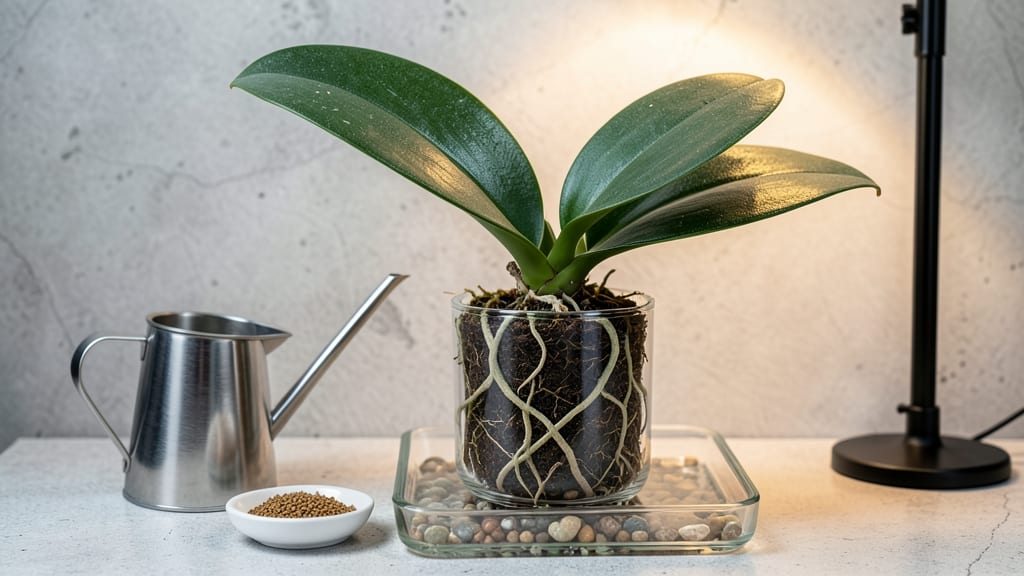
How to keep an orchid thriving doesn’t require a jungle—just the right balance. 🌿 I’ve kept mine blooming for years by mastering three simple rules: light like morning sun, water that mimics rain, and humidity that feels like a humid day. Most people overcomplicate it, but the secret is consistency, not complexity.
The right setup makes all the difference: a north-facing window or grow light, a pot with drainage holes, and bark-based mix (no regular soil!). Water only when the roots turn silvery-gray, and mist daily if your home feels dry.
Overwatering kills faster than underwatering—trust the roots to tell you when they’re thirsty.
You’ll see new growth within 4-6 weeks, and blooms lasting 6-8 weeks if you avoid common pitfalls like cold drafts or sudden light changes. The first time your orchid reblooms, you’ll wonder why you waited so long. It’s that simple once you know the basics.
Works for Phalaenopsis (the most common type) and other beginner-friendly orchids. Here’s how to troubleshoot before problems start—because prevention is easier than fixing stress signs.
📚 In This Guide
- What you need
- Instructions
- Tips and common mistakes
- Wrapping up and next steps
What you need
- ● Orchid Pot: A pot with drainage holes (preferably slotted or made of plastic, clay, or woven material). Size should fit the plant’s roots snugly—3–4 inches wider than the root ball.
- ● Potting Mix: Orchid-specific bark mix (avoid regular soil!). Look for blends labeled for Phalaenopsis, Cattleya, or Oncidium orchids.
- ● Watering Can or Spray Bottle: A gentle spray nozzle or a can with a rose attachment to avoid over-saturating the roots.
- ○ Fertilizer: A balanced orchid fertilizer (e.g., 20-20-20 or 10-10-10) diluted to half-strength. Optional: Slow-release spikes for convenience.
- ● Humidity Tray or Peat Moss: To maintain 50–70% humidity, especially in dry climates.
- ● Pruning Shears: Sterilized scissors for trimming spent blooms or yellow leaves.
- ● Grow Lights: LED or fluorescent bulbs (10,000–15,000 lux) if natural light is less than 4–6 hours/day.
- ● Thermometer/Hygrometer: To monitor temperature (60–80°F) and humidity.
- ● Root Stimulator: A mild solution (like seaweed extract) to encourage root growth after repotting.
- ● Decorative Stakes or Moss: For aesthetic support if your orchid needs extra stability.
Step-by-Step instructions for maintaining healthy orchids
Here's the method I've used to coax stunning reblooms from my finicky orchids—no green thumb required.
💧 Step 1: Master the Watering Routine
Orchids need watering only when the potting mix feels completely dry—about once a week in winter, every 5-7 days in spring/fall, and every 3-4 days in summer. I use the "soak-and-drain" method: place the pot in a shallow tray of room-temperature water for 10-15 minutes, then let it drain completely. Never let the roots sit in water, or they'll rot.
Watch for the pale green roots that signal thirst—healthy roots should be firm and slightly rubbery. If the mix stays damp for more than 2 days, you're overwatering. I keep a small spray bottle nearby to give a light misting between waterings if the air feels dry.
☀️ Step 2: Position for Bright, Indirect Light
Orchids crave bright, filtered light—think east or north-facing windows, or 2-3 feet from a west window. Direct midday sun will scorch leaves, leaving crispy brown edges. I notice my orchids "leaning" toward the light? That's their way of saying "move me closer."
Rotate the pot a quarter turn weekly so all sides get even light exposure. In winter, supplement with a 12-hour grow light if natural light drops below 1,000 foot-candles. Yellowing leaves mean too much light; dark green leaves mean more is needed.
🌱 Step 3: Feed Lightly During Active Growth
Use a balanced 20-20-20 fertilizer diluted to ¼ strength every 2-4 weeks during spring and summer when new growth appears. I feed right after watering so the roots absorb nutrients efficiently. In fall and winter, skip fertilizing entirely—orchids rest then.
Watch for new pseudobulbs (the thick, leafless stems) as your cue to start feeding. These store energy for future blooms. If you see brown tips on leaves, you're over-fertilizing—flush the pot by soaking it in plain water for 10 minutes.
✂️ Step 4: Prune and Encourage Reblooming
After flowering, cut the spent bloom spike down to the second or third node (the little bump where leaves or buds form). Some orchids will rebloom from the same spike, others need a fresh cut. I use sterilized scissors to make clean cuts at a 45-degree angle just above a node.
Reblooming depends on proper care: cool nights (55-60°F), bright light, and consistent watering. If your orchid skips blooming, it might need a 4-6 week rest period with reduced water and no fertilizer.
🪴 Step 5: Repot Every 1-2 Years
Orchids need repotting when the potting mix breaks down (usually every 1-2 years) or the roots outgrow the pot. I use firm bark mix with perlite for drainage. Gently remove the plant, trim any mushy roots with sterilized scissors, and place it in a pot just 1 inch larger than the previous one.
Don't bury the plant too deep—keep the base of the pseudobulbs at the same level as before repotting. The first watering after repotting should be light to help the roots settle. If you see new roots growing within a month, you've done it right.
Tips & tricks for perfect orchid care
Took me years to figure out these tricks after losing my first orchid to overwatering—here's what actually works.
Watering Precision: The 10-15 minute soak-and-drain method in Step 1 is non-negotiable. I've found that using a clear pot lets you see when the roots turn pale green—your visual cue they've had enough. For extra insurance, weigh your pot before and after watering: a 5-10% weight increase means proper saturation without soggy roots.
Light Troubleshooting: When your orchid leans toward light (Step 2), it's not being stubborn—it's telling you to move it closer. I keep a light meter near my windows and aim for 1,000-2,000 foot-candles. Too little light? The leaves will darken. Too much? You'll see crispy brown edges within days. A simple shade screen works wonders for west-facing windows.
Fertilizer Timing: The 2-4 week feeding schedule in Step 3 only works if you're consistent. I mark my calendar with stickers for each feeding day to avoid missing cycles. Pro tip: Mix your diluted fertilizer in a spray bottle and apply it directly to the roots during your regular misting—this mimics natural rain and prevents salt buildup.
Rebloom Secret: That 4-6 week rest period in Step 4 isn't just about reducing water—it's about creating temperature contrast. I move my orchids to a cooler spot at night (55-60°F) while keeping days warm. This mimics their natural tropical environment and triggers bloom signals. Think of it as their version of hibernation prep.
Pro Tips for Keep An Orchid
- Took me years to figure out these tricks after losing my first orchid to overwatering—here's what actually works.
- Watering Precision: The 10-15 minute soak-and-drain method in Step 1 is non-negotiable. I've found that using a clear...
- Light Troubleshooting: When your orchid leans toward light (Step 2), it's not being stubborn—it's telling you to move...
Frequently asked questions
Got questions about keeping your orchid happy? You’re not alone!
Here are answers to the most common concerns—so you can enjoy those stunning blooms without the stress.
How often should I water my orchid?
Orchids thrive on less water than you’d think! Water every 7–10 days (or when the roots turn silvery-green). Overwatering is the #1 killer—stick your finger in the pot: if the top inch feels dry, it’s time. Pro tip: Use room-temperature water and avoid soggy bottoms!
Why are my orchid leaves turning yellow?
Yellow leaves usually mean overwatering or poor drainage. Check for mushy roots (a red flag!) or brown spots (underwatering). Trim dead leaves with sterile scissors and repot if needed. Bonus: Bright, indirect light helps prevent stress.
How long do orchid blooms last, and can I make them rebloom?
Blooms typically last 2–6 months, depending on the type. To encourage reblooming, give your orchid 12 hours of darkness daily (like a "winter rest") and fertilize lightly every 2 weeks during growth. Patience pays off—some orchids rebloom in 6–12 months!
What’s the best temperature for orchids?
Most orchids love 60–80°F during the day and a 10°F drop at night (mimics their tropical habitat). Avoid drafts (like AC vents) or extreme heat—think cozy living room, not greenhouse. Fun fact: Some orchids even need a "cool spell" to bloom!
Can I keep my orchid in low light?
Orchids need light to thrive, but not direct sun. East-facing windows or 10–15 feet from a south/west window work best. If leaves turn dark green or grow leggy, it’s time to move it closer to a brighter spot. No bright windows? Try a grow light!
Wrapping up and next steps
Caring for orchids is all about patience, observation, and a little love—not rocket science! 🌸 With the right balance of light, water, and airflow, your orchid will reward you with stunning blooms for months. Start small, stay consistent, and soon, you’ll be the proud orchid whisperer in your circle.
Ready to take the next step? Pick one orchid variety (like Phalaenopsis or Dendrobium) and put these tips into action. Before you know it, your home will be a lush, blooming paradise! 🌱