
Propagation
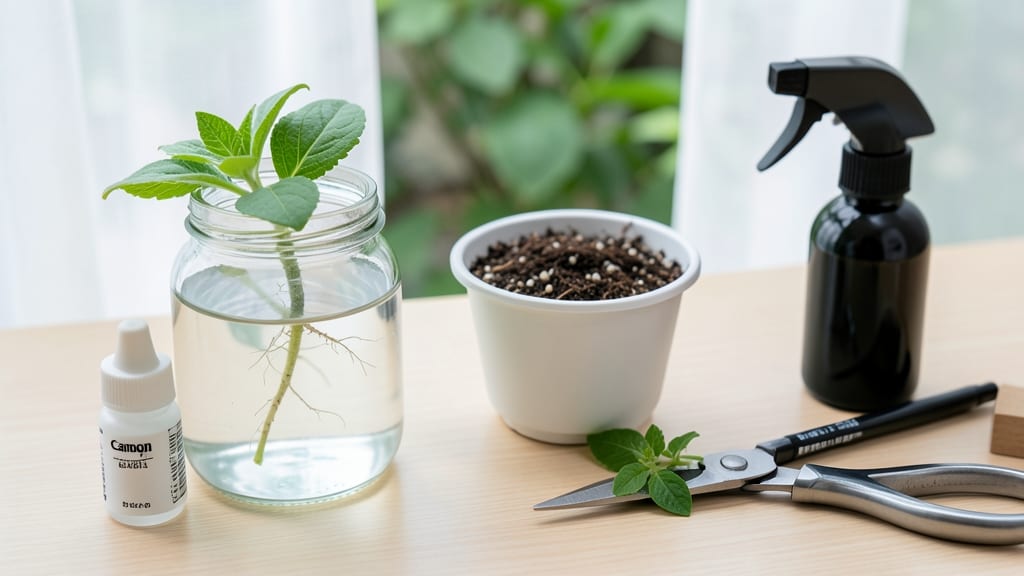
How to grow petunias from cuttings saves money and doubles your blooms. ✨ I’ve turned $5 worth of store-bought plants into a full-season display by simply snipping stems and rooting them—no green thumb required. The best part? These cuttings establish faster than seeds and bloom within weeks of transplanting.
You’ll need just a few supplies: sharp scissors, clean water, rooting hormone (optional), and small pots. The process takes about 4-6 weeks from cutting to flowering, and you can propagate throughout the growing season.
Humidity and bright light are your secret weapons—think of it as creating a mini greenhouse with what you have.
By the time summer fades, you’ll have lush, vibrant petunias spilling over containers and borders. The plants grow bushier, flower more prolifically, and resist heat better than store-bought alternatives. Plus, you’ll avoid the disappointment of wilted nursery plants that never recover.
This method works for trailing, grandiflora, or multiflora varieties—just adjust your pruning schedule. Start with healthy stems, keep the water fresh, and watch roots form in 1-2 weeks. The payoff? A garden bursting with color that lasts until frost.
📚 In This Guide
- What you need
- Instructions
- Tips and common mistakes
- Wrapping up and next steps
What you need
- ● Petunia cuttings: Healthy, non-flowering stems (4–6 inches long) with at least 2–3 leaf nodes.
- ● Sharp scissors or pruning shears: Sterilized to prevent disease (clean with rubbing alcohol).
- ○ Rooting hormone (optional but helpful): A powder or gel to encourage faster root growth.
- ● Clean water: Room-temperature, chlorine-free (let tap water sit out for 24 hours if needed).
- ● Glass or clear jar: Large enough to submerge cuttings (e.g., a mason jar or baby food jar).
- ● Well-draining potting mix: A blend of perlite, vermiculite, and peat moss (or a pre-mixed seed-starting mix).
- ● Small pots or trays: 2–3 inch pots or a seed tray with drainage holes.
- ● Plastic bag or humidity dome: To retain moisture while roots develop.
- ● Spray bottle: For gentle watering to keep cuttings hydrated.
- ● Grow lights or sunny windowsill: Bright, indirect light (6+ hours/day) speeds up rooting.
- ● Fertilizer (diluted): A balanced liquid fertilizer (e.g., 10-10-10) after roots form.
- ● Rooting cubes: Pre-moistened, peat-based cubes for hassle-free propagation.
- ● Label markers: To track varieties if propagating multiple types.
Step-by-Step instructions for propagating petunias from cuttings
Here's the foolproof method I use to multiply my petunias every season—no fancy tools or expensive supplies needed.
🌱 Step 1: Select Healthy Stems for Cuttings
Choose non-flowering stems with at least 4-6 inches of growth and 2-3 sets of leaves. Avoid woody, thick stems—they root poorly. Look for vibrant green, disease-free shoots from the current season's growth. I like to take cuttings after a light pinch-back, when the plant has fresh new growth.
Using clean, sharp scissors or pruning shears, make a 45-degree angle cut just below a leaf node. This angled cut increases surface area for root development. Strip the lower 2-3 leaves off the stem, leaving only the top leaves attached. These leaves will photosynthesize and feed the developing roots.
💧 Step 2: Root Cuttings in Water
Fill a clean glass or jar with room-temperature water—tap water is fine, but avoid chlorinated water if possible. Place the cuttings in the water so only the stripped portion (without leaves) is submerged. I use a small vase or even a repurposed soda bottle for each cutting to prevent overcrowding.
Change the water every 2-3 days to prevent bacterial growth and keep it fresh. Place the container in bright, indirect light—direct sun can overheat the water and stress the cuttings. You'll see tiny white root hairs appear in 7-10 days, and roots will be ½ inch long in about 3-4 weeks.
☀️ Step 3: Prepare Soil for Transplanting
While roots develop, mix well-draining potting soil with perlite or sand (half-and-half ratio) to create a light, airy medium. Petunias hate soggy roots, so good drainage is critical. Fill small pots (3-4 inches wide) with this mix, leaving ½ inch at the top for watering.
Make a small hole in the center of each pot with your finger. Gently remove the rooted cutting from the water, being careful not to damage the delicate roots. Dip the base in rooting hormone (optional but helpful for faster establishment) before placing the cutting in the hole. Firm the soil gently around the stem to secure it.
🪴 Step 4: Acclimate and Plant Outdoors
Keep the newly potted cuttings in bright, indirect light for 3-5 days to recover from transplant shock. Water lightly, keeping the soil evenly moist but not soggy. After this period, gradually introduce them to direct sunlight by moving them outdoors to a shaded spot for a few hours each day.
Once the cuttings show new growth (usually 1-2 weeks after transplanting), they're ready for their permanent spot. Plant them in full sun with well-draining soil, spacing them 10-12 inches apart. Water deeply after planting to help roots establish in their new home.
⏰ Step 5: Maintain for Continuous Blooms
Pinch back the tips of new growth 2-3 times during the first month to encourage bushier plants. Deadhead spent blooms regularly to redirect energy into new flowers. Petunias thrive with consistent moisture—water deeply 2-3 times per week, more often in extreme heat.
Fertilize every 2-3 weeks with a balanced liquid fertilizer (10-10-10 or similar) to keep them blooming nonstop. I swear by a slow-release granular fertilizer worked into the soil at planting, followed by monthly liquid feeds. With proper care, your cuttings will reward you with vibrant blooms all season long.
Tips & tricks for perfect petunia propagation
Between us, these little tricks saved me from throwing out dozens of failed cuttings—here's how to turn every stem into a thriving plant.
Selection is Everything: In Step 1, focus on stems with 3-4 leaf nodes that are flexible, not woody. I've learned the hard way that thicker stems often produce weaker roots. The 45-degree angle cut isn't just tradition—it creates more surface area for root development, which is why I never use straight cuts anymore. Work in the morning when stems are fully hydrated for best results.
Rooting Environment Matters: During the critical 2-3 week water rooting phase (Step 2), position your jars where they'll get bright, indirect light—think east-facing window or under grow lights. I've had cuttings fail spectacularly when placed in direct sun, which overheats the water and causes rot. Change that water every 3-4 days religiously, even if it doesn't look dirty. Bacteria grows faster than you'd think in still water.
Transplanting Technique: When moving rooted cuttings to soil in Step 4, the 1-inch deeper planting depth is non-negotiable. This buried section becomes the new root zone, while keeping the top nodes above soil prevents rot. I've found that gently pressing the soil around stems eliminates air pockets that would otherwise cause transplant shock. The partial shade for first 3-5 days is crucial—direct sun during this period can scorch delicate new roots.
Soil Science: For Step 3's well-draining mix, I've had the most success with a 75-25 blend of potting soil to perlite. The perlite prevents compaction while still holding enough moisture. Before planting, that damp sponge test is your best friend—it tells you exactly when the soil is ready without overwatering. I've seen petunias wilt dramatically when planted in soil that's either too dry or too wet.
Pro Tips for Grow Petunias From Cuttings
- Between us, these little tricks saved me from throwing out dozens of failed cuttings—here's how to turn every stem in...
- Selection is Everything: In Step 1, focus on stems with 3-4 leaf nodes that are flexible, not woody. I've learned the...
- Rooting Environment Matters: During the critical 2-3 week water rooting phase (Step 2), position your jars where they...
Frequently asked questions
Got questions about growing petunias from cuttings?
You’re not alone! Here are answers to the most common concerns—from timing to troubleshooting—so you can propagate like a pro.
What’s the best time of year to take petunia cuttings?
Take cuttings in early spring (before flowering) or late summer (after the first frost risk passes). Avoid winter—petunias are tender perennials in most climates, and cold stress weakens cuttings. Aim for 60–75°F (15–24°C) for rooting success.
How do I know if my cutting is healthy enough to root?
Look for non-flowering stems (flower buds drain energy), 4–6 inches long, and at least 2–3 sets of leaves. Avoid woody or yellowing stems—focus on green, flexible growth. A sharp, clean cut (just below a leaf node) boosts rooting chances.
How long does it take for petunia cuttings to root in water?
Most cuttings show roots in 2–4 weeks, but patience is key! Change the water every 3–4 days to prevent bacteria. If roots aren’t forming after 6 weeks, try hormone rooting gel or adjust light (bright, indirect is ideal).
Can I root petunias directly in soil instead of water?
Skip the water phase and dip cuttings in rooting hormone, then plant in moist, sterile potting mix (like perlite + peat). Cover with a plastic bag to retain humidity. Soil-rooted cuttings may establish faster but require consistent moisture—dryness kills them!
Why are my petunia cuttings turning yellow or mushy?
Yellowing = overwatering or rot (check for soft stems!). Mushy bases? Bacterial infection—trim affected areas and replant in fresh, sterile mix. Boost airflow (remove the humidity dome for 10 mins daily) and avoid wet foliage. Prevention tip: Use hydrogen peroxide (3%) in water to deter pathogens.
Wrapping up and next steps
Growing petunias from cuttings is a rewarding way to multiply your favorite blooms without spending a dime! With just a few simple steps—rooting in water, transplanting carefully, and providing love (and light)—you’ll soon enjoy vibrant, thriving plants that keep flowering all season. 🌸
Now that you’re armed with the know-how, roll up your sleeves and give it a try! Start with healthy cuttings, and soon you’ll be sharing (or gifting!) your new petunia babies with fellow gardeners. Happy growing! 🌱