
Propagation
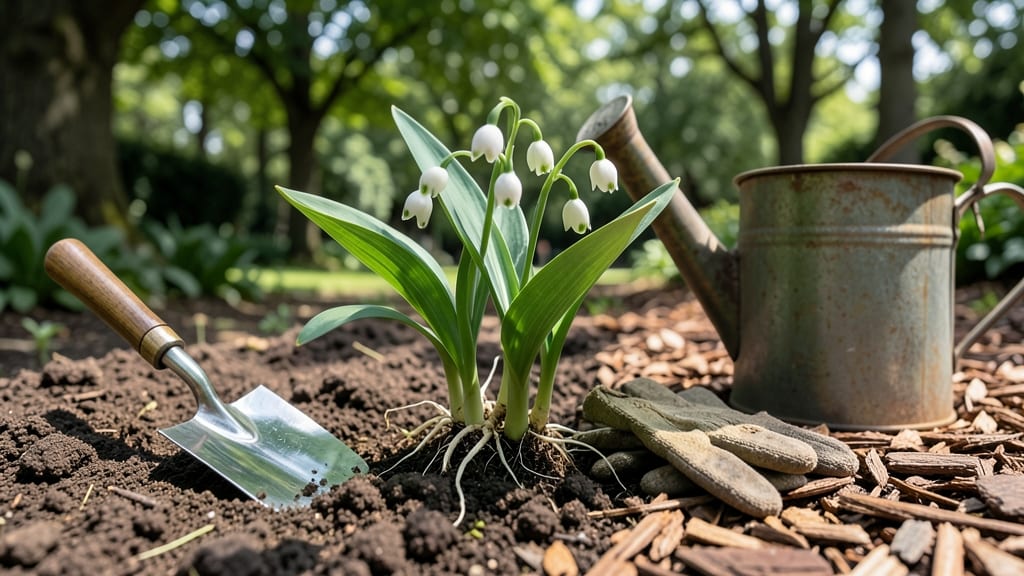
How to grow lily of the valley from roots feels like unlocking a secret garden. 🌿 The sweet fragrance and delicate blooms arrive after three years of patience—but the process itself is surprisingly simple once you know the right steps. I've propagated dozens of plants, and the key is timing, gentle handling, and the perfect spot.
You'll need a sharp knife, gloves (to protect your hands from the plant's mild toxicity), and a shady corner of your garden where the soil stays consistently moist but well-drained. The roots divide easily in early spring or fall, when the plant isn't actively flowering.
Plant them about 2 inches deep, spacing clusters 12-18 inches apart—this gives them room to spread slowly into lush, fragrant colonies.
Water them thoroughly after planting, then let the natural rain take over. These plants thrive in dappled shade and rich, slightly acidic soil—think woodland understory conditions. The first year is all about root establishment, so resist the urge to disturb them.
By year three, you'll see those iconic bell-shaped flowers arching above the foliage, filling the air with their signature scent.
Here's the best part: once established, lily of the valley spreads reliably with minimal care. The biggest mistake beginners make is overwatering or planting in full sun—both lead to floppy, weak growth.
Give them patience, and they'll reward you with decades of fragrant blooms with almost no effort after that initial setup.
📚 In This Guide
- What you need
- Instructions
- Tips and common mistakes
- Wrapping up and next steps
What you need
- ● Lily of the valley roots: Healthy, dormant roots (preferably with at least 2-3 buds per rhizome). Aim for 2-5 roots depending on your desired plant size.
- ● Well-draining potting mix: A blend of 50% peat moss or coconut coir, 30% perlite or coarse sand, and 20% compost (or a pre-mixed acidic, organic potting soil with a pH of 6.0-7.0).
- ● Container or garden bed: For pots: A container at least 6-8 inches deep with drainage holes (terracotta or plastic). Use one root per 4-6 inch pot.
- ● For in-ground planting: A shady, moist location with loose, well-draining soil. Space roots 6-12 inches apart.
- ● Mulch: 2-3 inches of organic mulch (e.g., shredded bark or pine needles) to retain moisture and regulate temperature.
- ● Garden trowel or small shovel (for planting roots).
- ● Pruning shears or sharp knife (to trim roots if necessary).
- ● Watering can or hose with a gentle spray nozzle (to avoid disturbing roots).
- ○ Gloves (optional but recommended—lily of the valley can irritate skin!).
- ● Slow-release fertilizer (e.g., 10-10-10 or organic compost tea) to boost early growth.
- ○ Rooting hormone (optional for stubborn roots—dip buds before planting).
- ● Shade cloth (if planting in hot climates to protect young roots).
- ● Label markers (to track planting dates and varieties).
Step-by-Step instructions for growing lily of the valley from roots
Here's how I've grown fragrant clusters of lily of the valley year after year with just a few simple steps.
🌱 Step 1: Select and Prepare Healthy Roots
Look for roots that are firm, plump, and free of soft spots or mold. Lily of the valley roots should feel like small, fleshy carrots with tiny buds at the base. I always choose roots with at least 2-3 buds—those are the future flowering stems. Soak the roots in lukewarm water for 30 minutes before planting to encourage root growth.
If you're dividing an established clump, dig carefully with a sharp spade to avoid damaging the roots. The best time to divide is in early spring or fall, when the plant isn't actively flowering. I like to separate roots into small clusters of 3-5 buds each for easier planting and faster establishment.
☀️ Step 2: Choose the Right Planting Location
Lily of the valley thrives in partial shade, with 3-6 hours of morning sun and protection from hot afternoon rays. A spot under deciduous trees works perfectly—they get dappled sunlight in spring and full shade in summer. The soil should be well-draining but moist, with a pH between 6.0 and 7.0.
I always test my soil first. If it's too sandy, I mix in 2 inches of compost to retain moisture. If it's too clay-heavy, I add 1 inch of perlite to improve drainage. The key is keeping the roots consistently moist but never soggy—this plant hates waterlogged soil.
🪴 Step 3: Plant the Roots Correctly
Dig holes 2-3 inches deep and space them 6-8 inches apart in rows 12 inches apart. Place each root cluster horizontally, with the buds facing upward. Cover lightly with soil, leaving the buds just below the surface. Press gently to remove air pockets but don't compact the soil too firmly.
Water thoroughly after planting to settle the soil and encourage root contact. I like to add a 1-inch layer of mulch around the base to retain moisture and suppress weeds. Lily of the valley spreads slowly, so don't worry about overcrowding—it'll fill in naturally over time.
💧 Step 4: Water and Maintain Through the First Year
Keep the soil consistently moist but not waterlogged during the first growing season. Water deeply once a week unless rainfall provides 1 inch of water. You'll know it's right when the soil feels damp 2 inches below the surface. Overwatering causes root rot, while underwatering stunts growth.
Fertilize lightly in early spring with a balanced 10-10-10 fertilizer applied at half strength. Too much fertilizer encourages leafy growth at the expense of flowers. I skip fertilizer in the first year unless the leaves look pale, which usually means the soil needs more organic matter.
⏰ Step 5: Enjoy the Rewards Over Three Years
Your first year will mostly be about root establishment—you'll see mostly leaves. By the second year, you might spot a few flower stalks, but don't expect much. The real show happens in the third year, when healthy plants produce clusters of fragrant white bells.
Once established, lily of the valley is nearly maintenance-free. I only divide clumps every 3-4 years to keep them healthy. The flowers appear in late spring, and their sweet fragrance fills the garden for weeks. Just be patient—it's worth the wait!
Tips & tricks for perfect lily of the valley growth
A few simple secrets can make all the difference when growing these delicate perennials.
Root Selection Matters: In Step 1, don't just count the buds—check for firmness. The roots should feel dense like small carrots, not soft or spongy. I learned this the hard way after planting moldy roots that failed to establish. Also, those 30 minutes of soaking in lukewarm water is crucial for kickstarting root activity. Use a thermometer to confirm the water is between 75-80°F—too hot or cold can shock the roots.
Planting Depth is Critical: When placing roots in Step 3, bury them just enough so the buds peek slightly above the soil line. Too deep and they won't sprout; too shallow and they'll dry out. I use a small ruler to measure the 2-3 inch depth consistently. Press the soil gently around the roots to eliminate air pockets, but don't compact it like you would for vegetables.
Mulching Strategy: That 1-inch layer of mulch in Step 3 isn't just decorative—it's essential for moisture retention. I use shredded hardwood mulch because it breaks down slowly and improves soil structure over time. Apply it after watering thoroughly so it settles properly against the soil. In hot climates, add an extra half-inch of mulch to protect the roots from temperature fluctuations.
Watering Wisdom: The once-a-week watering guideline in Step 4 works for average conditions, but your actual needs depend on rainfall and soil type. I check moisture by sticking my finger 2 inches deep—if it feels dry, water thoroughly until moisture reaches 4 inches down. For sandy soils, you might need to water twice a week, while clay soils may only need watering every 10 days. Consistency is key—lily of the valley hates moisture extremes.
Pro Tips for Grow Lily Of The Valley From Roots
- A few simple secrets can make all the difference when growing these delicate perennials.
- Root Selection Matters: In Step 1, don't just count the buds—check for firmness. The roots should feel dense like sma...
- Planting Depth is Critical: When placing roots in Step 3, bury them just enough so the buds peek slightly above the s...
Frequently asked questions
Got questions about growing lily of the valley from roots? You’re not alone—this fragrant beauty has a few quirks! Below, we’ve rounded up the most common queries to help you grow with confidence.
Can I grow lily of the valley from store-bought roots or potted plants?
Yes! If you spot roots for sale (often in spring), plant them immediately. For potted plants, gently remove the root ball, separate the rhizomes, and replant. Pro tip: Avoid buying from grocery stores—they’re often treated to prevent spreading. Opt for nursery-grown roots instead!
How long does it take for lily of the valley to bloom after planting?
Patience is key! Established plants may bloom in 2–3 years, but new roots can take 3–5 years to flower. Focus on keeping the soil moist and shaded—consistent care speeds up the process. Bonus: Dividing mature clumps every 3–4 years boosts blooms faster!
Why isn’t my lily of the valley growing or flowering?
Common culprits: too much sun (they prefer shade), drought stress, or overcrowded roots. Check soil moisture (keep it damp but not soggy) and ensure partial shade. If leaves yellow, it may need more organic matter. Fix: Divide clumps in early spring for better airflow and nutrients.
Can I grow lily of the valley in containers?
Use a 12-inch+ pot with drainage holes, well-draining soil, and a mix of peat/perlite. Containers dry faster, so water regularly. Just know: They’re not long-term container plants—after 2–3 years, transplant to the ground for best results.
Is lily of the valley toxic to pets or kids?
Yes, it’s highly toxic if ingested—can cause vomiting, diarrhea, or heart issues in pets/kids. Keep it out of reach! Wear gloves when handling roots, and wash hands afterward. Safety note: If you have curious pets, opt for pet-safe alternatives like Hellebore or Daffodils.
How do I divide lily of the valley roots for propagation?
Dig up clumps in early spring or fall, gently separate rhizomes (each should have 1–2 buds), and replant 3–4 inches deep. Discard damaged or tiny pieces. Timing tip: Do this every 3–4 years to prevent overcrowding and encourage lush growth!
Wrapping up and next steps
Growing lily of the valley from roots is a rewarding journey that brings fragrant blooms to your garden with minimal effort! 🌿 With patience and the right care—like choosing healthy roots, preparing well-draining soil, and providing shade—you’ll enjoy delicate clusters in just a few years.
Once established, these hardy perennials thrive with little maintenance, making them perfect for beginners and seasoned gardeners alike.
Now that you’re ready to plant, take the next step: mark your calendar for late summer or early fall—ideal timing for root division and transplanting. Happy gardening, and may your garden soon fill with the sweet scent of spring! 🌸