
Size
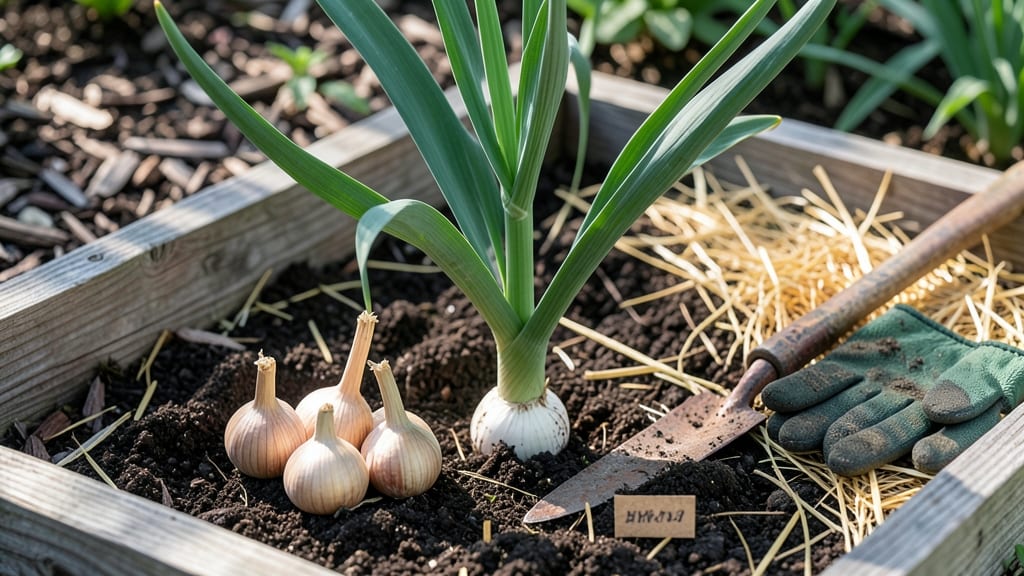
How to grow large garlic starts with the right timing and soil prep. 🌱 Last fall, I doubled my bulb size by planting hardneck varieties in well-drained soil and following a simple but critical routine. The secret isn't complicated—it's about mimicking what garlic does naturally in the wild, with consistent moisture and protection from weeds. You'll need a sunny spot with loose, fertile soil and cloves from a trusted source. Plant them 4-6 inches deep, 6-8 inches apart, with the pointed end up. Mulch heavily to insulate roots and retain moisture—this is where most gardeners miss out on monster-sized harvests. Water regularly but avoid soggy soil, which shrinks bulbs. By mid-summer, you'll see the tops yellow and flop over—that's your cue to stop watering. Let the bulbs cure in the soil for another 2-3 weeks before harvesting. The results? Bulbs that weigh twice as much as store-bought, with fewer but larger cloves inside each. This method works in zones 3-9, though timing varies slightly by region. The key is patience—large garlic takes a full growing season, but the payoff makes it worth every effort. Let's break down the exact steps that deliver those jaw-dropping harvests.
📚 In This Guide
- What you need
- Instructions
- Tips and common mistakes
- Wrapping up and next steps
What you need
- ● Garlic bulbs (planting stock): 10–20 hardneck or softneck varieties (e.g., Rocambole, Porcelain, or Silverskin). Choose bulbs with large, plump cloves (avoid store-bought garlic—it’s often treated to prevent sprouting!).
- ● Garden soil: Well-draining, loose, and rich in organic matter (aim for a pH of 6.0–7.0). Amend with compost (2–3 inches) or aged manure if needed.
- ● Fertilizer: Balanced organic fertilizer (e.g., 5-5-5 or 10-10-10) – Apply 1–2 pounds per 100 sq. ft. at planting.
- ● High-nitrogen fertilizer (e.g., blood meal or fish emulsion) – Use mid-season to boost leaf growth.
- ● Potassium-rich fertilizer (e.g., greensand or wood ash) – Helps bulb development.
- ● Mulch: 6–8 inches of straw or leaves to insulate bulbs and retain moisture.
- ● Garden tools: Trowel or garlic planter (for precise clove placement).
- ● Garden fork or broadfork (to loosen soil without disturbing cloves).
- ● Pruners or scissors (for removing flower stalks, called scapes).
- ● Watering system: Drip irrigation or soaker hose (garlic hates wet leaves—water at the base!).
- ● Garlic planting gauge: A handy tool for spacing cloves evenly (4–6 inches apart, 4–6 inches deep).
- ● Row covers or frost cloth: Protects young plants from late frosts (garlic thrives in cool weather).
- ● Soil test kit: Ensures your soil has the right nutrients and pH for bulb development.
- ● Compost tea or mycorrhizal fungi: Boosts soil microbes for healthier roots.
- ● Garlic storage mesh bags: Keeps bulbs dry and pest-free after harvest.
Step-by-step instructions for growing large garlic
Here's the foolproof method I use to grow garlic bulbs so big they split the cloves apart.
🌱 Step 1: Select and Prepare the Right Garlic Cloves
Start with hardneck garlic varieties—they produce the largest bulbs. Break apart a bulb into individual cloves, keeping the papery skin intact. Discard any cloves that are soft, shriveled, or have signs of mold. I always choose the largest, plump cloves—they grow into the biggest bulbs.
Plant only the center cloves from the bulb, as they've already formed a strong base. Soak these cloves in lukewarm water for 4-6 hours before planting to encourage faster root development. This step is non-negotiable—dry cloves take forever to sprout.
🪴 Step 2: Plant in Well-Draining Soil at the Right Depth
Choose a sunny spot with 6+ hours of direct sunlight daily. Garlic hates soggy soil, so amend heavy clay with 2-3 inches of compost to improve drainage. Plant the cloves 2 inches deep, pointed end up, with 4-6 inches between each clove in rows spaced 12 inches apart.
Press the soil gently around each clove to eliminate air pockets. Water lightly after planting to settle the soil. If your area gets heavy winter rains, raise beds slightly or plant on a slope to prevent waterlogging. The goal is moist but never soggy soil—garlic roots rot faster than they grow in wet conditions.
☀️ Step 3: Provide Consistent Care Through the Growing Season
Keep the soil evenly moist but never waterlogged—1 inch of water per week is ideal. Mulch with 2-3 inches of straw or leaves after sprouts reach 4 inches tall to retain moisture and suppress weeds. This mulch layer is your secret weapon—it keeps soil temps stable and prevents the bulbs from splitting.
Stop watering 4-6 weeks before harvest to toughen the skins and prevent rot. You'll know it's time when the lower leaves turn brown and the tops start to flop. Don't yank them out—wait until half the lower leaves have died back for maximum bulb size.
⏰ Step 4: Harvest and Cure for Long-Term Storage
Dig bulbs when the lower 6 leaves have browned but the tops are still mostly green. Use a fork to loosen the soil around the bulb, then gently lift it out. Shake off excess dirt but don't wash the bulbs—moisture speeds up spoilage. Let them dry in a shady, well-ventilated area for 2-3 weeks.
I hang mine in small bunches from a clothesline or lay them on wire racks. Proper curing is everything—bulbs that dry too quickly shrivel, while those that stay too damp rot. Once fully cured, the skins will be papery and the cloves will separate easily. Store in a cool, dark place with good airflow for up to 8 months.
Tips & tricks for growing large garlic
These little adjustments will help you grow garlic so big it'll make your neighbors jealous—and save you from common gardening headaches.
Clove Selection Matters: I can't stress this enough—those outer cloves? Skip them. They're underdeveloped and won't produce the monster bulbs you're after. Focus on the plump center cloves, which have already established strong roots. Pro tip: Break your bulb apart right before planting. The longer you store separated cloves, the more they dry out, and dry cloves mean slow starts.
Soaking Secret: That 4-6 hour lukewarm water soak isn't just busywork—it's your garlic's jumpstart. Think of it like giving your plants a pre-game pep talk. Use water around 70°F (warm to the touch) and soak until the cloves look slightly plump. If you're in a hurry, you can extend this to 8 hours, but don't go beyond that or you risk softening the cloves too much.
Sunlight Strategy: I've learned the hard way that garlic isn't fussy about sunlight—it demands it. If your spot gets less than 6 hours of direct sun, consider using reflective surfaces like white plastic mulch or even old CDs (yes, really!) to bounce extra light onto your beds. In shadier climates, I've had success growing garlic under black plastic that absorbs heat during the day and radiates it back at night.
Mulch Magic: That 2-3 inch layer of straw or leaves isn't just for show—it's your moisture regulator. When your sprouts hit 4 inches tall, add that mulch immediately. It acts like a blanket, keeping soil temps stable (which garlic loves) and preventing those temperature swings that cause bulb splitting. In hot climates, I sometimes add a second layer of mulch in summer to protect the bulbs from heat stress.
Pro Tips for Grow Large Garlic
- These little adjustments will help you grow garlic so big it'll make your neighbors jealous—and save you from common ...
- Clove Selection Matters: I can't stress this enough—those outer cloves? Skip them. They're underdeveloped and won't p...
- Soaking Secret: That 4-6 hour lukewarm water soak isn't just busywork—it's your garlic's jumpstart. Think of it like ...
Frequently asked questions
Got questions about growing jumbo garlic? You’re not alone—growing large, flavorful bulbs takes patience and know-how. Below, we’ve answered the most common questions to help you avoid pitfalls and maximize your harvest.
How do I know if my garlic cloves are big enough to plant?
Look for plump, firm cloves that weigh about 1–2 ounces each. Smaller cloves (under 1 inch) may not produce full-sized bulbs. Break apart your garlic bulb carefully—avoid bruising the cloves! Store them in a cool, dark place until planting.
When is the best time to harvest garlic for the largest bulbs?
Harvest when 60% of the lower leaves turn brown (usually late June to early July). Wait too long, and the bulbs may split or sprout. Dig gently with a fork, shake off soil, and cure in a dry, shaded spot for 2–3 weeks before storing.
Why is my garlic growing, but the bulbs are tiny?
Tiny bulbs often mean poor soil, overcrowding, or insufficient nutrients. Test your soil (pH 6.0–7.0 is ideal) and amend with compost. Space cloves 4–6 inches apart and side-dress with nitrogen-rich fertilizer mid-season. Hardneck varieties may naturally stay smaller—choose softneck for bigger bulbs!
Can I grow large garlic in containers or small spaces?
Yes! Use deep pots (12+ inches) with well-draining soil. Plant 1–2 cloves per pot, spacing them 4 inches apart. Containers warm up faster, so plant 4–6 weeks earlier than your last frost date. Just ensure pots get full sun (6+ hours daily).
What should I do if my garlic gets pests like aphids or fungus?
Prevent pests with neem oil or copper fungicide (apply early). For aphids, spray with soapy water. Remove infected plants immediately to stop spread. Mulch with straw to deter rot. Rotate crops yearly—never plant garlic in the same spot two years in a row!
Wrapping up and next steps
Growing large, monster garlic bulbs is totally within reach—just follow the right steps! With the right soil, timing, and care, you’ll harvest plump, flavorful cloves that’ll make your kitchen (and neighbors) jealous. 🌱✨
Ready to take the next step? Start small this season—plant a few cloves, experiment with varieties, and refine your technique. Before you know it, you’ll be the garlic-growing champion of your block! Happy planting!