
Container Gardens
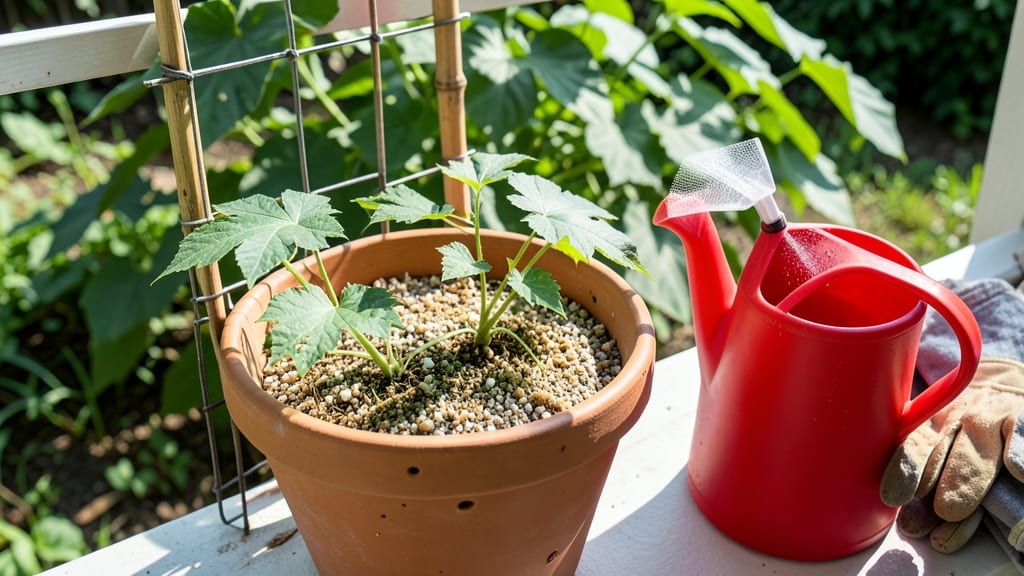
How to grow ampalaya in a pot lets you enjoy this tropical veggie even in tiny spaces. 🌱 I’ve grown it in 5-gallon containers on my balcony, and the vines thrive—producing plenty of those signature bitter melons without taking over my garden. You’ll need a 5-gallon pot (or larger), well-draining soil, and 6+ hours of sunlight daily. Ampalaya loves heat and humidity, so if you’re in a cooler climate, keep it near a sunny window or use a grow light. Water when the top inch of soil feels dry—overwatering is the #1 killer of potted ampalaya. By midsummer, you’ll see 10-15-foot vines climbing (or sprawling) with 5-10 melons per plant by fall. The key? Prune regularly to encourage bushier growth and harvest young for milder flavor. Pests are rare, but watch for aphids—spray with soapy water if needed. Perfect for urban gardens, patios, or even indoors with grow lights. Let’s get those vines climbing!
📚 In This Guide
- What you need
- Instructions
- Tips and common mistakes
- Wrapping up and next steps
What you need
- ● Container: A 5-gallon or larger pot (at least 12–18 inches deep) with drainage holes. Terracotta or fabric pots work best for airflow.
- ● Potting Mix: 1 part coco coir or peat moss + 1 part perlite or coarse sand + 1 part garden soil (sterilized). Avoid heavy clay soil.
- ● Ampalaya Seeds or Seedlings: Buy organic, disease-free seeds or young plants from a nursery. 3–4 seeds per pot (thin to 1–2 strongest plants).
- ● Fertilizer: Balanced liquid fertilizer (10-10-10) or compost tea for organic growth. Fish emulsion works too!
- ● Support System: A small trellis, bamboo stake, or wire cage (ampalaya vines grow 6–10 feet!).
- ● Watering Can or Hose: With a gentle spray nozzle to avoid disturbing soil.
- ● Pruning Shears: For trimming vines and harvesting.
- ● Mulch: Straw or shredded leaves to retain moisture and suppress weeds.
- ● pH Test Kit: Ampalaya prefers slightly acidic soil (6.0–6.8).
- ● Grow Lights: If indoors, LED grow lights (12–14 hrs/day) for optimal growth.
- ● Insect Net: To protect seedlings from pests like aphids.
Step-by-step instructions for growing ampalaya in containers
Here’s how to grow this tropical vine in pots—perfect for small spaces or balconies.
🪴 Step 1: Choose the Right Pot and Soil Mix
Pick a 5-gallon container with drainage holes—ampalaya needs room for its sprawling roots. I use a fabric grow bag for better aeration, but any sturdy pot works. Fill it with a mix of 60% potting soil, 30% coconut coir, and 10% perlite to ensure drainage while holding moisture.
Moisten the mix before planting—it should feel like a wrung-out sponge. Ampalaya roots rot easily in soggy soil, so avoid heavy garden soil. Add a handful of well-rotted compost to the bottom for nutrients, then top with 2 inches of fresh mix.
🌱 Step 2: Plant Seeds or Transplants Correctly
If starting from seed, sow 2-3 seeds per pot at ½-inch depth—they germinate best in warmth (75-85°F). Cover with a clear plastic dome or wrap the pot in plastic wrap to trap humidity. Keep the soil consistently damp (not wet) until sprouts appear in 10-14 days.
For transplants, dig a hole twice as wide as the root ball and place the plant so the top of the roots sits 1 inch below soil level. Press gently to secure, then water deeply. Ampalaya thrives in full sun (6+ hours daily), so place your pot in the brightest spot possible.
💧 Step 3: Water and Fertilize for Healthy Growth
Water when the top 2 inches of soil feel dry—ampalaya’s thick vines store moisture, so overwatering is the biggest mistake. Use a drip irrigation system or water at the base to avoid wetting leaves, which can cause fungal diseases. Yellowing leaves usually mean too much water or poor drainage.
Feed every 4-6 weeks with a balanced liquid fertilizer (10-10-10) diluted to half strength. I switch to a low-nitrogen, high-phosphorus fertilizer when flowers appear to encourage fruiting. Stop fertilizing once fruits form to avoid bitter-tasting ampalaya.
✂️ Step 4: Prune and Support for Maximum Yield
Train vines along a trellis or sturdy wire frame to save space and improve airflow. Prune leggy growth by cutting back 1/3 of the vine when it reaches 6 feet—this triggers bushier growth and more fruit. Remove any yellow or diseased leaves immediately to prevent spread.
Harvest bite-sized fruits when they’re 3-4 inches long and still tender. Use pruning shears to cut stems cleanly, leaving ½ inch of stem attached. Regular harvesting encourages more production, but don’t take more than 30% of the crop at once—ampalaya needs energy to keep fruiting.
⏰ Step 5: Overwinter and Extend the Season
In cooler climates, move pots indoors near a south-facing window or under grow lights (12+ hours daily). Reduce watering to every 7-10 days and stop fertilizing until spring. Ampalaya is tropical—it won’t survive frost, so protect it or replant from seed each year.
If you’re in a warm zone, prune back half the vine in late fall to rejuvenate growth. I often let mine go dormant in winter, then resume care in spring with fresh compost and a balanced fertilizer. The key is keeping it alive—once established, ampalaya in pots can produce for years.
Tips & tricks for growing ampalaya in containers
Between us, these little details make all the difference when growing ampalaya in pots—especially in small spaces where every inch counts.
Container Selection: Ampalaya’s roots spread aggressively, so a 5-gallon container is your minimum. I’ve seen people use fabric grow bags for better aeration, but even a sturdy plastic pot with drainage holes works—just avoid terra cotta, which dries out too fast. For warmer climates, consider adding a second pot for companion planting with herbs like basil, which thrive in similar conditions.
Germination Hack: Those 10-14 days of waiting can feel endless, but you can speed things up by soaking seeds in warm water overnight before planting. Place your pot in a warm spot (75-85°F) and use a heat mat if needed—this mimics tropical conditions and gets sprouts popping in just 7-10 days. Just keep that plastic wrap handy to maintain humidity without drowning the seeds.
Sunlight Strategy: Ampalaya needs 6+ hours of direct sun daily, but if your balcony only gets morning light, rotate your pot every few days. I’ve had success with reflective surfaces—place a white tray beneath the pot to bounce extra light onto the leaves. In winter, supplement with grow lights if natural light drops below 4 hours.
Pruning Pro Tip: When you cut back that 1/3 of the vine at 6 feet, save those trimmings! Root the healthy cuttings in water for 2 weeks, then transplant into fresh soil. This gives you free plants for next year’s harvest. Just avoid pruning during flowering—you’ll lose potential fruit.
Pro Tips for Grow Ampalaya In A Pot
- Between us, these little details make all the difference when growing ampalaya in pots—especially in small spaces whe...
- Container Selection: Ampalaya’s roots spread aggressively, so a 5-gallon container is your minimum. I’ve seen people ...
- Germination Hack: Those 10-14 days of waiting can feel endless, but you can speed things up by soaking seeds in warm ...
Frequently asked questions
about growing ampalaya (bitter melon) in pots—here’s what you need to know to avoid common pitfalls and maximize your harvest!What’s the best pot size for ampalaya?
Ampalaya thrives in 5-gallon pots or larger (at least 12–18 inches deep) to support its vining growth. If space is tight, opt for dwarf varieties like ‘Chinese White’—they stay compact but still produce abundant fruit. Just ensure pots have drainage holes to prevent root rot!
How long does it take for ampalaya to bear fruit in a pot?
With ideal conditions (sun, warmth, and consistent care), you’ll see flowers in 6–8 weeks and fruit in 3–4 months. Patience pays off! Prune early vines to redirect energy to fruit production. Pro tip: Use a balanced fertilizer (10-10-10) every 4–6 weeks to speed up maturation.
Can I grow ampalaya in a pot indoors?
Ampalaya loves sunlight—it needs 6+ hours of direct light daily. Indoors? Place it near a south-facing window or supplement with a grow light (12–14 hours/day). Temperatures below 50°F (10°C) stunt growth, so keep it warm (ideal: 70–85°F / 21–29°C).
Why are my ampalaya leaves turning yellow or curling?
Yellowing leaves often signal overwatering or nutrient deficiency. Let the top 1–2 inches of soil dry between waterings. Curling leaves? Check for pests (aphids, spider mites)—spray with neem oil or insecticidal soap. Bonus: Ampalaya is thirsty but hates soggy roots!
Can I harvest ampalaya leaves and fruit at the same time?
Yes! Harvest leaves (young, tender ones) anytime for stir-fries, and pick fruit when 3–6 inches long (green or slightly yellow). Use pruning shears to avoid damaging vines. Fun fact: Unripe fruit is bitterest—cook it to mellow the flavor! For continuous harvests, pick 1–2 fruits per vine weekly.
What can I plant with ampalaya in the same pot?
Ampalaya’s vining habit works well with companion plants like basil, chili peppers, or marigolds (repel pests). Avoid competitive rooters like tomatoes or corn. If using a large container, tuck in herbs (e.g., lemongrass, mint)—just monitor water needs!
Wrapping up and next steps
Growing ampalaya in a pot is a rewarding journey that brings fresh, homegrown goodness to your table—even in limited spaces! With the right container, soil, and care, you can enjoy a thriving vine, delicious pods, and even beautiful flowers. 🌱
Now that you’re armed with all the tips and tricks, it’s time to roll up your sleeves and start planting! Watch your pot transform into a mini ampalaya paradise—and don’t forget to share your progress with fellow gardeners. Ready to harvest your first crop? Happy growing! 🌟