
Companion Plants
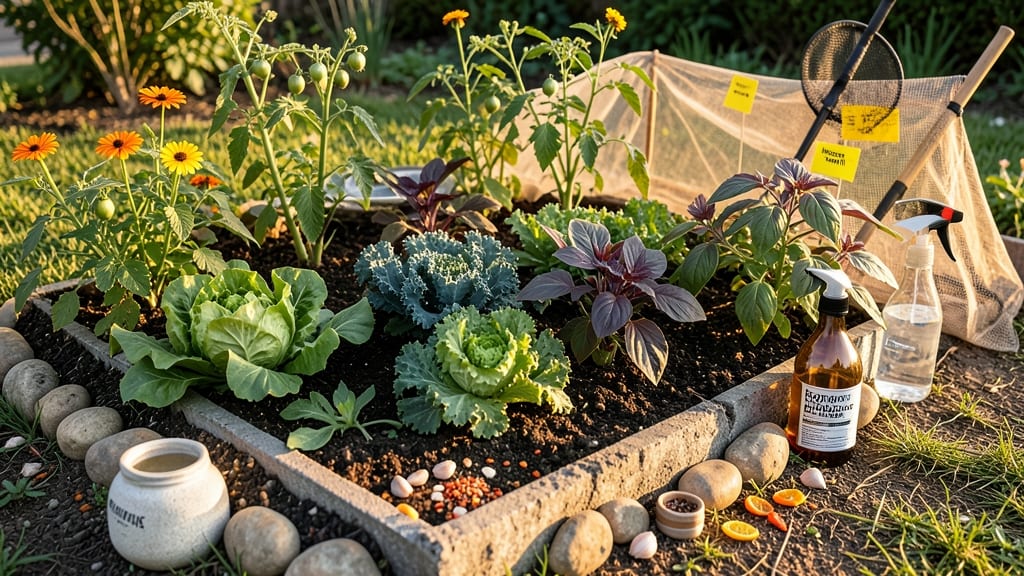
How to get rid of grasshoppers on plants—those striped invaders can turn a thriving garden into skeleton leaves in days. 🌱 I’ve battled grasshoppers for years, and neem oil isn’t just a spray—it’s a game-changer that disrupts their life cycle while keeping your plants safe. The key is timing, concentration, and consistency, not just slapping on a bottle of oil and hoping for the best.
You’ll need 1 tablespoon of neem oil, 1 teaspoon of mild liquid soap, and 1 gallon of water—that’s it. Mix it in a spray bottle, shake well, and apply it when grasshoppers are most active (early morning or late afternoon).
The soap helps the oil stick to their exoskeletons, while the neem oil starves them over time. No harsh chemicals, no harm to bees or beneficial insects.
Within 3-5 days, you’ll see fewer jumpers on your plants, and new growth will look noticeably healthier. The real magic happens when you combine this spray with companion planting—marigolds and basil act as natural repellents, giving your garden a two-layer defense. Grasshoppers won’t stand a chance.
For stubborn infestations, repeat every 5-7 days until they’re gone. The spray works best when grasshoppers are young, so early intervention is everything. Once you’ve mastered this, your garden will stay lush, and those pesky striped bullies? They’ll be history.
📚 In This Guide
- What you need
- Instructions
- Tips and common mistakes
- Wrapping up and next steps
What you need
- ● Neem oil (cold-pressed, organic): 2 tablespoons (preferably Azadirachta indica extract)
- ● Dish soap (mild, unscented): 1 teaspoon (helps the oil stick to grasshoppers)
- ● Water (distilled or dechlorinated): 1 quart (32 oz)
- ● Spray bottle (glass or dark plastic, 16–32 oz): 1 (avoid clear bottles—sunlight degrades neem oil)
- ○ Protective gear (optional but recommended): Gloves (nitrile or rubber)
- ● Long sleeves/pants (to avoid skin irritation)
- ● Eye protection (if spraying near face)
- ● Garlic or chili pepper (powder or fresh): 1–2 teaspoons (adds a natural repellent kick)
- ● Horticultural oil or vegetable oil (if neem isn’t available): 2 tablespoons (as a backup)
- ● Companion plants (long-term solution): Basil, marigolds, or catnip (plant near vulnerable greens)
- ● Fine-mesh strainer: 1 (if using powdered spices or garlic)
Step-by-step instructions for creating a neem oil grasshopper repellent
This natural spray disrupts grasshopper feeding cycles while protecting your plants—no harsh chemicals needed.
🌿 Step 1: Gather and Mix the Active Ingredients
Combine 1 tablespoon of pure neem oil with 1 teaspoon of liquid dish soap (the soap helps the oil stick to grasshoppers' exoskeletons). Add this mixture to 1 quart of warm water in a clean spray bottle. Stir gently to avoid creating suds—you want a smooth, even blend that won't clog your sprayer.
Here's the thing—I always use organic neem oil because cold-pressed versions retain more active compounds. If your oil separates after mixing, give it a quick shake right before spraying. The warmth of the water helps the oil disperse more evenly, which means better coverage on your plants and the pests.
💧 Step 2: Apply the Spray During Early Morning or Late Evening
Wait until temperatures are below 85°F to spray, as neem oil can burn plant leaves in direct sunlight. Focus on the undersides of leaves where grasshoppers often hide, and apply until the foliage glistens lightly with moisture. You'll see the best results when you coat both the top and bottom surfaces—grasshoppers will avoid treated areas immediately.
Real talk: Don't spray when rain is forecast within 24 hours. The oil needs time to work, and rain will wash it away before it can disrupt the pests' feeding habits. I like to use a handheld sprayer with a fine mist setting—it gives me better control and less waste.
✂️ Step 3: Reapply Every 5-7 Days Until Grasshoppers Disappear
Neem oil doesn't kill grasshoppers instantly—it starves and repels them by interfering with their feeding and growth hormones. After the first application, you'll notice fewer grasshoppers within 3-5 days, but consistency is key. Keep spraying until you've gone two full weeks without spotting any new damage.
This is the moment that matters: If you stop too soon, the grasshoppers may return. I always mark my calendar with the last application date and set a reminder for the follow-up. For severe infestations, add 1 tablespoon of garlic juice to the mix—it enhances the repellent effect while adding another layer of protection.
☀️ Step 4: Combine With Physical Barriers for Extra Protection
While the neem spray works, grasshoppers can still jump onto plants from untreated areas. Create a 2-foot wide barrier of diatomaceous earth around your garden beds to prevent them from hopping in. Sprinkle it lightly around the base of plants, avoiding direct contact with foliage—it dehydrates grasshoppers on contact but is harmless once wet.
I know it seems like overkill, but this two-pronged approach works faster. The neem spray disrupts their feeding, while the diatomaceous earth creates a physical block. Together, they force grasshoppers to seek easier meals elsewhere. Just remember to reapply the diatomaceous earth after rain—it loses effectiveness when wet.
Tips & tricks for effective neem oil grasshopper control
Common pitfalls—and how to sidestep every one—when using neem oil to keep grasshoppers at bay.
Ingredient Quality: The effectiveness of your spray depends entirely on the quality of your neem oil. Cold-pressed, organic neem oil contains the highest concentration of active compounds that disrupt grasshopper feeding cycles. I've found that cheaper, refined versions often lack the potency needed to repel pests effectively over time. Store your oil in a cool, dark place to preserve its potency—exposure to light and heat degrades the active ingredients faster.
Application Timing Secret: The 85°F temperature limit isn't just arbitrary—it's when neem oil starts to cause phytotoxicity (leaf burn) in many plants. I've learned this the hard way after seeing scorched leaves on my tomato plants during midday applications. Early morning or late evening applications also allow the oil to settle on leaves without evaporating quickly from direct sunlight. Pro tip: If you must spray during hotter conditions, apply only to the undersides of leaves where grasshoppers hide most frequently.
Consistency is Key: The 5-7 day reapplication window is critical because neem oil works by interfering with grasshopper growth hormones and feeding behaviors. I've noticed that skipping even one application can lead to a resurgence of pests within days. Create a simple chart marking your application dates—this visual reminder system has saved me from forgetting multiple times. For severe infestations, consider adding garlic juice (the 1 tablespoon mentioned in Step 3) to enhance the repellent effect without introducing new chemicals.
Barrier Strategy: The 2-foot wide diatomaceous earth barrier works best when applied in a complete circle around your garden beds. Grasshoppers can jump up to 2 feet, so any gaps in your barrier will allow them to bypass the treatment. I recommend using a garden hose to create a neat, even line of diatomaceous earth. Remember to reapply this barrier after rain—it becomes ineffective when wet, which is why I always check the weather forecast before applying either treatment.
Pro Tips for Get Rid Of Grasshoppers On Plants
- Common pitfalls—and how to sidestep every one—when using neem oil to keep grasshoppers at bay.
- Ingredient Quality: The effectiveness of your spray depends entirely on the quality of your neem oil. Cold-pressed, o...
- Application Timing Secret: The 85°F temperature limit isn't just arbitrary—it's when neem oil starts to cause phytoto...
Frequently asked questions
about grasshopper control—because even the best-laid plans need a little troubleshooting!How do I know if grasshoppers are actually damaging my plants?
Look for chewed leaves, notched edges, or skeletonized foliage (where only veins remain). Young plants are most vulnerable, but even mature ones may show signs like stunted growth or holes in fruit. If you spot these, it’s time to act!
When is the best time of day to apply neem oil for grasshoppers?
Apply neem oil early morning or late afternoon to avoid harming beneficial insects (like bees) that are active during the day. Avoid spraying when plants are damp or under direct sunlight, as this can cause leaf burn. Weekends are ideal—fewer pollinators are around!
What if grasshoppers keep coming back after treatment?
Persistence is key! Reapply neem oil every 7–10 days and combine it with physical barriers (like row covers) or natural predators (e.g., birds, spiders). Check for newly hatched nymphs hiding in mulch or under leaves—they’re sneaky!
Can I use neem oil on edible plants like tomatoes or herbs?
Yes! Neem oil is organic and safe for edible plants when used correctly. Wait 24–48 hours after spraying before harvesting to ensure residue settles. Always test a small area first—some sensitive plants (like basil) may react. Rinse produce thoroughly before eating.
Are there any plants that naturally repel grasshoppers?
Plant companion plants like marigolds, garlic, catnip, or tansy near vulnerable crops. Grasshoppers hate their strong scents. Even lavender or rosemary can deter them—bonus: they add beauty and fragrance to your garden!
Wrapping up and next steps
Dealing with grasshoppers doesn’t have to be a battle—with the right tools like neem oil and a few natural strategies, you can protect your plants without harsh chemicals. 🌱 Start small, stay consistent, and soon your garden will thrive pest-free!
Ready to take action? Pick one method today—whether it’s spraying, companion planting, or habitat tweaks—and watch your plants flourish.
Need extra help? Check out our full guide for step-by-step tips and pro tricks to keep grasshoppers at bay for good!