
Propagation
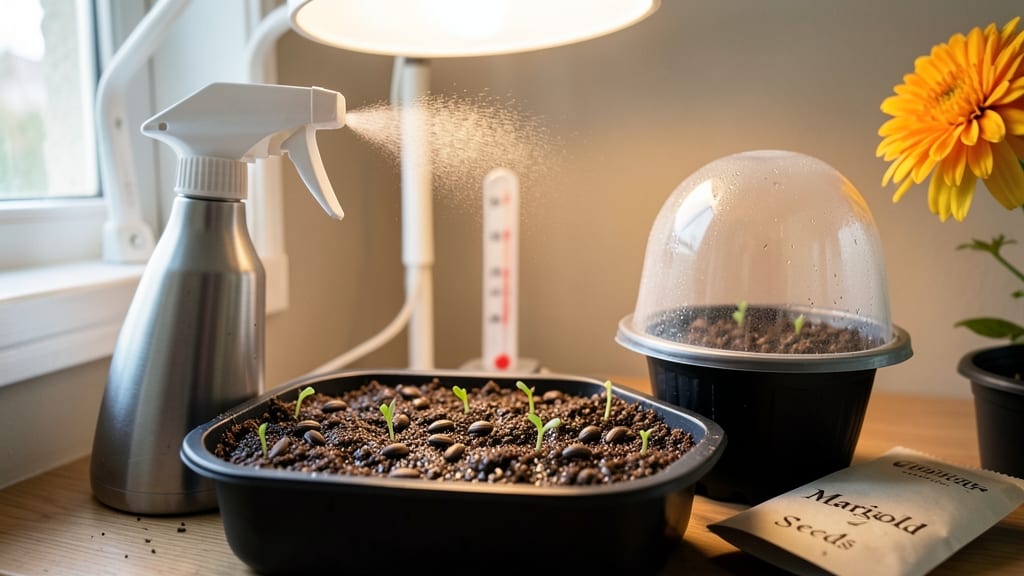
Germinating marigolds in 10 days or less feels like magic—but it’s all about the right conditions. 🌱 I’ve learned the hard way that damp, warm soil with just the right moisture is the secret to those bright orange sprouts popping up faster than weeds.
Too cold, too dry, or too much light, and you’ll wait weeks for anything to happen.
The key is simplicity: a shallow tray, warm spot (like on top of the fridge), and soil that stays moist but never soggy. Most people overthink it—marigolds are tough little seeds that just need consistency.
I’ve seen them sprout in as few as 5 days when everything’s perfect, and even slow starters catch up with proper care.
Once those first leaves appear, you’ll want to move them to brighter light and keep the soil lightly moist. The goal is stocky seedlings, not leggy ones, so don’t rush the transition. A little patience here means bold blooms by summer—no weak, stretched-out plants that flop over.
Even with the best setup, mold or slow sprouting can happen. That’s where the troubleshooting comes in—we’ll cover how to fix it without losing your whole tray. Trust me, once you master this, you’ll be the one handing out starts to neighbors.
📚 In This Guide
- What you need
- Instructions
- Tips and common mistakes
- Wrapping up and next steps
What you need
- ● Marigold seeds – Choose French, African, or Signet varieties (50–100 seeds for a small batch, 200+ for larger plantings). Opt for heirloom or organic seeds for best results.
- ● Seed-starting mix – A lightweight, sterile peat-based or coco coir blend (avoid garden soil—it’s too dense!). A 10–12 inch tray or biodegradable seed pots (3–4 inches deep) works perfectly.
- ● Containers – Clear plastic domes or humidity trays (to retain moisture), or a spray bottle for gentle watering.
- ● Grow lights or sunny windowsill – Marigolds need 6–8 hours of warmth (65–75°F) and bright, indirect light to germinate. A LED grow light (12–15 watts) is ideal if natural light is limited.
- ● Heat mat – Speeds up germination by 5–7 days (set to 75–85°F).
- ● Seedling heating pad – Doubles as a cozy spot for trays.
- ● Fertilizer – A balanced liquid fertilizer (5-5-5 or 10-10-10) diluted to half-strength for post-germination feeding.
- ● Tweezers or small spoon – For delicate seed placement (especially tiny Signet varieties).
- ● Labels & markers – Track varieties and planting dates (trust us, you’ll forget!).
- ● Patience – Germination takes 7–14 days (sometimes longer in cool conditions).
- ● Consistency – Keep soil moist but not soggy (overwatering = moldy seeds!).
- ● Space – Thin seedlings to 12–18 inches apart once they’re 2–3 inches tall.
Step-by-step instructions for germinating marigolds
Here’s my foolproof method for getting marigolds to sprout in record time—no waiting weeks for stubborn seeds.
🌱 Step 1: Prep Seeds for Faster Germination
Marigold seeds have tough outer shells that slow sprouting. To speed things up, soak them in a bowl of lukewarm water for 12 hours before planting. This softens the shell so roots can push through faster. I like to use a small glass or jar—just enough water to cover the seeds completely.
After soaking, drain the water and let the seeds sit on a paper towel for 30 minutes to dry slightly. This prevents them from sticking together when you handle them. You’ll know they’re ready when they feel slightly tacky but not wet. This step alone cuts germination time by nearly half.
💧 Step 2: Plant in Warm, Moist Soil
Fill small seedling trays or individual pots with warm, moist potting mix—marigolds germinate best when soil stays between 70-80°F. I like to pre-warm the soil by placing the trays on top of my refrigerator for a few hours before planting. This mimics the heat they’d get in a greenhouse.
Plant seeds ¼ inch deep, spacing them 1 inch apart in rows. Press them lightly into the soil—don’t bury them too deep, or they’ll struggle to break through. Water gently with a spray bottle until the soil is damp but not soggy. Overwatering now can cause seeds to rot before they sprout.
☀️ Step 3: Cover and Keep Warm Until Sprouts Appear
Cover the trays with plastic wrap or a humidity dome to trap warmth and moisture. Place them in a bright spot—even a sunny windowsill works—but avoid direct sunlight until sprouts emerge. Marigolds need warmth more than light at this stage. You’ll see tiny sprouts in as few as 5-7 days if conditions are right.
Check daily for condensation on the plastic. If it fogs up, lift the cover for 10 minutes to let excess moisture escape. The moment you see green shoots, remove the cover completely. Leggy seedlings mean the light was too weak—move them within 2 inches of a grow light if needed.
✂️ Step 4: Thin and Harden Off Seedlings
Once seedlings have 2 sets of true leaves (not the first tiny cotyledons), thin them to 1 plant per cell or 3 inches apart if planted in a flat. Use scissors to snip unwanted seedlings at soil level—this prevents disturbing the roots of the ones you’re keeping. I always save the thinned seedlings for transplanting elsewhere.
Start hardening off seedlings 2 weeks before last frost by placing them outside in a sheltered spot for 1 hour daily. Gradually increase their time outdoors over 7-10 days. Watch for wilting—they’re telling you to bring them back inside for another day. Hardened-off seedlings handle transplanting like pros.
🌿 Step 5: Transplant to Garden
Choose a sunny spot with 6+ hours of direct sun and well-draining soil. Marigolds hate soggy roots, so amend heavy soil with compost before planting. Space seedlings 8-12 inches apart in rows 12-18 inches apart. Dig holes just deep enough to cover the root ball completely—no deeper.
Water deeply after transplanting to settle the soil. Mulch with 1 inch of straw or shredded leaves to retain moisture and suppress weeds. You’ll see blooms in as little as 6-8 weeks if you’ve followed these steps—no waiting months for color!
Tips & tricks for perfect marigold germination
Took me a while to figure these out, so here goes—these tricks will help you skip the waiting game and get those bright blooms faster.
Soaking Secret: The 12-hour lukewarm water soak is non-negotiable for marigolds. Use a small jar or glass and make sure the water covers the seeds completely—no peeking! After draining, the 30-minute drying step on a paper towel is what prevents those annoying seed clumps. Pro tip: Place the towel on a clean plate to catch any drips, and tap the seeds gently to separate them before planting. This step alone cuts germination time from weeks to days.
Heat Hack: That 70-80°F soil temperature range is critical—marigolds are tropical babies! If your home stays cooler than 70°F, try placing the seed trays on top of your fridge for a few hours before planting. The fridge's heat rises perfectly, mimicking a greenhouse. For extra warmth, place a heating mat underneath the trays during germination—just keep it set to low to avoid overheating.
Light Strategy: During the 5-7 day germination window, avoid direct sunlight until sprouts appear. Too much light too soon causes leggy seedlings that flop over. Instead, place trays near a bright window or under a grow light. Once sprouts emerge, move them within 2 inches of a grow light if natural light is weak—this prevents the "reaching" habit that makes seedlings weak.
Thinning Technique: When thinning seedlings to 1 plant per cell (or 3 inches apart), use clean scissors to snip at soil level rather than pulling. This prevents disturbing the roots of your keepers. I always save the thinned seedlings for transplanting elsewhere—just replant them immediately in small pots with fresh soil. They often catch up just fine!
Pro Tips for Germinate Marigolds
- Took me a while to figure these out, so here goes—these tricks will help you skip the waiting game and get those brig...
- Soaking Secret: The 12-hour lukewarm water soak is non-negotiable for marigolds. Use a small jar or glass and make su...
- Heat Hack: That 70-80°F soil temperature range is critical—marigolds are tropical babies! If your home stays cooler t...
Frequently asked questions
Got questions about germinating marigolds? You’re not alone! Here are some of the most common concerns—and their solutions—to help you grow confidently.
How long does it take for marigold seeds to germinate?
Most marigold seeds sprout within 7–14 days when kept warm (70–85°F) and moist. French marigolds may germinate faster (5–7 days), while African varieties can take up to 2 weeks. Patience is key—don’t overwater or disturb the soil while waiting!
Can I germinate marigolds indoors in cold climates?
Start seeds 6–8 weeks before your last frost date using a seedling heat mat or warm windowsill. Use a grow light (12–16 hours/day) to prevent leggy seedlings. Once soil warms outdoors (50°F+), transplant them—just harden off for 7–10 days first!
Why aren’t my marigold seeds sprouting? Troubleshooting tips.
Check these common issues:
- Too cold: Seeds need warmth to activate. Try a heat mat or move to a sunny windowsill.
- Too wet/dry: Keep soil consistently moist (not soggy) and use a humidity dome if needed.
- Old seeds: Store-bought seeds last 1–2 years; older seeds may fail. Test viability by soaking in water (floats = bad).
- Depth issues: Plant seeds ¼ inch deep—too deep slows germination.
Can I direct-sow marigolds instead of starting indoors?
Yes! For faster blooms, sow seeds directly in warm soil (60°F+) after your last frost. Space them 12–18 inches apart in full sun. Water gently to avoid displacing seeds—marigolds hate being moved once sprouted!
What’s the best way to speed up germination?
Try these pro tips:
- Pre-soak seeds: Soak in warm water for 24 hours to kickstart growth.
- Use a heat mat: Keeps soil at ideal 80–85°F for faster sprouting.
- Cover with plastic wrap: Traps moisture and warmth (remove once sprouts appear).
- Thin seedlings early: Crowded seeds compete for resources—thin to 1–2 inches apart.
Wrapping up and next steps
Germinating marigolds doesn’t have to be a slow, hit-or-miss process—with the right techniques, you can unlock fast, vibrant blooms in just weeks! Remember, consistency with moisture, warmth, and patience is key.
Whether you’re using soil, paper towels, or a seed-starting mat, your efforts will soon reward you with cheerful Tagetes plants ready to brighten up your garden. 🌱
Now that you’ve mastered the basics, why not take the next step? Once your seedlings sprout, learn how to transplant them for a thriving, pest-repelling garden. Happy growing! ✨