
Propagation
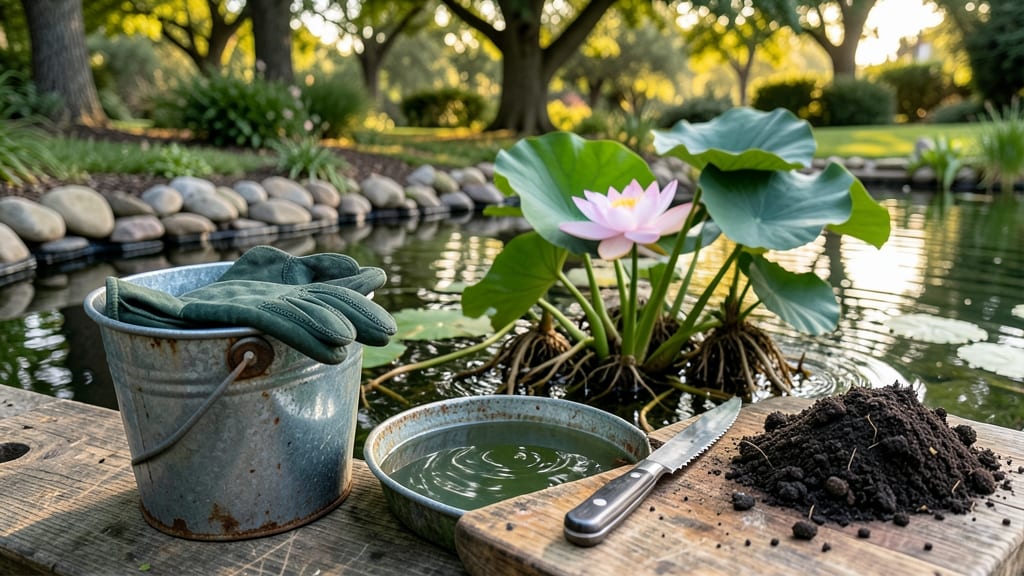
Dividing water lilies doubles your blooms without the drama. ✨ The secret timing—spring or early summer—lets roots recover before winter, while a sharp knife and steady hands prevent stress. I’ve turned one overcrowded plant into three thriving colonies using this method, and you can too.
You’ll need gloves, a clean knife, and a bucket of pond water to keep roots hydrated. The key is separating rhizomes with at least one growth eye per division, then replanting in containers with 12-18 inches of water depth. Too shallow, and roots suffocate; too deep, and blooms struggle.
After replanting, fertilize lightly with aquatic tabs and watch for new leaves within 2-3 weeks. The first year might be modest, but by season two, you’ll have lush pads and nonstop blooms that outshine store-bought plants. Works for hardy and tropical varieties alike—just adjust timing for your climate.
Here’s how to avoid the most common mistakes and keep your lilies happy for years.
📚 In This Guide
- What you need
- Instructions
- Tips and common mistakes
- Wrapping up and next steps
What you need
- ● Healthy water lilies: Mature plants (2–3 years old) with robust roots and at least 3–5 visible crowns per division.
- ● Clean, sharp pruners or a garden knife: Sterilized (rubbing alcohol wipe) to prevent disease. Size: 4–6" blade for precision cuts.
- ● Gloves: Waterproof or rubber gloves (to protect against sharp roots and bacteria).
- ● Bucket or container: Large enough to hold divided sections (5+ gallons) with water to keep roots hydrated.
- ● Pond net or fine mesh: To gently scoop plants from the pond without damaging foliage.
- ○ Potting soil or aquatic plant substrate: Optional for temporary pots: Peat moss or coconut coir mix (if replanting immediately isn’t possible).
- ○ Fertilizer (optional but helpful): Slow-release aquatic plant tabs or liquid fertilizer (e.g., Miracle-Gro Aquatic Plant Food) to boost recovery.
- ● Rooting hormone: Powder or gel to encourage faster root growth in divided sections.
- ● Pond thermometer: To check water temp (ideal range: 65–85°F for division).
- ● Label markers: Waterproof tags to track varieties if dividing multiple types.
- ● Pond dye or shade cloth: To reduce algae growth in temporary containers.
Step-by-Step instructions for dividing water lilies
Here’s how to refresh your pond plants without shocking their roots—just a little patience and the right timing.
🪴 Step 1: Choose the Right Time and Tools
Divide water lilies in early spring when new shoots emerge but before blooming begins. This timing gives roots time to recover before summer’s heat. I use a sharp pond knife (or clean pruners) and gloves—lily roots are slippery and can harbor bacteria.
Work on a sunny, dry day so the pond stays stable. Avoid dividing during dormancy (fall/winter) or peak bloom (summer)—roots need energy to regrow. If you must divide in summer, do it after blooming to reduce stress.
🌱 Step 2: Lift the Lily and Inspect the Roots
Gently lower a weighted net or pond rake into the water to loosen the roots. Grasp the stem near the base and pull upward—healthy roots will release with minimal resistance. If stuck, wiggle gently or use the pond knife to sever stubborn fibers.
Once out, rinse the roots in clean pond water to remove debris. Look for thick, white crowns (the base where leaves and roots meet)—each crown should have 3-5 healthy shoots and at least 6 inches of roots. Smaller sections will bloom later but may struggle in the first season.
✂️ Step 3: Separate Crowns Carefully
Use your sterilized knife to cut between crowns, leaving each division with its own root system. Aim for 2-3 crowns per division—this ensures enough energy for regrowth. Discard any crowns with blackened roots, holes, or slimy texture (signs of rot or pests).
I like to dip the cuts in hydrogen peroxide (3%) for 30 seconds to prevent bacterial infections. This step is optional but worth it if your pond has had past issues with rot. Let divisions soak in fresh water for 10 minutes before replanting.
💧 Step 4: Replant Divisions at the Right Depth
Water lilies need 6-12 inches of water depth—plant too shallow, and roots suffocate; too deep, and blooms won’t reach the surface. Use a weighted pot (like a clay container with rocks) to anchor each division. Fill the pot with pond soil (no garden soil—it compacts and rots).
Gently press the crown into the soil until it’s 1-2 inches below the surface. The roots should spread naturally—don’t force them. Secure the pot with pond weights or stakes to keep it stable. Avoid stirring up sediment, which can cloud the water and stress new plants.
☀️ Step 5: Monitor and Maintain New Growth
Keep divisions in partial shade for the first 2 weeks to reduce stress. Gradually move them to full sun as new leaves appear. You’ll see first true leaves in 3-4 weeks—this signals successful regrowth. If leaves yellow or wilt, check for overcrowding or nutrient deficiency (add a slow-release pond fertilizer if needed).
Blooms may take 6-8 weeks to return after division, but patience pays off. Thin out any weak shoots to focus energy on the strongest stems. Dividing every 3-4 years keeps lilies vigorous and prevents overcrowding—your pond will thank you with bigger, brighter blooms each season.
Tips & tricks for perfect water lily division
These essential tips will help you avoid common pitfalls and ensure your water lilies thrive after division.
Timing is Everything: Early spring is critical for successful division—those new shoots in Step 1 indicate the plant is ready to recover. If you miss this window, wait until after blooming in summer. I've learned the hard way that dividing during dormancy (fall/winter) or peak bloom (summer) stresses roots and can delay blooming by up to a full season.
Root Inspection Technique: In Step 2, focus on those thick, white crowns with 3-5 healthy shoots and at least 6 inches of roots. The crown is the plant's energy center—discarding damaged ones prevents spreading disease. I use a magnifying glass to check for tiny holes or slimy texture that might indicate pests or rot before they become visible to the naked eye.
Sterilization Matters: The 30-second hydrogen peroxide dip in Step 3 is your secret weapon against bacterial infections. I keep a small spray bottle of diluted hydrogen peroxide (3%) handy for quick sterilization between cuts. This simple step has saved me from losing entire divisions to rot after replanting.
Depth and Stability: The 6-12 inch depth range in Step 4 is non-negotiable for healthy growth. Too shallow and roots suffocate; too deep and blooms won't reach the surface. I use a simple measuring tape tied to my pond rake to check depth before planting each division. For stability, I always anchor pots with pond weights—nothing worse than watching your hard work float away during a windstorm.
Pro Tips for Divide Water Lilies
- These essential tips will help you avoid common pitfalls and ensure your water lilies thrive after division.
- Timing is Everything: Early spring is critical for successful division—those new shoots in Step 1 indicate the plant ...
- Root Inspection Technique: In Step 2, focus on those thick, white crowns with 3-5 healthy shoots and at least 6 inche...
Frequently asked questions
Got questions about dividing water lilies? You’re not alone—this process can feel tricky, but with the right know-how, you’ll have thriving plants in no time. Below, we’ve rounded up the most common queries to help you navigate the task like a pro.
When is the best time to divide water lilies?
The ideal window is early spring (just as new shoots emerge) or late summer (after blooming). Avoid dividing in fall or winter, as the plants need time to recover before cold weather hits. Spring divisions give roots a full growing season to establish, while summer divisions work well if you’re in a warm climate.
How do I know if my water lily needs dividing?
Watch for these red flags: fewer blooms, yellowing leaves, or crowded tubers spilling over the pot. If your plant’s growth slows or flowers shrink, it’s likely overcrowded. A healthy water lily should have 3–5 strong tubers per pot—any more, and it’s time to split!
Can I divide water lilies without uprooting the entire plant?
Yes! For hardy water lilies (like Nymphaea species), you can gently tease apart tubers in the water using your hands or a fork. For tropical varieties, partial removal is riskier—opt for full uprooting to minimize stress. Just work slowly to avoid damaging delicate roots.
What do I do with the divided sections afterward?
Repot each section in its own container with fresh substrate (aquatic soil or gravel). Place them in partial shade for 2–3 weeks to recover, then gradually reintroduce them to full sun. Avoid fertilizing immediately—let roots heal first! If leaves wilt, it’s normal; they’ll bounce back once established.
Will dividing water lilies kill them?
Not if done correctly! Stress is the real enemy—keep tubers moist, avoid exposing roots to air, and divide during active growth. Tropical lilies are more sensitive; hardy types handle division better. With proper care, your plants should rebound within 4–6 weeks. Patience is key!
Still unsure? Drop your specific scenario in the comments—we’re happy to help troubleshoot!
Wrapping up and next steps
Dividing water lilies is a rewarding way to expand your pond while keeping your plants healthy and blooming beautifully! 🌸 With the right timing, tools, and care, you can propagate new plants with minimal stress. Remember: patience and precision are key—your efforts will pay off in lush, vibrant foliage and stunning flowers.
Now that you’re ready to tackle the task, grab your tools and get started! If you’re new to pond gardening, consider joining a local gardening group or exploring more water lily care tips to deepen your green thumb skills. Happy dividing—and enjoy your thriving aquatic oasis! 🌊