
Planting
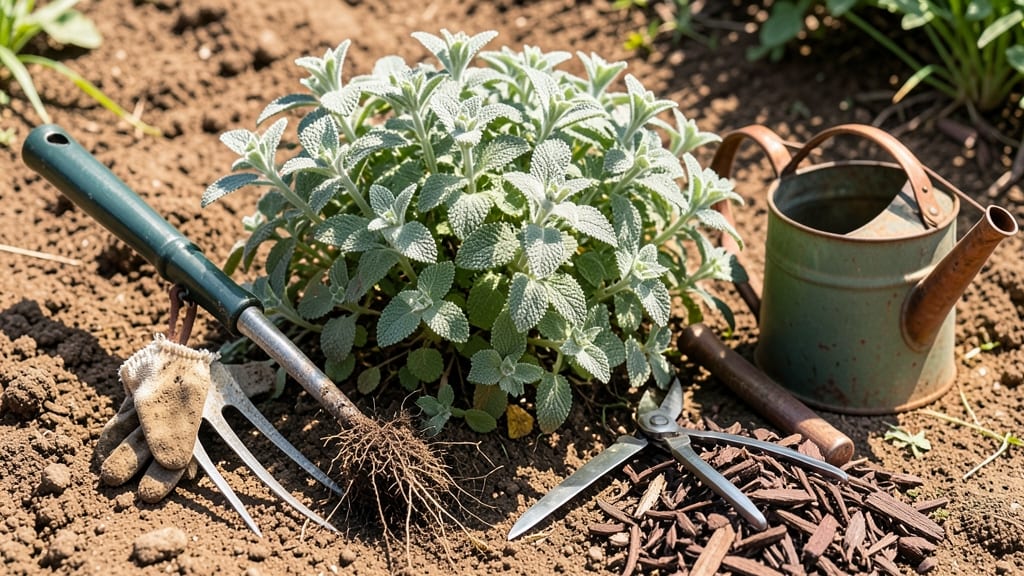
Dividing catmint every 3-4 years keeps it blooming like crazy. 🌿 I’ve split my clumps in early spring or fall, and the results—vibrant purple spikes, lush foliage, and plants that spread without crowding—are worth the effort.
The key is timing, tools, and knowing how to handle those tough stems without damaging the roots.
You’ll need sharp pruners, a garden fork, and gloves (catmint is tough but can scratch). Dig when the soil is moist but not soggy, and space divisions 18-24 inches apart for airflow.
Amend the soil with compost—catmint thrives in well-draining beds but hates soggy roots. The first few weeks after dividing are critical for root establishment.
After splitting, water deeply once a week for the first month, then taper off as new growth appears. Prune back any leggy stems by one-third to encourage bushier, more prolific blooms.
Within weeks, you’ll see fresh green shoots pushing through, and by summer, those signature lavender-blue flowers will return in full force.
Common mistakes? Overcrowding new divisions too soon or skipping the soil prep. I’ve learned the hard way—rushed planting leads to weak stems and fewer blooms. But when done right, dividing catmint gives you free plants for borders, containers, or gifts, plus a rejuvenated mother plant that blooms harder than ever.
📚 In This Guide
- What you need
- Instructions
- Tips and common mistakes
- Wrapping up and next steps
What you need
- ● Healthy, mature catmint plant (at least 2-3 years old, with a well-established clump—aim for 3+ feet in diameter for easier division).
- ● Sharp garden fork or digging spade (a bypass pruner or clean, sterilized knife for trimming roots if needed).
- ● Garden gloves (to protect your hands from thorns and dirt—opt for durable, breathable fabric).
- ● Watering can or hose with a gentle spray nozzle (for pre- and post-division hydration).
- ● Compost or well-aged manure (a 5-gallon bucket’s worth to enrich planting holes).
- ○ Mulch (optional but recommended) (shredded bark, straw, or pine needles to retain moisture and suppress weeds).
- ● Pruning shears (for trimming leggy stems post-division).
- ● Planting hole marker or stakes (to label new divisions if replanting in the same area).
- ○ Rooting hormone (optional) (speeds up establishment for cuttings if you’re propagating separately).
- ● Wheelbarrow or bucket (for hauling soil, compost, or divided sections).
- ● Sterilizing solution (like 1 part bleach to 9 parts water) to clean tools and prevent disease spread.
Step-by-Step instructions for dividing catmint plants
Here's how I split established catmint clumps to keep them blooming vigorously for years.
🌱 Step 1: Choose the Right Time and Prepare Tools
Divide catmint in early spring or early fall when the plant is actively growing but not flowering. This timing gives the new divisions enough time to establish roots before summer heat or winter dormancy. Gather your tools: a sharp spade or garden knife, gloves (catmint can be prickly), and a bucket of water for immediate hydration.
Work on a mild, overcast day to reduce stress on the plant. If you must divide in hot weather, do it in the early morning or late evening when temperatures are cooler. The goal is to minimize shock—catmint is tough, but it still appreciates gentle handling.
🪴 Step 2: Dig Up the Entire Clump Carefully
Use your spade to dig around the outer edge of the clump, cutting 1-2 inches deep to loosen the roots. Lift the entire plant out of the ground, shaking off excess soil to reveal the root structure. You'll see distinct sections with their own root balls and shoots—this is where you'll make your cuts.
If the clump is large, I often divide it into 4-6 sections (depending on size), ensuring each piece has 3-5 stems and a good portion of roots. Avoid pulling or tearing roots—clean cuts with your spade or knife promote faster regrowth. Real talk: If a section looks weak, it's better to discard it than force it to survive.
✂️ Step 3: Separate the Clump Into Healthy Divisions
Inspect each section for vigorous stems and white, firm roots. Discard any portions with mushy, brown roots or no visible growth points—these won’t recover. Use your knife to separate the clump along natural gaps between root systems, making sure each division has at least 3-4 stems for stability.
Here's the thing—catmint divisions can be surprisingly small and still thrive. Even a section with just 2-3 stems and a few roots will regrow if healthy. Trim any damaged roots with clean cuts, and rinse the divisions gently to remove old soil. This step is where patience pays off—rushing leads to weak, leggy regrowth.
💧 Step 4: Replant Divisions Immediately
Dig new holes twice as wide as the root ball but only as deep as the original planting. Amend the soil with a handful of compost to encourage root establishment. Place each division in its hole, ensuring the crown (where stems meet roots) sits just below soil level—burying too deep causes rot, while planting too high stresses the plant.
Water deeply right after planting to settle the soil and eliminate air pockets. Mulch around the base with 1-2 inches of organic mulch (like shredded bark) to retain moisture and suppress weeds. Avoid overwatering—the first few weeks are about root establishment, not saturation. You'll know it's working when new growth appears within 2-3 weeks.
☀️ Step 5: Provide Post-Division Care
Keep newly planted divisions in partial shade for the first week or two to reduce stress. Gradually reintroduce them to full sun over the next 10 days. Water every 2-3 days until the soil is evenly moist but not soggy—catmint hates wet feet but needs consistent moisture to root.
Fertilize lightly with a balanced, slow-release fertilizer (like 10-10-10) 4-6 weeks after replanting to support regrowth. Avoid high-nitrogen feeds—they encourage leafy growth at the expense of flowers. By mid-summer, your divisions should be blooming as vigorously as the original plant, proving the split was worth the effort.
Tips & tricks for perfect catmint division
These pro-level insights will help you avoid common pitfalls and maximize your catmint's potential after dividing.
Timing is Everything: The early spring or early fall windows are non-negotiable for catmint division. In spring, you're giving roots time to establish before summer's heat stress, while fall divisions benefit from cooler temperatures and natural root growth before winter dormancy. I've learned this the hard way—dividing in summer heat leads to transplant shock and poor recovery rates. If you must work in summer, stick to those early morning or late evening slots when temperatures dip below 75°F.
Root Health is Non-Negotiable: When inspecting divisions in Step 3, look for white, firm roots that snap cleanly when bent—not mushy or brown. I once kept a division with some questionable roots, and it struggled for months before finally dying back. Healthy roots should feel crisp like celery stalks. If you're unsure, make the cut—better to have fewer strong divisions than many weak ones. Rinse your divisions gently after trimming to remove old soil, which can harbor diseases that stress newly transplanted plants.
Crown Placement Matters: In Step 4, positioning the crown just below soil level is critical—this prevents rot from being buried too deep while ensuring stability without being planted too high. I use a simple trick: after placing the division in the hole, I press the soil gently around it until the crown is barely covered, then check by looking for the transition point between stems and roots. This visual cue ensures perfect placement every time. Too high, and the plant will struggle; too low, and you risk crown rot.
Post-Division Care Prevents Failure: The first week or two of partial shade is crucial for stress recovery. I've seen divisions wilt dramatically when exposed to full sun too soon—it's like giving a sunburn to a plant that's already been through major surgery. After that initial period, gradually reintroduce full sun over 10 days to harden them off. Watering every 2-3 days maintains consistent moisture without waterlogging, which catmint absolutely hates. The goal is to mimic natural rainfall patterns rather than creating soggy conditions.
Pro Tips for Divide Catmint Plant
- These pro-level insights will help you avoid common pitfalls and maximize your catmint's potential after dividing.
- Timing is Everything: The early spring or early fall windows are non-negotiable for catmint division. In spring, you'...
- Root Health is Non-Negotiable: When inspecting divisions in Step 3, look for white, firm roots that snap cleanly when...
Frequently asked questions
Got questions about dividing your catmint? You’re not alone!
Here are answers to the most common concerns—from timing to troubleshooting—to keep your plants thriving and blooming like never before.
When is the best time to divide catmint?
Divide catmint in early spring or fall when the soil is workable but not frozen. Avoid dividing in summer heat or winter frost, as stress can weaken the plant. Early spring gives roots time to establish before blooming season!
How often should I divide my catmint?
Divide catmint every 2–3 years to prevent overcrowding and maintain vigor. Overgrown clumps may flower less and attract pests. If your plant looks leggy or blooms sparsely, it’s time to split!
Can I divide catmint in pots instead of the ground?
Yes! Container-grown catmint can be divided similarly, but choose pots with drainage holes. Repot in fresh soil after splitting, and water thoroughly. Just ensure the pot is large enough (at least 12 inches deep) to accommodate the divided sections.
What do I do if my divided catmint isn’t growing after replanting?
Check for root rot or drought stress. Ensure the soil stays moist but not soggy for the first 2 weeks post-division. If leaves wilt, trim damaged foliage and mulch to retain moisture. Patience is key—new growth may take 3–4 weeks!
Will dividing catmint reduce next year’s flowers?
Not if done right! Dividing stimulates fresh growth and often increases blooms. Just avoid heavy pruning right after division—let the plant focus on root recovery. With proper care, you’ll see even more vibrant flowers the following season!
Wrapping up and next steps
Dividing your catmint plants is a rewarding way to boost blooms, rejuvenate growth, and share this hardy beauty with fellow gardeners!
By following the clump-splitting method—timing your divide in early spring, using sharp tools, and giving roots room to breathe—you’ll unlock a low-maintenance way to keep your catmint thriving for years.
Whether you’re tackling a mature clump or a new transplant, this simple process pays off with vibrant, long-lasting flowers and healthier plants.
Ready to transform your garden? Grab your gloves, find that perfect sunny spot, and get dividing! Need a refresher? Revisit our FAQs or materials