
Watering
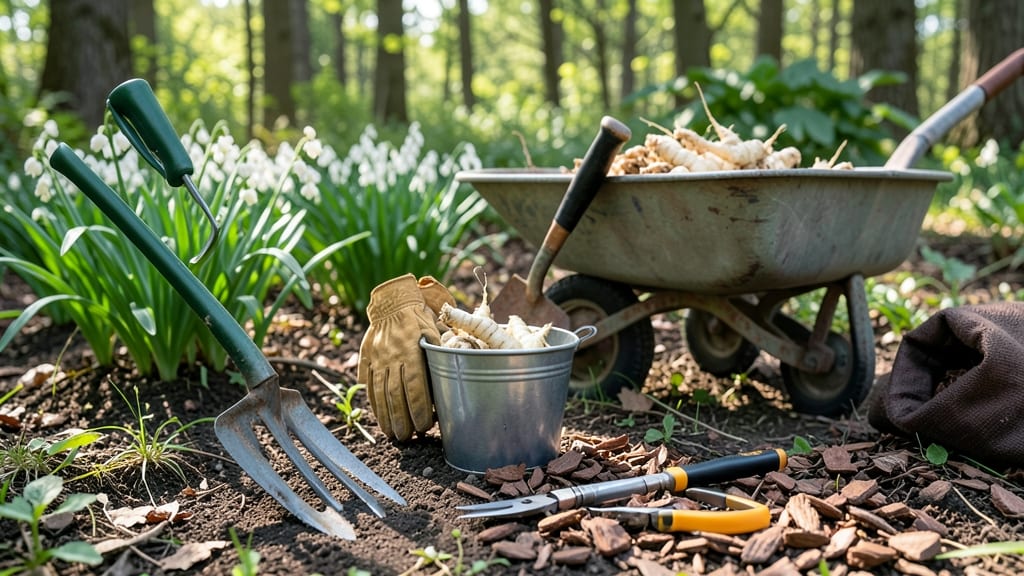
Lily of the valley thrives when gently moved—timing and technique make all the difference. 🌿 The best time to dig these delicate rhizomes is after blooming but before they go dormant in early fall, when they're strong enough to handle transplanting without shock.
You'll need a sharp spade, a bucket of water, and a soft cloth to protect the roots. The key is working slowly—lily of the valley spreads through long, fragile rhizomes that break easily.
Dig in a circle around the plant, keeping the soil attached to the roots as much as possible. Once lifted, rinse off the soil to inspect for damage. Trim any broken or rotting sections with clean scissors, then soak the healthy rhizomes in water for 20 minutes before replanting.
This gives them a drink and helps them recover from the stress of moving. For replanting, choose a shady spot with well-draining soil and space the rhizomes 6 inches apart. Water thoroughly after planting, and avoid disturbing them for at least a month.
With gentle care, your lily of the valley will bounce back stronger than ever.
📚 In This Guide
- What you need
- Instructions
- Tips and common mistakes
- Wrapping up and next steps
What you need
- ● Garden fork or digging fork – A heavy-duty, 4-6 tine fork with a 16-20 inch handle for easy leverage. Pro tip: A border fork works best for delicate roots!
- ● Sharp spade or transplant spade – A 6-8 inch wide blade to cleanly slice through roots and soil.
- ● Garden gloves – Heavy-duty, chemical-resistant (to protect against sap and soil-borne irritants).
- ● Watering can or hose with a gentle spray nozzle – For pre-dig hydration (1-2 gallons per plant, 1-2 days before digging).
- ● Buckets or containers – 2-3 large, sturdy buckets (5+ gallon size) to transport clumps and soil.
- ● Pruning shears or sharp scissors – For trimming overgrown foliage post-extraction.
- ● Mulch or compost – 2-3 inches of organic mulch (e.g., shredded bark or compost) for the new planting site.
- ○ Anti-transpirant gel (optional but helpful) – Spray-on gel to reduce stress on transplanted plants.
- ● Root stimulator powder/gel – Like Rootone or Mycorrhizal fungi to boost regrowth.
- ● Soil test kit – To check pH and nutrient levels of the new planting area (ideal: pH 6.0-7.0).
- ● Plant labels or markers – To track varieties if dividing multiple clumps.
- ● Wheelbarrow – For hauling heavy soil or large clumps.
Step-by-Step instructions for digging up lily of the valley
This method preserves root health and ensures your clumps thrive in their new spot.
🪴 Step 1: Choose the Right Time and Tools
Dig up lily of the valley in early fall or late winter when the plant is dormant. This gives roots time to recover before active growth resumes. I use a sharp garden fork or hand trowel—never a dull spade, which tears delicate roots. Gather a bucket of water and pruning shears too. The bucket keeps roots moist during transport, and shears help trim any damaged foliage.
Work on a cool, overcast day to reduce stress on the plant. If you must dig on a sunny day, move the clump to shade immediately after lifting. Lily of the valley roots are shallow but spread aggressively—you’ll see why once you start digging. The key is patience; rushing leads to broken rhizomes that won’t recover.
✂️ Step 2: Loosen and Lift the Clump Gently
Use your fork to pierce the soil around the clump in a circle about 6 inches from the base. Push down gently but firmly—you’re not trying to cut roots, just separate the soil. Work your way around until the entire clump feels loose. For stubborn soil, wiggle the fork back and forth to break up the earth without damaging the roots.
Once the soil is loosened, grip the base of the clump with both hands and lift straight up. If the clump resists, don’t force it—tap the fork deeper or widen your circle. Healthy roots will pull free with minimal effort. If you hear a snap, you’ve torn a rhizome. Trim the damaged section with your pruning shears, leaving a clean cut. This prevents rot and allows the remaining root to heal.
💧 Step 3: Divide and Prepare for Replanting
Place the clump in your bucket of water to keep roots hydrated. Use your hands or a clean knife to separate the clump into smaller sections, ensuring each piece has 3-5 healthy shoots and a portion of the root system. Avoid pulling—this can strip roots. Instead, gently twist or cut through the connecting rhizomes. The more shoots per division, the faster it establishes in its new home.
Inspect each division for soft, mushy roots or blackened sections—these are signs of rot. Trim these away immediately with your shears. Healthy roots should be firm and white or tan. If you find any, soak the division in a 1:10 hydrogen peroxide solution (1 part 3% peroxide to 10 parts water) for 10 minutes to disinfect. This step prevents disease from spreading to your new planting site.
☀️ Step 4: Acclimate and Replant for Success
Before replanting, let the divisions sit in partial shade for 2-3 hours to reduce transplant shock. This mimics natural conditions and prevents sudden stress. Water the new planting hole deeply before placing the division inside. The hole should be the same depth as the original planting spot—lily of the valley roots don’t like being buried too deep or left exposed.
Fill the hole with soil, pressing gently to eliminate air pockets. Water again until the soil is evenly moist but not soggy. Mulch the area with 2-3 inches of organic mulch (like shredded bark) to retain moisture and suppress weeds. Avoid heavy mulch piles against the stems—this can cause rot. In 2-3 weeks, you’ll see new growth, signaling the plant has taken root.
⏰ Step 5: Monitor and Care for Recovery
Keep the newly planted divisions consistently moist for the first 2 weeks. Water deeply every 2-3 days if the weather is dry, but avoid soggy soil. You’ll know moisture is right when the top 1 inch of soil feels damp but not dripping. Overwatering is the fastest way to kill a freshly transplanted lily of the valley—roots need air too.
Fertilize lightly 4-6 weeks after replanting with a balanced, slow-release fertilizer (like 10-10-10). Too much fertilizer too soon stresses the plant. Watch for yellowing leaves—this usually means the plant needs more water or is struggling to adjust. If you see wilting despite moist soil, the roots may have dried out during transport. Trim any damaged foliage to redirect the plant’s energy to root growth.
Tips & tricks for healthy lily of the valley transplants
Here's what nobody tells you about keeping your lily of the valley thriving after digging—these small details make all the difference.
The Right Time Matters: The instructions mention early fall or late winter, but I've found that mid-fall (around late October) is the sweet spot in many climates. This gives roots a full dormant season to recover before spring growth. If you're in a warmer zone, late winter works better—just avoid spring when new shoots are already pushing through the soil.
Tool Prep is Critical: Before you even start digging, give your garden fork and pruning shears a quick disinfecting wipe with rubbing alcohol. This prevents introducing pathogens to your healthy plants. I also like to sharpen my fork blades slightly with a file—dull tools make the job harder and risk damaging roots. The 6-inch circle from Step 2 works perfectly, but if your clump is extra large, widen it to 8 inches for easier lifting.
Division Strategy: When separating your clump in Step 3, aim for divisions with at least 4 shoots—this gives each new plant a better chance to establish. I've learned the hard way that smaller divisions (with just 2-3 shoots) often fail to thrive. Also, don't be afraid to make the cuts a bit thicker than you think—lily of the valley roots are surprisingly resilient. Just remember to keep that 1:10 hydrogen peroxide solution ready for any questionable roots.
Post-Planting Recovery: The 2-3 week window for new growth in Step 4 can feel like forever, but resist the urge to check too often. I've seen gardeners pull up newly planted divisions to "see how they're doing" only to kill them. Instead, mark the spot with a small stake and let nature do its work. If you're worried, gently brush back the mulch after 10 days to check for signs of sprouting without disturbing the roots.
Pro Tips for Dig Up Lily Of The Valley
- Here's what nobody tells you about keeping your lily of the valley thriving after digging—these small details make al...
- The Right Time Matters: The instructions mention early fall or late winter, but I've found that mid-fall (around late...
- Tool Prep is Critical: Before you even start digging, give your garden fork and pruning shears a quick disinfecting w...
Frequently asked questions
Got questions about digging up lily of the valley? You’re not alone!
Here are answers to the most common concerns—from timing to troubleshooting—so you can handle the process like a pro.
When is the best time to dig up lily of the valley?
The ideal window is early spring (March–April) or early fall (September–October), when the plant is dormant but roots are still active. Avoid peak summer heat or winter frost—these stress the plant and reduce transplant success. If you must dig in summer, do it on a cool, cloudy day and water thoroughly afterward.
How do I know if my lily of the valley is ready to be dug up?
Look for these signs: clumps are overcrowded (3+ years old), leaves are yellowing or dying back, or the plant is struggling in its current spot. Healthy roots should be white or light tan and firm, not mushy or rotting. If the foliage is still lush, wait another season—transplanting stressed plants often fails.
Can I divide and replant lily of the valley in the same garden?
Lily of the valley spreads easily, so dividing it helps rejuvenate the plant and fill bare spots. Just ensure each section has at least 3–5 healthy buds (the small bulbs at the base of the leaves). Space divisions 12–18 inches apart in partial shade with well-draining soil. Avoid moving them to full sun—they’ll struggle!
What should I do if the roots look damaged or rotting when I dig them up?
Don’t panic! Trim away soft, black, or slimy roots with clean, sharp shears, then dust the cuts with cinnamon or fungicide to prevent rot. Soak the clump in a weak hydrogen peroxide solution (1 part peroxide to 3 parts water) for 10 minutes to disinfect. If most roots are healthy, the plant will recover—just replant in fresh soil and keep it moist (not soggy) for 2 weeks.
Are there alternatives if I can’t dig up the entire clump?
Yes! Try these low-stress options: Lift and separate small sections (even a single bud can root), or layer the stems—bend a healthy stem to the ground, weigh it down with a rock, and cover the tip with soil. Keep it moist until roots form (4–6 weeks). For stubborn clumps, dig a trench around the outer edges, gently pry up the soil, and slide the plant out intact.
Pro tip: Label your divisions! Lily of the valley can look like other toxic plants (like Veratrum), so mark new plantings to avoid accidental ingestion by pets or kids.
Wrapping up and next steps
Digging up lily of the valley doesn’t have to be stressful—with the right tools, patience, and care, you can successfully transplant these delicate beauties while keeping them thriving.
Now that you’re armed with the know-how, grab your gloves and give your lily of the valley a fresh start! 🌱 Ready for more gardening tips? Check out our guide on post-transplant care to ensure your plants stay happy and healthy.