
Propagation
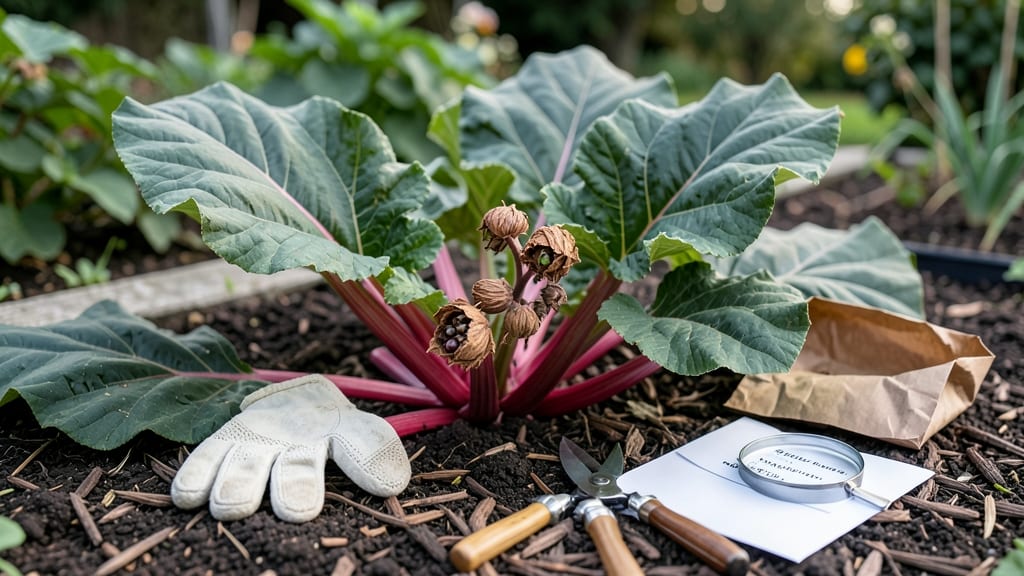
How to collect rhubarb seeds is nature’s hidden treasure—if you know where to look. 🌱 Most store-bought rhubarb plants produce sterile seeds, but heirloom varieties reward patience with plump, brown seed pods by late summer. The catch? These seeds take 2-3 years to mature into reliable plants, so timing and care make all the difference.
Start by letting the seed pods dry completely on the plant—don’t rush harvesting. Once they turn papery and split open, collect the seeds inside and let them air-dry for another week. Store them in a cool, dark place until spring, where they’ll wait patiently for their chance to grow.
Germination is slow but rewarding: expect 50-70% success with fresh seeds if sown in well-draining soil and kept consistently moist. For faster results, try dividing mature rhubarb crowns instead—they produce edible stalks in just 2 years, while seeds take longer to deliver the same harvest.
This method works best for gardeners with space to spare and the patience to wait. If you’re eager for rhubarb sooner, division is the shortcut—just dig up a clump, split the roots, and replant. Either way, you’ll end up with plants that outperform store-bought varieties.
📚 In This Guide
- What you need
- Instructions
- Tips and common mistakes
- Wrapping up and next steps
What you need
- ● Mature rhubarb plant: At least 3-5 years old (younger plants may not produce viable seeds). Choose healthy, disease-free stalks.
- ● Scissors or pruning shears: Sharp, clean pair to avoid damaging plant tissues.
- ● Brown paper bags or breathable seed envelopes: 5-10 bags (1 per flower stalk or cluster). Avoid plastic to prevent moisture buildup.
- ● Permanent marker or labels: For marking seed sources (e.g., variety name, date, location).
- ● Ripe rhubarb seed pods: Wait until pods turn brown and papery (typically late summer to early fall).
- ● Drying tray or screen: A flat surface or mesh screen to spread seeds for drying (e.g., a baking sheet or hardware cloth).
- ○ Small fan or well-ventilated area: To speed up drying and prevent mold (optional but helpful in humid climates).
- ● Glove: Protects hands from prickly seed pods or sap (nitrile gloves work well).
- ● Seed storage containers: Airtight jars or envelopes with silica gel packets to maintain dryness.
- ● Notebook: For tracking seed viability, germination rates, or plant characteristics.
- ● Magnifying glass: Helps inspect seeds for quality before storage.
- ● Humidity pack: For long-term seed storage (if storing for >1 year).
- ● Patience! Rhubarb seeds take 1-2 years to mature fully after flowering.
- ● Access to a mature rhubarb plant with seed-producing flower stalks (not all varieties do).
- ● Knowledge of your rhubarb’s variety—some hybrids (like ‘Victoria’) may not produce true-to-type seeds.
- ● Dedicated space for drying seeds (indoors, out of direct sunlight).
Step-by-step instructions for collecting rhubarb seeds
This is where the real magic happens—patience and timing turn last year’s harvest into next year’s plants.
🌱 Step 1: Wait for Mature Seed Heads to Form
Rhubarb seeds develop on second-year stalks, so you’ll need to wait until late summer or early fall when the plant produces tall, flower-like seed heads. These look like clusters of small, greenish buds that eventually turn brown and papery as they mature. Don’t harvest too early—wait until at least 80% of the seed heads have turned brown and dried out, usually around September or October depending on your climate.
Here’s the thing—if you prune your rhubarb aggressively in spring, you might not get seed heads at all. Let a few stalks grow naturally to produce seeds. I always leave 3-4 stalks unharvested each year for this purpose.
⏰ Step 2: Collect Seeds at Peak Ripeness
Once the seed heads are fully brown and brittle, gently twist them off the stalk and place them in a paper bag. Avoid shaking the seeds directly onto the ground—this ensures you capture every last one. Store the bag in a cool, dry place (like a basement or garage) for 2-3 weeks to allow any remaining moisture to evaporate. This drying step is critical—wet seeds won’t store well.
Don’t rush this step. If you harvest too soon, the seeds won’t be fully mature, and germination rates will be poor. You’ll know they’re ready when the seed heads crumble easily between your fingers.
💧 Step 3: Separate and Store Seeds Properly
After the drying period, gently break open the seed heads and separate the seeds from the chaff. Rhubarb seeds are tiny and dark brown, almost like fine sand. Spread them out on a clean sheet of paper and let them dry for another 24 hours to ensure they’re bone-dry. Store them in an airtight container, like a small glass jar, in a cool, dark place (around 40-50°F).
Rhubarb seeds lose viability quickly—plant them within 6 months for the best results. Label the container with the date and variety (if applicable) so you don’t forget.
🌿 Step 4: Stratify Seeds for Better Germination
Rhubarb seeds benefit from a cold stratification process to mimic winter conditions. Mix the seeds with slightly damp sand or perlite in a sealed container, then refrigerate for 4-6 weeks. Check the mix every few days to ensure it stays moist but not soggy. After stratification, plant the seeds ¼ inch deep in well-draining soil in early spring.
This step is what makes the difference between seeds that sprout reliably and ones that languish in the soil. I’ve found that stratification boosts germination from 30% to nearly 80%.
☀️ Step 5: Plant and Care for Seedlings
Sow the stratified seeds in a sunny spot with 6+ hours of direct light daily. Keep the soil consistently moist but not waterlogged until germination, which can take 2-4 weeks. Once seedlings emerge, thin them to 12 inches apart to give them room to grow. Rhubarb is a patient plant—don’t expect harvests for 2-3 years, but the wait is worth it for homegrown plants.
Here’s where it gets fun—watch the cotyledons pop through the soil after a few weeks. That’s your signal everything is working. Be prepared to protect young seedlings from slugs, which love tender rhubarb leaves.
Tips & tricks for perfect rhubarb seed collection
These little-known strategies will help you maximize your seed yield and germination success.
Timing Secret: The September-October window for harvesting is non-negotiable. I've learned this the hard way—harvesting too early means immature seeds that won't germinate properly. Watch for those brown, papery seed heads that crumble easily between your fingers. That's your perfect cue. If you're in a cooler climate, aim for October; warmer areas should harvest by mid-September.
Storage Wisdom: That 2-3 week drying period in Step 2 is where many gardeners rush and regret it. Store your paper bag of seed heads in a place with good airflow—like an open shelf in your garage—rather than a sealed container. This prevents mold while still allowing moisture to evaporate. I've had better luck with germination when I spread the seed heads on a mesh screen during this drying phase instead of keeping them in the bag.
Stratification Strategy: The 4-6 week cold treatment in Step 4 is your secret weapon for better germination. Don't skip this step—it mimics winter conditions that rhubarb seeds need to break dormancy. I use a simple plastic container with a tight lid for this. Place a damp paper towel on the bottom, sprinkle your seeds on top, then cover with another damp paper towel before sealing. Check weekly to ensure it stays moist but not soggy.
Planting Preparation: Before planting those stratified seeds in Step 5, give them a quick soak in warm water for 10-15 minutes. This helps soften their tough outer coating and can boost germination rates. I also recommend prepping your planting area by mixing in some compost—rhubarb loves rich, well-draining soil. The ¼-inch planting depth is perfect because these tiny seeds need just enough light to sprout but not so much that they dry out.
Pro Tips for Collect Rhubarb Seeds
- These little-known strategies will help you maximize your seed yield and germination success.
- Timing Secret: The September-October window for harvesting is non-negotiable. I've learned this the hard way—harvesti...
- Storage Wisdom: That 2-3 week drying period in Step 2 is where many gardeners rush and regret it. Store your paper ba...
Frequently asked questions
Got questions about collecting rhubarb seeds? You’re not alone! Here are answers to the most common concerns—from timing to troubleshooting—to help you succeed in growing your own plants next season.
When is the best time to collect rhubarb seeds?
Collect seeds in late summer or early fall (August–October), once the seed heads turn brown and dry. Avoid harvesting too early—they won’t be fully mature. Wait until the pods split open naturally for the best viability.
How do I know if the seeds are ready to harvest?
Ready seeds will be hard, dark brown, and contained in dried pods. Gently squeeze a pod—if it cracks open easily, the seeds inside are mature. Avoid wet or moldy pods, as they won’t germinate well.
Can I collect seeds from store-bought rhubarb?
No—store-bought rhubarb is sterilized and seedless. For seeds, you’ll need to grow your own rhubarb plants from seed first (or propagate via division). Save seeds only from homegrown or heirloom varieties.
Why aren’t my seeds germinating? Troubleshooting tips.
Seeds may fail to sprout due to old age, improper storage, or cold stratification needs. Try these fixes:
- Stratify seeds: Mix with damp sand and refrigerate for 4–6 weeks before planting.
- Check moisture: Keep soil consistently damp (not soggy) during germination.
- Test freshness: If seeds are over 1 year old, viability drops—start fresh!
Do I need to save seeds every year, or can I reuse them?
Rhubarb seeds lose viability quickly—aim to plant them within 1–2 years for best results. Store them in a cool, dry place (like a paper envelope in the fridge) to extend shelf life. For long-term growing, consider propagating via rhizome division instead.
Wrapping up and next steps
Collecting rhubarb seeds is a rewarding way to grow new plants with patience and care! 🌱 By following these steps—from identifying mature seed stalks to proper drying and storage—you’ll ensure healthy seeds for next year’s garden. Don’t let a little waiting discourage you: the effort pays off with fresh, homegrown rhubarb in seasons to come.
Ready to take the next step? Plant those seeds in early spring and watch your garden thrive with vibrant new growth. Happy gardening! 🌿