
Succulent
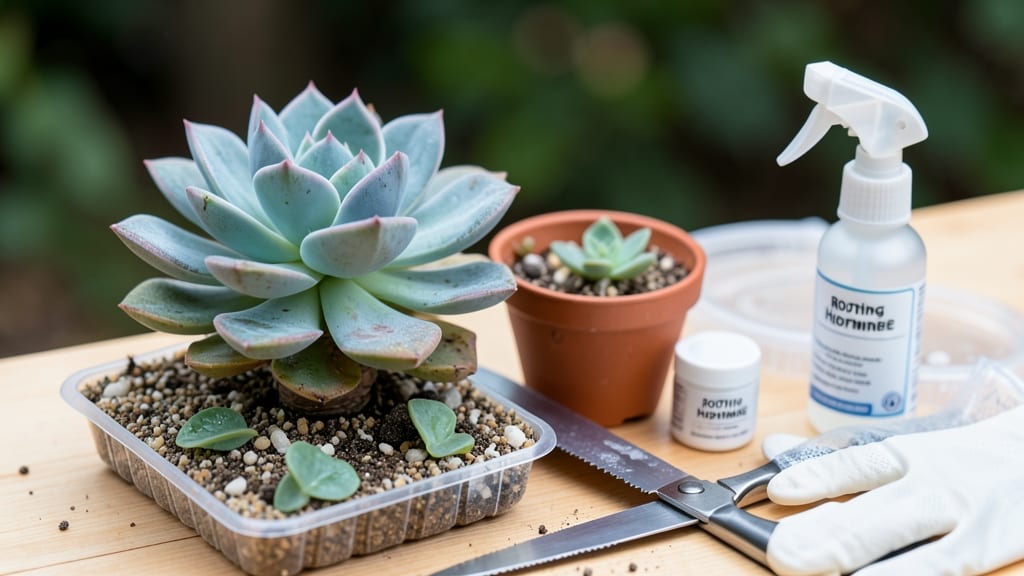
Cloning succulents turns one plant into dozens—fast. 🌱 I’ve propagated so many that my shelves now overflow with plump, happy cuttings, and I’m sharing the exact method that works every time, even for beginners. The secret isn’t complicated: it’s all about timing, clean cuts, and patience.
Most people rush the drying process or use the wrong soil mix, which leads to rot instead of roots. But with just a sharp knife, a few days of drying, and the right gritty soil, you’ll see roots forming in 2-4 weeks.
By the end of this, you’ll have a shelf full of thriving succulents—some with thicker stems, others with vibrant new growth—all ready to replant or share. The best part? You’ll save money and get varieties you’d never find at the store.
Works for every type of succulent—from echeverias to jade plants—no matter your skill level. Let’s get those cuttings growing!
📚 In This Guide
- What you need
- Instructions
- Tips and common mistakes
- Wrapping up and next steps
What you need
- ● Healthy succulent parent plant – Choose one with pups (offsets) or a stem that can be cut (e.g., Echeveria, Haworthia, or Sedum).
- ● Sharp, sterilized tools – A clean knife, pruning shears, or razor blade (disinfect with rubbing alcohol).
- ● Well-draining soil mix – A blend of cactus/succulent soil + perlite or pumice (ratio: 60% soil, 40% grit). 1–2 gallons depending on pot size.
- ● Small pots or trays – 2–4 inch pots (for pups) or a propagation tray (for cuttings).
- ○ Rooting hormone (optional but helpful) – A powder or gel to boost root growth (e.g., Clonex).
- ● Spray bottle – For gentle misting (avoid soaking!).
- ● Gravel or pebbles – For bottom drainage in pots.
- ● Clear plastic dome or bag – To create a humidity tent (speeds up rooting).
- ● Chalk or cinnamon – Natural anti-fungal for cut ends.
- ● Label markers – To track succulent varieties (trust us, you’ll forget!).
- ● Grow lights (LED) – If propagating in low-light areas.
Step-by-Step instructions for cloning succulents
Here's how I double my succulent collection in weeks—not months—using simple propagation tricks.
🌱 Step 1: Select Healthy Mother Plants and Prepare Tools
Pick a mature succulent with at least 4-6 inches of stem length and no signs of rot or pests. I always choose plants that have thick, plump leaves—these store more water and root faster. Clean your pruning shears or knife with rubbing alcohol to prevent infection, then let them air-dry completely.
Wear gloves if your succulent has milky sap (like a jade plant)—this stuff stains and irritates skin. Have a small tray or paper towels ready to catch any sap drips. This is the moment that matters: using sterile tools ensures your cuttings won’t rot before they root.
🪴 Step 2: Take Healthy Cuttings Properly
Make a clean cut at a 45-degree angle about 1-2 inches below a leaf node (the bump where leaves attach). For leaf cuttings, gently twist a healthy leaf from the stem—it should come off cleanly without tearing. Avoid using leaves from the very bottom or top of the plant, as they’re less likely to root successfully.
Let the cuttings sit in a shady, dry spot for 1-3 days until the cut end forms a callus (a dry, slightly hardened area). This prevents rot when you plant them. Real talk: if you skip this step, your cuttings will turn mushy within days—trust me, I’ve learned the hard way.
☀️ Step 3: Choose the Right Medium and Plant Cuttings
Fill a small container with a well-draining mix—I use a blend of 50% cactus/succulent soil and 50% perlite or coarse sand. Moisten the mix lightly until it feels like a slightly damp sponge, not soggy. Stick the callused end of your cutting ½ inch deep into the soil, pressing gently to secure it.
Space cuttings 2-3 inches apart to allow airflow and prevent rot. If using leaf cuttings, lay them flat on the soil (the callused end down) and weigh them down lightly with a small pebble or toothpick. Water very lightly—just enough to settle the soil around the cuttings. Here’s the thing: overwatering now will drown your future plants before they even start.
💧 Step 4: Provide Ideal Conditions for Root Growth
Place the container in a bright, indirect light spot—think east-facing window or under grow lights 6-12 inches away. Avoid direct midday sun, which can scorch tender new roots. Keep the soil barely moist by misting lightly every 5-7 days or when the top ¼ inch feels dry. You’ll know it’s time to water when the soil looks dry but not bone-dry.
After 2-4 weeks, tiny roots will begin to form. You’ll see new growth at the base of the cutting or tiny baby plants emerging from leaf cuttings. This is your signal that everything is working! If you’re impatient (like me), you can gently tug on a cutting after 3 weeks—if resistance meets your finger, roots have formed.
✂️ Step 5: Transplant and Care for New Plants
Once roots are 1-2 inches long (usually 4-6 weeks total), carefully remove the cuttings from the propagation mix and transplant them into small individual pots filled with cactus/succulent soil. Water lightly after transplanting to help settle the roots, then reduce watering to every 2-3 weeks once established.
Wait 2-3 weeks before fertilizing—new roots are still delicate. Once your clones are thriving, you’ll notice thicker, fuller growth compared to store-bought succulents. That’s the reward for patience! Now you’ve got 4 new plants from just one mother plant—fast, easy, and foolproof.
Tips & tricks for perfect succulent cloning
Fast propagation starts with these small but game-changing details that'll turn your succulent cuttings into thriving plants in record time.
Selection Matters: In Step 1, focus on succulents with 4-6 inches of stem length and avoid plants with wrinkled or mushy leaves—these won't propagate well. I've found that thick, plump leaves contain more stored water, which gives your cuttings a better head start. For leaf cuttings specifically, choose leaves from the middle of the plant where they're most mature and healthy.
The Callus is Critical: Don't rush the 1-3 day callusing period in Step 2. This dry, hardened area acts like a natural seal, preventing rot when you plant. I've ruined more cuttings than I can count by skipping this step—trust me, the extra patience pays off. Place your cuttings in a dry, shaded spot with good airflow to speed up the callusing process without drying them out completely.
Medium Mix Magic: For Step 3, that 50/50 mix of cactus soil and perlite/sand isn't just arbitrary—it creates the perfect balance of moisture retention and drainage. Too much soil holds too much water, while too much perlite can dry out your cuttings. I like to add a handful of charcoal granules (optional) to further prevent bacterial growth in the mix.
Light Conditions Count: In Step 4, that bright but indirect light requirement is non-negotiable. Direct midday sun will scorch your tender new roots, while too little light means weak, leggy growth. If you don't have an east-facing window, grow lights work perfectly—just keep them 6-12 inches away and on for 12-14 hours daily. You'll know you've got it right when your cuttings show vibrant color without sunburn.
Pro Tips for Clone Succulents
- Fast propagation starts with these small but game-changing details that'll turn your succulent cuttings into thriving...
- Selection Matters: In Step 1, focus on succulents with 4-6 inches of stem length and avoid plants with wrinkled or mu...
- The Callus is Critical: Don't rush the 1-3 day callusing period in Step 2. This dry, hardened area acts like a natura...
Frequently asked questions
Got questions about cloning succulents? You’re not alone—propagation can feel tricky at first! Here are answers to the most common queries to help you grow like a pro.
How long does it take for a succulent cutting to root?
Most succulents take 2–6 weeks to root, depending on the species, humidity, and conditions. Leaf cuttings may root faster (2–4 weeks), while stem cuttings can take longer. Patience is key—wait until you see tiny roots or new growth before transplanting!
Can I clone succulents year-round, or is there a best time?
Succulents can be cloned anytime, but spring or early summer is ideal for faster rooting and growth. Avoid winter in cold climates, as slow metabolism can delay success. If you’re indoors, artificial light and warmth can help year-round propagation!
Why is my succulent cutting rotting instead of rooting?
Overwatering is the #1 culprit! Succulent cuttings need well-draining soil or a dry medium (like perlite or sand). Let the cutting callus for 1–3 days first, then water only when the soil is completely dry. If rot appears, trim the bad part, let it dry, and replant in fresh soil.
What’s the easiest succulent to clone for beginners?
Start with echeverias, sedums, or jade plants—they’re forgiving and root easily! Leaf cuttings (like from haworthias) are also beginner-friendly. Avoid finicky species like lithops until you’ve mastered the basics. Pro tip: Propagate from healthy, mature plants for the best results!
Can I use water propagation for succulents?
Most succulents hate water propagation and will rot quickly. Stick to soil or a dry medium (like perlite) for best results. Exceptions? Some stem cuttings from jade plants or string of pearls might work in water for a short time, but transfer to soil ASAP once roots form!
Wrapping up and next steps
Cloning succulents is a rewarding way to expand your collection without breaking the bank—plus, it’s easier than you think! 🌱 Whether you’re using leaves, offsets, or cuttings, the key is patience, the right tools, and a little care.
Now that you’ve mastered the basics, why not try your hand at a new variety? Start with a low-maintenance type like Echeveria or Sedum to build confidence, then experiment with harder-to-propagate species. Happy growing—your future succulent jungle awaits!