
Propagation
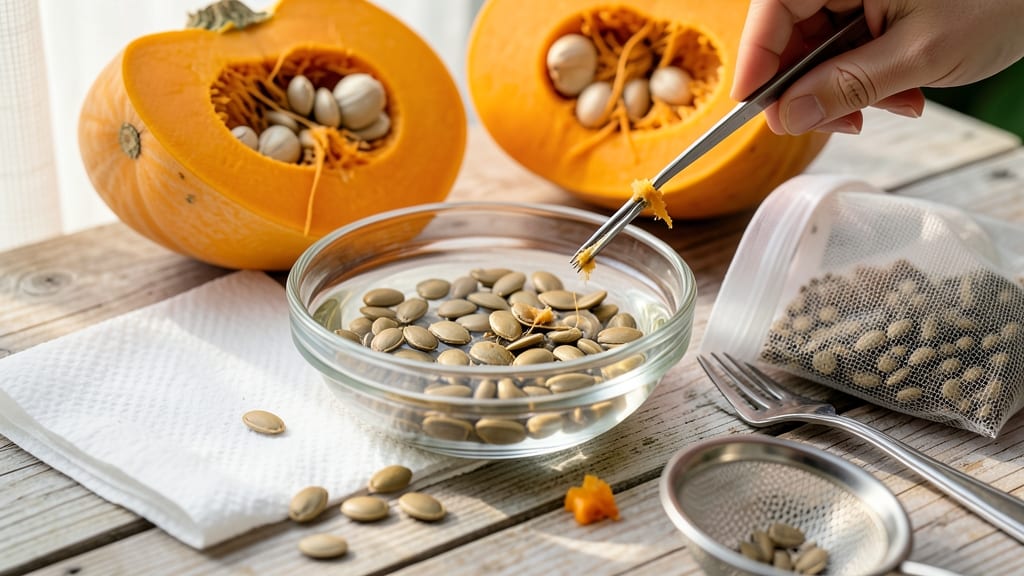
Clean pumpkin seeds for planting in just 30 minutes—no fancy tools needed. 🌱 I’ve saved hundreds of dollars by cleaning seeds from store-bought pumpkins instead of buying packets, and the process is simpler than you’d think.
The key? Removing all that stringy pulp while keeping the seeds intact and healthy for germination.
Grab a bowl of warm water, a spoon, and a paper towel—those are your only essentials. Most people make the mistake of rushing the drying process or scrubbing too hard, which can damage the seed coat.
We’ll avoid that by soaking, gently scrubbing, and letting them dry properly over 24 hours.
By the end, you’ll have plump, clean seeds ready to plant, with a germination rate that rivals store-bought varieties. The dried seeds can even be stored for up to 5 years in a cool, dark place—no need to plant them all at once.
This method works for any pumpkin variety, from small sugar pumpkins to giant carving types. Let’s get those seeds sparkling clean and ready to sprout!
📚 In This Guide
- What you need
- Instructions
- Tips and common mistakes
- Wrapping up and next steps
What you need
- ● Fresh pumpkin seeds: Harvest from a healthy, organic pumpkin (avoid store-bought if treated with preservatives). Aim for 1–2 cups (about 100–200 seeds, depending on pumpkin size).
- ● Large bowl or basin: Deep enough to fully submerge seeds (e.g., a 16–24 oz mixing bowl or a 5-gallon bucket for bulk cleaning).
- ● Water: Room-temperature or lukewarm (cold water can shock seeds). Use 4–6 cups for soaking.
- ● Colander or fine-mesh strainer: With holes small enough to trap seeds but allow water to drain (e.g., 1/4-inch mesh).
- ● Baking sheet or drying tray: Line with parchment paper or a clean towel for even drying.
- ● Paper towels or clean cloth: For gentle scrubbing and patting seeds dry.
- ○ Soft-bristle brush or toothbrush: For stubborn pulp or debris (optional but helpful!).
- ● Small bowl or container: For rinsing seeds mid-cleaning (e.g., a small glass bowl).
- ● Bleach solution (1:10 ratio): 1 tsp bleach per 1 cup water for sanitizing seeds (use sparingly and rinse thoroughly).
- ● Food-safe drying rack: Elevates seeds for faster airflow (e.g., a wire cooling rack).
- ● Air-tight container: For storing cleaned seeds until planting (e.g., a small mason jar with silica gel packets).
- ● Labeling tags: To mark seed varieties or planting dates.
Step-by-Step instructions for cleaning pumpkin seeds for planting
Here’s my foolproof method for prepping seeds that’ll sprout strong, disease-free plants every time.
🌱 Step 1: Extract and Rinse the Seeds
Cut open a mature pumpkin (or use store-bought seeds if organic) and scoop out the pulp and seeds into a bowl. The pulp contains enzymes that can inhibit germination, so we need to remove it completely. I like to use a spoon to scrape out the seeds, then transfer them to a colander for rinsing.
Hold the colander under running water and gently swirl the seeds with your fingers. You’ll feel the pulp separate—it’ll wash away while the seeds stay behind. Keep rinsing until the water runs clear. This step ensures no lingering pulp slows down germination later.
💧 Step 2: Soak to Remove Residue
Fill a bowl with lukewarm water and add the rinsed seeds. Let them soak for 12-24 hours. This softens any remaining pulp and helps separate seeds that might still be stuck together. I stir them gently every few hours to keep everything moving.
After soaking, drain the water and give the seeds another rinse in the colander. You’ll notice the water stays clear this time—it means most of the pulp is gone. This soak also helps identify any bad seeds (they’ll float or look discolored). Discard those and save the good ones for planting.
✂️ Step 3: Scrub and Dry Thoroughly
Spread the seeds on a clean towel or paper towels. Pat them dry with another towel to remove excess moisture. Now, take a soft brush (like a toothbrush) and gently scrub each seed to remove any last bits of pulp or debris. This step is critical—leftover pulp can mold and kill sprouts.
Once dry, spread the seeds in a single layer on a baking sheet. Place them in a warm, dry spot with good airflow (like a sunny windowsill or a fan-cooled area). Let them dry for 2-3 days, stirring occasionally. They’re ready when completely dry to the touch—no moisture left at all.
🪴 Step 4: Store Until Planting
Transfer the dried seeds into a paper envelope or airtight container. Label it with the pumpkin variety and date. Store in a cool, dark place (like a pantry) until you’re ready to plant. Properly stored seeds stay viable for 4-5 years, though I like to plant them fresh for the best germination.
Before planting, do a quick float test: Drop a few seeds in water. If they sink, they’re good to go. If they float, toss them—they won’t sprout. This final check ensures you’re starting with only the healthiest seeds for strong, vigorous plants.
Tips & tricks for perfectly clean pumpkin seeds
Here's what nobody tells you about getting seeds ready for planting—these little tricks make all the difference for strong, healthy sprouts.
Soaking Strategy: During that 12-24 hour soak in Step 2, place the bowl in your refrigerator instead of leaving it at room temperature. The cooler environment slows down any potential fermentation while still softening the pulp. I also add a splash of white vinegar (just 1 tablespoon) to the soaking water—it helps break down any remaining enzymes in the pulp that could inhibit germination. This extra step gives you seeds that'll sprout faster and stronger.
Visual Cues for Clean Seeds: In Step 1, when rinsing your seeds, look for the "float test" happening right away. Any seeds that float immediately during the initial rinse should be discarded—they're either hollow or damaged. For the seeds that sink, gently squeeze them between your fingers. If they feel slimy or mushy, they need more rinsing. Good seeds should feel firm and dry to the touch after proper rinsing.
Drying Secrets: When spreading seeds on a baking sheet in Step 3, don't just leave them in one spot. Every 6-8 hours, give them a gentle stir with a clean spoon. This ensures even drying and prevents any seeds from sticking together. Also, if you're in a humid climate, consider placing a small fan nearby to create gentle airflow—this can cut your drying time from 2-3 days down to just 1-2 days without compromising quality.
Storage Wisdom: For the 4-5 year storage mentioned in Step 4, add a packet of silica gel (the kind that comes with electronics) to your storage container. This helps absorb any residual moisture that could cause mold. I also recommend labeling your container with both the pumpkin variety AND the year—this helps track seed freshness. Pro tip: Store your seeds in the freezer for up to 10 years if you want maximum longevity, though germination rates may decrease slightly over time.
Pro Tips for Clean Pumpkin Seeds For Planting
- Here's what nobody tells you about getting seeds ready for planting—these little tricks make all the difference for s...
- Soaking Strategy: During that 12-24 hour soak in Step 2, place the bowl in your refrigerator instead of leaving it at...
- Visual Cues for Clean Seeds: In Step 1, when rinsing your seeds, look for the "float test" happening right away. Any ...
Frequently asked questions
Got questions about cleaning pumpkin seeds for planting? You’re not alone—here are some of the most common concerns and straightforward answers to help you get started with confidence!
Can I plant pumpkin seeds straight from a store-bought pumpkin?
Yes, but with a few caveats! Store-bought seeds are often treated to prevent sprouting or may come from hybrid varieties that don’t produce true-to-type pumpkins. If you’re set on planting, choose organic or heirloom pumpkins labeled as non-GMO for better success. Otherwise, save seeds from your own pumpkins for guaranteed results!
How long do I need to soak pumpkin seeds before planting?
Soaking seeds for 12–24 hours in warm water softens the outer shell, making it easier to remove the flesh and speed up germination. For faster sprouting, add a splash of hydrogen peroxide (1 tsp per cup of water) to disinfect the seeds. Avoid over-soaking—seeds can absorb too much water and rot!
What if my seeds smell bad or look moldy after cleaning?
Mold or a foul odor means your seeds are contaminated—don’t plant them! Rinse them thoroughly in a 10% bleach solution (1 part bleach to 9 parts water) for 10 minutes, then rinse again with clean water. If the smell persists or mold returns, discard the seeds and start fresh with a new batch.
Can I dry pumpkin seeds in the sun instead of an oven?
Sun-drying is a great alternative if you have a warm, dry climate. Spread seeds on a clean screen or paper towel in direct sunlight for 3–5 days, stirring occasionally. Avoid humidity—moisture can cause mold. For faster drying, use a fan on low heat in a warm room (below 95°F/35°C).
When is the best time to plant cleaned pumpkin seeds?
Pumpkin seeds thrive in warm soil (70–90°F/21–32°C), so aim to plant them 1–2 weeks after your last frost date in spring. For fall harvests, start seeds indoors 2–3 weeks before transplanting when nighttime temps stay above 50°F (10°C). In warm climates, you can plant year-round!
Wrapping up and next steps
Cleaning pumpkin seeds for planting is a simple yet rewarding process that sets the stage for thriving vines and bountiful harvests! By following these steps—soaking, scrubbing, drying, and storing—you’ll ensure your seeds are ready to sprout strong and healthy.
Now that you’re equipped with the know-how, there’s no better time to roll up your sleeves and start your own pumpkin patch! 🌱
Ready to take the next step? Grab your seeds, pick a sunny spot, and plant them in well-draining soil—your future pumpkins will thank you!