
Tools
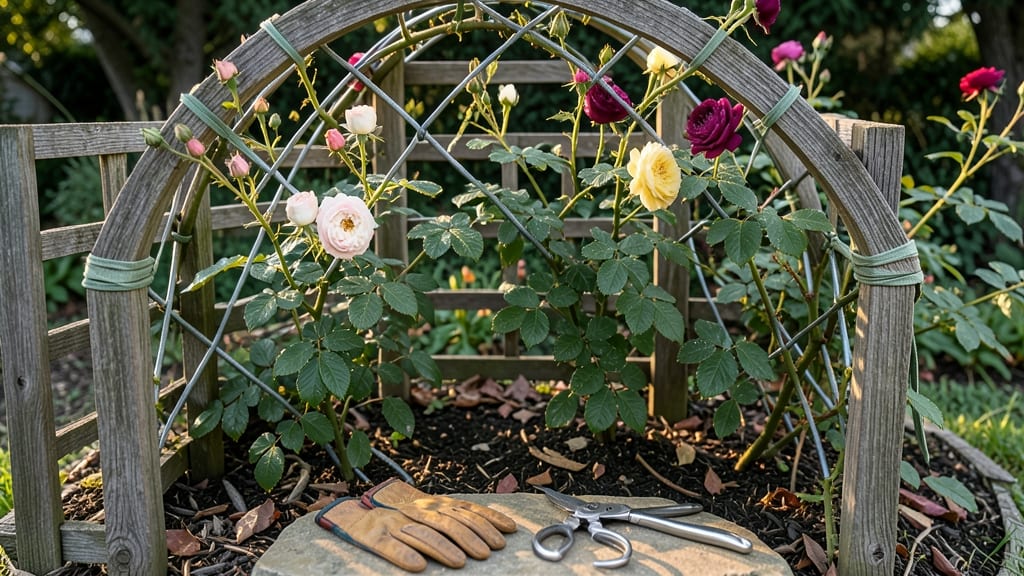
Building a rose trellis that actually holds up to vigorous climbers—no wobbly arches here. 🌹 I’ve seen too many flimsy setups collapse under the weight of blooms, so I designed this foolproof method using simple materials that won’t rot or rust in a season.
Start with 2x4 lumber for the base and 1-inch PVC pipes for the arches—cheap, lightweight, and strong enough to support roses for years. The key is spacing the uprights 3 feet apart and bending the PVC into semi-circles (not sharp angles) so thorns don’t shred the stems.
No fancy tools needed—just a saw, drill, and a little elbow grease. By the time you’re done, you’ll have a sturdy, decorative trellis that trains roses upward, prevents disease from ground contact, and turns your garden into a fragrant, vertical masterpiece. The best part?
You can customize it into arches, obelisks, or even a full arbor—no two gardens need to look the same. Avoid the rookie mistakes: bury the posts at least 12 inches deep (or use concrete anchors) and leave 18 inches of space between trellises so roses don’t compete for sunlight.
Now, let’s get building!
📚 In This Guide
- What you need
- Instructions
- Tips and common mistakes
- Wrapping up and next steps
What you need
- ● Trellis frame: 4–6 4x4-inch wooden posts (8 ft tall, pressure-treated for durability)
- ● 1–2 2x4-inch lumber (for horizontal supports, cut to size—typically 4–6 ft long)
- ○ Metal or wooden stakes (optional but helpful for anchoring posts)
- ● Hardware: Galvanized 3-inch deck screws or exterior-grade bolts (10–15 pieces)
- ● Heavy-duty brackets (2–4, for extra support)
- ○ Optional but recommended: Landscape fabric (to prevent weeds and retain moisture)
- ● Post caps or decorative finials (for a polished look)
- ● Paint or stain (weather-resistant, to match your garden aesthetic)
- ● Basic carpentry skills (or a willingness to learn!)
- ● Measuring tape, pencil, and level for precision
- ● Drill/driver with phosphor bronze or cobalt bits (for wood)
- ● Safety gear: gloves, safety glasses, and ear protection (if using power tools)
- ● Sunny spot in your garden with well-draining soil
Step-by-Step instructions for building a rose trellis
Here's the simple method I use to create sturdy, beautiful arches that support climbing roses perfectly.
🪴 Step 1: Gather Materials and Tools
For a 4-foot wide arch (enough for one climbing rose bush), you'll need 2 x 4-foot long wooden posts (4x4 lumber works best for stability), 1 x 10-foot long 2x4 board (for the arch curve), 4 x 4-inch wood screws, 1 box exterior wood glue, 1 tube exterior wood sealant, and 1 roll landscape fabric (to prevent weeds). I always pre-cut the 2x4 board into a 4-foot length for the arch top before starting.
You'll also need basic tools: a circular saw (or handsaw), drill/driver, measuring tape, level, safety glasses, and work gloves. If you're working with pressure-treated wood, wear gloves—it's rough on bare hands. I like to set up my workspace near the planting area so I can move materials easily once everything's ready.
✂️ Step 2: Cut and Prepare the Arch Frame
First, cut the 2x4 board into a 4-foot length for the arch top. Then, cut the 2x4 posts to 3 feet tall (standard height for a climbing rose trellis). Here's the trick: mark the center of each post and the center of the arch board. Drill a ¼-inch hole at each mark—this will help you align everything perfectly later.
Lay the arch board on the ground and bend it gently into a semi-circle (not too tight—you want a graceful curve). Secure it temporarily with zip ties or clothespins while you test the fit. The arch should be about 2 feet wide at the base and 1 foot wide at the top when fully curved. Once you're happy with the shape, remove the temporary ties and set it aside.
🪴 Step 3: Assemble the Trellis Frame
Place the two posts 3 feet apart in the ground where you want the trellis. Use a level to ensure they're perfectly vertical before digging holes—roses need straight support to climb properly. The holes should be deep enough so 2 feet of the post is buried (about 12 inches deep for most soil types). I like to dig a little wider than the post to add gravel at the bottom for drainage.
Once the posts are in place, position the curved arch board on top, aligning the drilled holes. Insert the 4-inch wood screws through the holes to secure the arch to the posts. Add a dab of exterior wood glue to each screw hole before tightening—this prevents splitting and adds extra strength. Double-check that the arch sits level before finalizing the screws.
☀️ Step 4: Reinforce and Finish the Trellis
To make the trellis extra sturdy, add diagonal supports by cutting two 2-foot long 2x2 boards and screwing them from the top of each post to the arch (like an "X" shape). This prevents the arch from sagging under the weight of climbing roses. Once all screws are tight, apply exterior wood sealant to all exposed wood surfaces—this protects against rot and weather damage.
Finally, wrap the base of the trellis with landscape fabric, securing it with staples or landscape pins. This keeps weeds from growing around the base and makes future maintenance easier. Step back and admire your work—the arch should look elegant and sturdy enough to support roses for years.
🌿 Step 5: Plant and Train Your Climbing Rose
After the trellis is dry (usually 24 hours), plant your climbing rose 6 inches away from the trellis so its canes can grow toward it naturally. Water deeply right after planting to help roots establish. As new growth appears, tie the main canes to the arch with soft plant ties (never wire—it can damage the stems).
Here's the thing—roses grow best when they're trained gently. Don't force canes to wrap around the arch; instead, guide them in a spiral pattern as they climb. Within a season, your rose will twine up the arch beautifully, creating a stunning vertical display. I always prune in late winter to encourage new growth that will climb the trellis the following year.
Tips & tricks for building sturdy rose trellis arches
These practical tips will help you avoid common mistakes and create a trellis that lasts for years.
Material Selection Matters: For the 4-foot wide arch, I recommend using pressure-treated 4x4 lumber for the posts—it resists rot and lasts longer. If you're on a budget, cedar or redwood work beautifully too, though they require more frequent sealing. The 2x4 board for the arch should be straight and free of knots to prevent weak spots. I always check my lumber at the store for these qualities before buying.
Precision Cutting: When cutting the 4-foot arch board in Step 2, use a straightedge guide on your saw to ensure perfect curves. For the 3-foot posts, mark measurements twice—once at the top and once at the bottom—to account for any saw blade drift. A carpenter's square helps verify your cuts are perfectly square before assembly. This attention to detail prevents wobbly arches later.
Bending the Arch Board: The secret to a graceful curve is patience! Bend the 4-foot board gently over your knee or use a large piece of plywood as a bending jig. Apply even pressure along the entire length to avoid creating a sharp curve in one spot. Once you've achieved the right shape (about 2 feet wide at the base, 1 foot at the top), secure it temporarily with zip ties while you test the fit. This prevents the wood from springing back to its original shape.
Assembly Alignment: In Step 3, when positioning the arch board between the posts, use a level to check both the horizontal and vertical alignment before securing with screws. I've found that placing a small scrap piece of wood under the arch board at the center point helps distribute weight evenly and prevents sagging. The drilled holes you marked earlier will make this alignment much easier—just drop the screws through and you're golden.
Pro Tips for Build A Rose Trellis
- These practical tips will help you avoid common mistakes and create a trellis that lasts for years.
- Material Selection Matters: For the 4-foot wide arch, I recommend using pressure-treated 4x4 lumber for the posts—it ...
- Precision Cutting: When cutting the 4-foot arch board in Step 2, use a straightedge guide on your saw to ensure perfe...
Frequently asked questions
Got questions about building your rose trellis?
You’re not alone! Here are answers to the most common ones to help you get started with confidence.
What’s the best material for a rose trellis?
A sturdy rose trellis should use pressure-treated lumber (2x4s or 4x4s) for the frame, as it resists rot and pests. For arches, cedar or redwood are great natural options—they’re lightweight yet strong. Avoid untreated wood unless you’re sealing it thoroughly, as roses need long-lasting support!
When is the best time to build a rose trellis?
The ideal time is late winter or early spring, before planting your roses. This gives roots time to establish and climb the trellis as they grow. If you’re adding it later, plant bare-root roses in winter or potted roses in early spring—just be patient and train vines gently to avoid stressing the plant.
Can I use a trellis for other climbing plants besides roses?
A rose trellis works well for clematis, wisteria, morning glories, or even grapes. Just adjust the spacing: roses need 3–4 feet of vertical support, while vines like wisteria may need taller or more intricate designs. The same materials and building principles apply—just tweak the height and structure!
My trellis is leaning—how do I fix it?
If your trellis is unstable, check the base first. Bury the posts at least 12 inches deep or secure them with concrete footings for extra stability. For arched trellises, reinforce joints with metal brackets or additional stakes. If it’s still wobbly, add diagonal braces between posts for extra support.
How can I make my trellis look decorative?
Skip the plain wood! Paint or stain your trellis in soft pastels or earthy tones to complement your roses. Add twisting vines, lattice panels, or hanging baskets for texture. For a rustic look, use reclaimed wood or climbing roses with thorns—they’ll naturally weave into the design over time!
Wrapping up and next steps
Building a rose trellis is a rewarding project that elevates your garden’s beauty while offering a sturdy foundation for your climbing roses. 🌹 With the right materials, patience, and a little creativity, you’ll create a lasting structure that supports growth and adds charm to your outdoor space.
Now that you’re equipped with the know-how, grab your tools and start building! Next, plant your roses with confidence—your trellis is ready to guide them toward stunning vertical displays.