
Fertilization
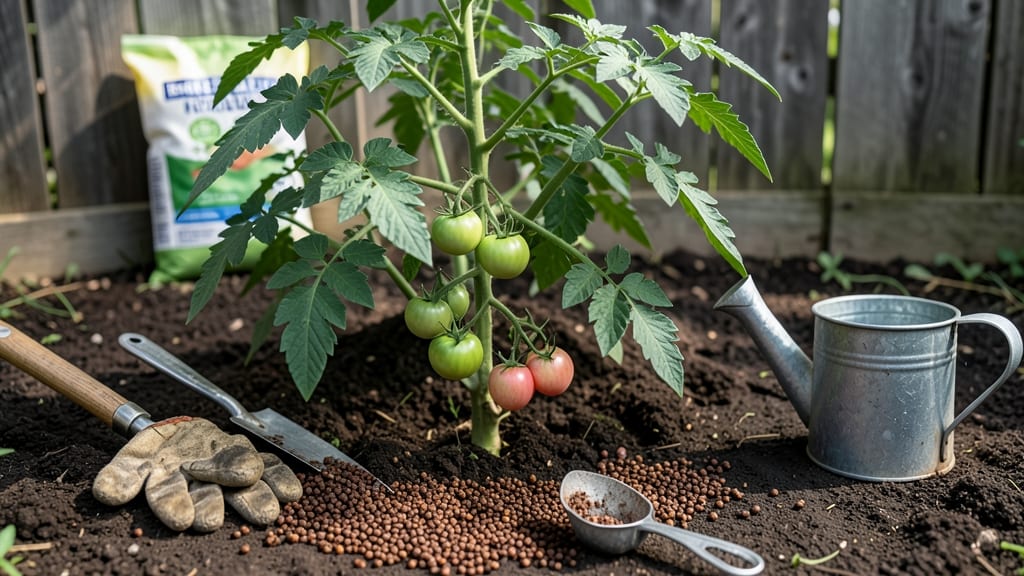
Mastering how to apply fertiliser correctly can transform your garden from a thriving paradise into a sad, crispy mess—unless you time it right. 🌱 I’ve burned more plants than I’d like to admit by guessing when and how to feed them, until I learned the science behind timing.
The difference between a lush, productive garden and one that struggles isn’t just what you feed your plants, but when they get it.
Most gardeners overdo it at the wrong times, thinking more fertilizer equals better growth. But plants only absorb nutrients when they need them—too much too soon can scorch roots or wash away.
The key is matching fertilizer type (granular, liquid, or organic) to your plants’ growth stage: pre-planting for root establishment, mid-season for blooms or harvests, and light maintenance after harvest. For vegetables, a balanced 10-10-10 works early, while flowers often need phosphorus-heavy feeds when buds form.
By the end, you’ll know exactly when to feed your tomatoes for bigger fruit, when to hold off with roses to avoid leaf burn, and how to read your soil’s hunger cues.
No more guessing—just confident timing that turns your garden into a high-performing machine. And yes, even your black thumb can nail this.
We’ll cover organic vs. synthetic options, dilution rates, and the one mistake that kills more plants than pests. Let’s get those roots feasting the right way.
📚 In This Guide
- What you need
- Instructions
- Tips and common mistakes
- Wrapping up and next steps
What you need
- ● Fertiliser: Granular (e.g., 10-10-10 NPK ratio) – 1–2 lbs per 100 sq ft
- ● Liquid (e.g., fish emulsion or compost tea) – 1–2 cups per gallon of water
- ● Slow-release (e.g., Osmocote) – Follow package instructions
- ● Application Tools: Spreaders (broadcast or drop) – For even distribution
- ● Hose-end sprayer – For liquid fertiliser
- ● Garden gloves – To protect your hands
- ● Watering can (with fine rose) – For spot application
- ● Measuring Tools: Measuring cup or scale – For precise fertiliser amounts
- ● pH test kit – To check soil acidity (ideal: 6.0–7.0)
- ○ Safety Gear (Optional but Recommended): Dust mask – For granular fertiliser
- ● Goggles – If working with concentrated liquids
- ● Soil test results – To determine nutrient deficiencies
- ● Clear weather forecast – Avoid applying before heavy rain
- ● Healthy plants – No signs of disease or pest infestation
- ● Water source – For rinsing tools and diluting liquid fertiliser
Step-by-step guide to applying fertiliser for healthy plant growth
Here’s my foolproof approach to fertilising—timing matters more than most gardeners realise.
🌱 Step 1: Choose the Right Fertiliser for Your Plants
Not all fertilisers work the same. For vegetables and flowering plants, I reach for a balanced, water-soluble fertiliser (like 10-10-10) because it dissolves quickly and lets roots absorb nutrients immediately. If you’re growing acid-loving plants like blueberries or azaleas, grab an acid-forming fertiliser instead—those plants won’t thrive with regular blends.
Check the label for the NPK ratio (nitrogen, phosphorus, potassium). Early in the growing season, focus on higher nitrogen (first number) for leafy growth. Later, when plants flower or fruit, switch to a lower nitrogen, higher phosphorus formula. I always read the instructions on the back—most fertilisers specify how much to use based on plant type.
💧 Step 2: Prepare the Soil and Water Before Application
Moisten the soil 1-2 days before fertilising—dry soil repels water-soluble fertilisers, leaving nutrients sitting on the surface where roots can’t reach them. Stick your finger 2 inches deep into the soil; if it feels dry, water thoroughly until moisture reaches that depth. Wait until the soil is damp but not soggy before applying fertiliser.
I like to fertilise in the early morning when temperatures are cooler. This prevents rapid evaporation and gives roots time to absorb nutrients before the heat of the day. Avoid fertilising when rain is forecast—you’ll just wash away what you’ve just applied. If you must fertilise before rain, use a slow-release granular fertiliser instead.
☀️ Step 3: Apply Fertiliser Precisely According to Plant Needs
For water-soluble fertilisers, mix the recommended dose in a watering can with 1 gallon of water—never guess the amount. I measure carefully because over-fertilising burns roots and can kill plants faster than under-fertilising. Spread the solution evenly over the soil, avoiding the leaves. Water-soluble fertilisers should never touch foliage, as they cause chemical burns.
For granular fertilisers, scatter the granules 2-3 inches away from the plant stem and lightly scratch them into the top ½ inch of soil with a rake or your fingers. This keeps them out of direct contact with stems while making them accessible to roots. Water immediately after applying to dissolve granules and carry nutrients down to the roots.
⏰ Step 4: Monitor and Adjust Based on Plant Response
Watch for visual cues in the first 7-10 days after fertilising. Healthy growth looks like deep green leaves, strong stems, and new buds or flowers. If leaves turn yellow with brown edges, you’ve overdone it—flush the soil with plain water to dilute excess salts. If growth stalls or leaves look pale, the plant might need more nitrogen or micronutrients.
I fertilise every 4-6 weeks during the growing season, but I cut back in late summer to avoid encouraging tender new growth before winter. For container plants, I fertilise twice as often because nutrients leach out faster. Always follow the label’s recommended frequency—it’s tailored to the specific fertiliser’s strength.
✂️ Step 5: Clean Up and Store Leftover Fertiliser Properly
After fertilising, rinse your tools and watering can with clean water to remove any residual fertiliser. Leftover granules should be stored in a cool, dry place in their original container, sealed tightly. I keep mine in a plastic bin with a lid to protect it from moisture, which can clump granules together and reduce effectiveness.
Never reuse fertiliser from last season—nutrients degrade over time, and old fertiliser may contain harmful bacteria. If you have leftover liquid fertiliser, dilute it 1:1 with water and use it immediately, then discard any remaining solution. Proper storage keeps your fertiliser potent and your plants thriving season after season.
Tips & tricks for perfect fertiliser application
Between us, these small adjustments make all the difference when feeding your plants the right way.
Soil Test First: Don't skip the soil test—it's the foundation of everything. I've seen gardeners waste expensive fertilizer because they didn't check their soil first. Most test kits cost under $10 and reveal exactly what your soil needs. For example, if your test shows high potassium but low nitrogen, you'll want a fertilizer with a higher first number (like 12-4-4) rather than a balanced 10-10-10. This targeted approach prevents nutrient waste and saves you money in the long run.
Timing Secret: The early morning or late afternoon window matters more than you might think. I've noticed that applying fertilizer during these cooler hours prevents the heat from burning plant roots. If you must fertilize during peak sun, reduce the dosage by half to protect tender roots. Also, avoid fertilizing during extreme weather—roots can't absorb nutrients efficiently when they're stressed by heat or cold.
Precision Placement: When applying granular fertilizer, keep that 2-3 inch distance from plant stems that the instructions mention. I learned this the hard way after seeing brown spots appear around my tomato plants. The fertilizer needs to reach the root zone, not sit near the stem where it can cause burns. For liquids, always water thoroughly after application to help distribute nutrients evenly through the soil profile.
Monitoring Matters: That first week after fertilizing is critical. Watch for signs like vibrant new leaves or stronger stems—these indicate your plants are absorbing nutrients properly. If you notice yellowing leaves within days, it's often a sign of overapplication. In that case, flush the soil with plenty of water to dilute any excess salts. I keep a small notebook by my garden to track what I've applied and when, which helps me spot patterns over time.
Pro Tips for Apply Fertiliser
- Between us, these small adjustments make all the difference when feeding your plants the right way.
- Soil Test First: Don't skip the soil test—it's the foundation of everything. I've seen gardeners waste expensive fert...
- Timing Secret: The early morning or late afternoon window matters more than you might think. I've noticed that applyi...
Frequently asked questions
Got questions about fertiliser application? You’re not alone! Here are answers to the most common concerns—from timing to troubleshooting—to help you fertilise like a pro.
How often should I apply fertiliser?
Frequency depends on your plants and fertiliser type. Slow-release granules may last 6–12 weeks, while liquid fertilisers need monthly applications. Always follow package instructions—overdoing it can burn roots! For veggies, split doses every 4–6 weeks during the growing season.
When is the best time of day to apply fertiliser?
Apply fertiliser in the early morning (before 10 AM) to give roots time to absorb nutrients before the heat of the day. Avoid late afternoon or evening—this can cause salt burn or attract pests. Water thoroughly afterward to activate uptake.
Can I use fertiliser if it’s rained recently?
Wait 24–48 hours after rain before applying fertiliser. Wet soil can dilute nutrients, reducing effectiveness. If heavy rain is forecast, opt for slow-release fertilisers or water-soluble types just before a shower to prevent runoff.
What’s the difference between organic and synthetic fertilisers?
| Type | Pros | Cons |
|---|---|---|
| Organic (compost, manure, bone meal) | Improves soil health long-term, slow-release | Slower results, may require larger quantities |
| Synthetic (chemical granules/liquids) | Fast nutrient delivery, precise ratios | Risk of over-fertilisation, no soil benefits |
Mix both for balanced growth! Organic builds soil; synthetic gives quick boosts.
My plants look burnt after fertilising—what went wrong?
This usually means over-application or high salt concentration. Flush the soil with water immediately, then reduce fertiliser strength by half. Use a soil test next time to avoid guesswork. For severe cases, amend soil with compost to dilute salts.
Wrapping up and next steps
Mastering the art of fertiliser application is all about timing, technique, and consistency—just like nurturing a thriving garden! By following these steps, you’ve learned how to maximize root uptake, avoid waste, and give your plants the nutrients they crave. Your green thumb is about to shine even brighter!
Now that you’re armed with the know-how, take action! Start with a small test patch, observe how your plants respond, and adjust as needed. Happy gardening—and may your soil (and plants) thank you! 🌱💚